Appendix:Red and Blue walkthrough/Section 6: Difference between revisions
mNo edit summary |
(Going back to Cerulean for the Bicycle) |
||
| (47 intermediate revisions by 24 users not shown) | |||
| Line 1: | Line 1: | ||
{{WalkthroughNotice}} | |||
== Route 6 == | == Route 6 == | ||
[[ | [[File:Kanto Route 6 RBY.png|thumb|130px|[[Route 6]]]] | ||
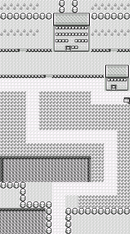
This area has six Trainers total, but only the last two are unavoidable. | This area has six Trainers total, but only the last two are unavoidable. The wild Pokémon here are all the same as on {{rt|5|Kanto}}, though {{p|Poliwag|certain}} {{p|Goldeen|water-}}{{p|Shellder|dwelling}} {{p|Krabby|Pokémon}} will be available later with the right fishing rod. Continue south to [[Vermilion City]]. | ||
{| class="expandable" | {| class="expandable" align="center" style="background: #{{blue color light}}; {{roundy}}; border: 5px solid #{{red color light}};" | ||
|- align="center" | |||
! Trainers | |||
! | |- | ||
| | |||
| | {{trainerheader|land}} | ||
| Bug Catcher | {{Trainerentry|Spr RG Bug Catcher.png|Bug Catcher||160|3|013|Weedle||16||010|Caterpie||16||013|Weedle||16||}} | ||
| | {{trainerdiv}} | ||
{{Trainerentry|Spr RG Jr Trainer M.png|Jr. Trainer♂||320|1|007|Squirtle||20||}} | |||
| | {{trainerdiv}} | ||
| Jr. Trainer♂ | {{Trainerentry|Spr RG Jr Trainer F.png|Jr. Trainer♀||400|2|019|Rattata||16||025|Pikachu||16||}} | ||
| | {{trainerdiv}} | ||
{{Trainerentry|Spr RG Bug Catcher.png|Bug Catcher||200|1|012|Butterfree||20||}} | |||
| | {{trainerdiv}} | ||
| Jr. Trainer♀ | {{Trainerentry|Spr RG Jr Trainer F.png|Jr. Trainer♀||320|3|016|Pidgey||16||016|Pidgey||16||016|Pidgey||16||}} | ||
| | {{trainerdiv}} | ||
{{Trainerentry|Spr RG Jr Trainer M.png|Jr. Trainer♂||320|2|021|Spearow||16||020|Raticate||16||}} | |||
| | {{trainerfooter|land|I}} | ||
| Bug Catcher | |||
| | |||
| | |||
| Jr. Trainer♀ | |||
| | |||
| | |||
| Jr. Trainer♂ | |||
| | |||
|} | |} | ||
{| class="expandable" | |||
{| class="expandable" align="center" style="background: #{{blue color light}}; {{roundy}}; border: 5px solid #{{red color light}};" | |||
! Pokémon | |- align="center" | ||
! Available Pokémon | |||
| | |- | ||
| {{ | | | ||
| 40% | {{Catch/header|land|no}} | ||
| | {{Catch/entry1|043|Oddish|yes|no|no|Grass|13, 15-16|40%|type1=Grass|type2=Poison}} | ||
{{Catch/entry1|069|Bellsprout|no|yes|no|Grass|13, 15-16|40%|type1=Grass|type2=Poison}} | |||
| 35% | {{Catch/entry1|016|Pidgey|yes|yes|no|Grass|13, 15-16|35%|type1=Normal|type2=Flying}} | ||
| | {{Catch/entry1|056|Mankey|yes|no|no|Grass|10, 12, 14, 16|25%|type1=Fighting}} | ||
{{Catch/entry1|052|Meowth|no|yes|no|Grass|10, 12, 14, 16|25%|type1=Normal}} | |||
| | {{Catch/footer|land}} | ||
| | |||
| | |||
| | |||
| | |||
| | |||
| | |||
| | |||
|} | |} | ||
{{-}} | |||
== Vermilion City == | == Vermilion City == | ||
[[ | [[File:Vermilion City RBY.png|thumb|Vermilion City]] | ||
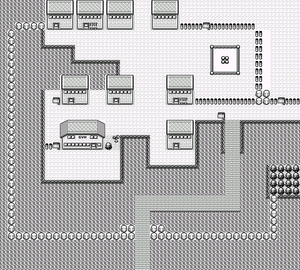
The | [[Vermilion City]] is a major port city, and the harbor is always busy. The Vermilion Gym is blocked off by a small tree, so you can't claim your third badge just yet. The luxury cruiseliner [[S.S. Anne]] visits the city once a year, and has just docked in the harbor. | ||
{| align="center" | |||
| | |||
{{shop|Poké Mart}} | |||
{{shoprow|{{shopitem|Poké Ball|200}}|{{shopitem|Super Potion|700}}}} | |||
{{shoprow|{{shopitem|Ice Heal|250}}|{{shopitem|Awakening|200}}}} | |||
{{shoprow|{{shopitem|Parlyz Heal|200}}|{{shopitem|Repel|350}}}} | |||
{{shopfooter}} | |||
|} | |||
{| class="expandable" align="center" style="background: #{{blue color light}}; {{roundy}}; border: 5px solid #{{red color light}};" | |||
|- align="center" | |||
! Available Pokémon | |||
|- | |||
| | |||
{{Catch/header|sand|no}} | |||
{{Catch/div|sand|Gift Pokémon}} | |||
{{Catch/entry1|083|Farfetch'd|yes|yes|no|Trade|tradenum=021|tradename=Spearow|The same as the Traded Pokémon|One|type1=Normal|type2=Flying}} | |||
{{Catch/div|water|Fishing}} | |||
{{Catch/entry1|129|Magikarp|yes|yes|no|Fish Old|5|100%|type1=Water}} | |||
{{Catch/footer|sand}} | |||
|} | |||
{| class="expandable" align="center" style="background: #{{blue color light}}; {{roundy}}; border: 5px solid #{{red color light}};" | |||
|- align="center" | |||
! Items | |||
|- | |||
| | |||
{{itlisth|sand}} | |||
{{Itemlist|Bike Voucher|Received from the [[Pokémon Fan Club Chairman]]|R=yes|B=yes|display={{key|I|Bike Voucher|Bike}} {{key|III|Bike Voucher|Voucher}}}} | |||
{{Itemlist|Old Rod|Received from the [[Fishing Brothers|Fishing Guru]]|R=yes|B=yes|display={{DL|Fishing|Old Rod}}}} | |||
{{itemlist|TM Electric|Reward for defeating Lt. Surge|R=yes|B=yes|display={{TM|24|Thunderbolt}}}} | |||
{{itlistfoot|sand}} | |||
|} | |||
=== Fishing Guru #1 === | === Fishing Guru #1 === | ||
Visit the house to the west of the Pokémon Center and talk to the fisherman inside. Convince him that you love fishing as much as he does to receive the {{DL|Fishing|Old Rod}}. All you can really catch with it is {{p|Magikarp}}, but at least you can find them for free now. The {{DL|Fishing|Good Rod}} and {{DL|Fishing|Super Rod}} are better, but you won't get those until later. | |||
=== Time for a Trade === | |||
A little girl in the house next to the Fan Club would like to trade. She is hoping to receive a {{p|Spearow}} in exchange for her {{p|Farfetch'd}}. This is the only one of its kind, and though it may not be the best choice in battle, it can learn two {{m|Cut|field}} {{m|Fly|moves}} to help navigate the countryside. | |||
=== Pokémon Fan Club === | === Pokémon Fan Club === | ||
The building just north of the [[Vermilion Gym]] is the [[Pokémon Fan Club]]. Listen to the Chairman's rambling thoughts to receive a {{key|I|Bike Voucher}} for your time. Go back to the Bike Shop in {{ci|Cerulean}} to finally get a bicycle. | |||
== Cerulean City == | |||
=== | === Bike Shop === | ||
Use your {{key|I|Bike Voucher}} to trade it for a bicycle. Now you can travel faster. Go back to {{ci|Vermilion}} and enter the S.S. Anne. | |||
{| class="expandable" align="center" style="background: #{{blue color light}}; {{roundy}}; border: 5px solid #{{red color light}};" | |||
|- align="center" | |||
! Items | |||
|- | |||
| | |||
{{Itlisth|road}} | |||
{{Itemlist|Bicycle|Received from the [[Miracle Cycle|Bike Shop]] owner in return for a {{key|I|Bike Voucher|Bike}} {{key|III|Bike Voucher|Voucher}}|R=yes|B=yes}} | |||
{{Itlistfoot|road}} | |||
|} | |||
== S.S. Anne == | == S.S. Anne == | ||
[[ | [[File:SS Anne 1F RBY.png|thumb|right|S.S. Anne, 1F]] | ||
[[File:SS Anne 2F RBY.png|thumb|right|S.S. Anne, 2F]] | |||
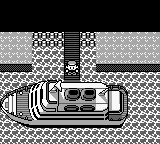
[[File:SS Anne RBY.png|thumb|The ship as it sets sail]] | |||
This cruise ship caters to the world's best Pokémon Trainers, so expect some heavy battling | This cruise ship caters to the world's best Pokémon Trainers, so expect some heavy battling on board. | ||
{| class="expandable" {{ | {| class="expandable" align="center" style="background: #{{blue color light}}; {{roundy}}; border: 5px solid #{{red color light}};" | ||
|- style="background: #{{ | |- align="center" | ||
! | ! Available Pokémon | ||
|- | |||
| | |||
| | {{Catch/header|water|no}} | ||
| | {{Catch/div|water|Fishing}} | ||
| | {{Catch/entry1|129|Magikarp|yes|yes|no|Fish Old|5|100%|type1=Water}} | ||
| {{ | {{Catch/footer|water}} | ||
| | |} | ||
| Youngster | |||
| | {| class="expandable" align="center" style="background: #{{blue color light}}; {{roundy}}; border: 5px solid #{{red color light}};" | ||
| {{ | |- align="center" | ||
|- | ! Trainers | ||
| | |- | ||
| | | | ||
| {{ | {| class="expandable" align="center" style="background: #{{blue color light}}; {{roundy}}; border: 5px solid #{{red color light}};" | ||
| | |- align="center" | ||
| | ! 1F | ||
| | |- | ||
| {{ | | | ||
{{trainerheader|ocean}} | |||
{{Trainerentry|Spr RG Gentleman.png|Gentleman||1260|2|058|Growlithe||18||058|Growlithe||18}} | |||
{{Trainerdiv|ocean}} | |||
{{Trainerentry|Spr RG Gentleman.png|Gentleman||1330|2|032|Nidoran♂||19||029|Nidoran♀||19}} | |||
{{Trainerdiv|ocean}} | |||
{{Trainerentry|Spr RG Lass.png|Lass||270|2|016|Pidgey||18||029|Nidoran♀||18}} | |||
{{Trainerdiv|ocean}} | |||
{{Trainerentry|Spr RG Youngster.png|Youngster||315|1|032|Nidoran♂||21}} | |||
{{Trainerfooter|ocean|I}} | |||
|} | |||
{| class="expandable" align="center" style="background: #{{blue color light}}; {{roundy}}; border: 5px solid #{{red color light}};" | |||
|- align="center" | |||
! B1F | |||
|- | |||
| | |||
{{trainerheader|ocean}} | |||
{{Trainerentry|Spr RG Sailor.png|Sailor||630|1|090|Shellder||21}} | |||
{{Trainerdiv|ocean}} | |||
{{Trainerentry|Spr RG Sailor.png|Sailor||510|3|116|Horsea||17||090|Shellder||17||072|Tentacool||17}} | |||
{{Trainerdiv|ocean}} | |||
{{Trainerentry|Spr RG Sailor.png|Sailor||510|3|116|Horsea||17||116|Horsea||17||116|Horsea||17}} | |||
{{Trainerdiv|ocean}} | |||
{{Trainerentry|Spr RG Sailor.png|Sailor||540|2|072|Tentacool||18||120|Staryu||18}} | |||
{{Trainerdiv|ocean}} | |||
{{Trainerentry|Spr RG Fisherman.png|Fisherman||595|3|072|Tentacool||17||120|Staryu||17||090|Shellder||17}} | |||
{{Trainerdiv|ocean}} | |||
{{Trainerentry|Spr RG Sailor.png|Sailor||600|1|066|Machop||20}} | |||
{{Trainerfooter|ocean|I}} | |||
|} | |} | ||
{| class="expandable" | {| class="expandable" align="center" style="background: #{{blue color light}}; {{roundy}}; border: 5px solid #{{red color light}};" | ||
|- align="center" | |||
! Deck | |||
! | |- | ||
|- | | | ||
| {{ | {{trainerheader|ocean}} | ||
| | {{Trainerentry|Spr RG Sailor.png|Sailor||510|2|066|Machop||17||072|Tentacool||17}} | ||
{{Trainerdiv|ocean}} | |||
{{Trainerentry|Spr RG Sailor.png|Sailor||540|2|066|Machop||18||090|Shellder||18}} | |||
{{Trainerfooter|ocean|I}} | |||
|} | |} | ||
{| class="expandable" align="center" style="background: #{{blue color light}}; {{roundy}}; border: 5px solid #{{red color light}};" | |||
|- align="center" | |||
! 2F | |||
|- | |||
{| class="expandable" | | | ||
{{trainerheader|ocean}} | |||
{{Trainerentry|Spr RG Fisherman.png|Fisherman||595|3|118|Goldeen||17||072|Tentacool||17||118|Goldeen||17}} | |||
! | {{Trainerdiv|ocean}} | ||
{{Trainerentry|Spr RG Gentleman.png|Gentleman||1610|1|025|Pikachu||23}} | |||
|- | {{Trainerdiv|ocean}} | ||
| | {{Trainerentry|Spr RG Gentleman.png|Gentleman||1190|2|058|Growlithe||17||077|Ponyta||17}} | ||
{{Trainerdiv|ocean}} | |||
{{Trainerentry|Spr RG Lass.png|Lass||270|2|019|Rattata||18||025|Pikachu||18}} | |||
| | {{Trainerfooter|ocean|I}} | ||
| | |||
| | |||
| | |||
| | |||
| | |||
| | |||
| | |||
| | |||
| | |||
| | |||
| | |||
| | |||
| | |||
| | |||
| | |||
|} | |} | ||
|} | |} | ||
{| class="expandable" align="center" style="background: #{{blue color light}}; {{roundy}}; border: 5px solid #{{red color light}};" | |||
|- align="center" | |||
! Items | |||
|- | |||
| | |||
{{Itlisth|ocean}} | |||
{{Itemlist|Max Potion|On the bottom deck, in the far right room|R=yes|B=yes|display={{DL|Potion|Max Potion}}}} | |||
{{Itemlist|Ether|In room 3 on bottom deck|R=yes|B=yes|display={{DL|Ether|Ether}}}} | |||
{{Itemlist|TM Psychic|In room 2 on bottom deck|R=yes|B=yes|display={{TM|44|Rest}}}} | |||
{{Itemlist|Hyper Potion|On the bottom deck, in the far left room, on the bed's pillow ''(hidden)''|R=yes|B=yes|display={{DL|Potion|Hyper Potion}}}} | |||
{{Itemlist|TM Normal|On the main deck, in the second room from the left|R=yes|B=yes|display={{TM|08|Body Slam}}}} | |||
{{Itemlist|Great Ball|In the galley, in the bottom trash can ''(hidden)''|R=yes|B=yes|display={{ball|Great}}}} | |||
{{Itemlist|Max Ether|On the top deck, in the second room from the left|R=yes|B=yes|display={{DL|Ether|Max Ether}}}} | |||
{{Itemlist|Rare Candy|On the top deck, in the third room from the right|R=yes|B=yes|display={{DL|Vitamin|Rare Candy}}}} | |||
{{Itemlist|HM Normal|Gift from the Captain in his quarters on the top deck|R=yes|B=yes|display={{HM|01|Cut}}}} | |||
{{Itlistfoot|ocean}} | |||
|} | |||
=== 1F === | |||
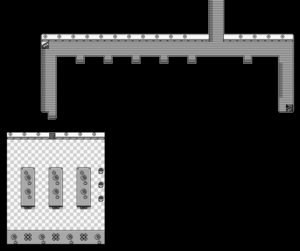
Check the second cabin from the left to find {{TM|08|Body Slam}}, then follow the hallway to the right and go down the stairs. | |||
=== B1F === | |||
This part of the ship is a dead-end hallway with five rooms. Check the far-right room for a {{DL|Potion|Max Potion}}, and the center room for an [[Ether]]. The fourth room from the stairs has {{TM|44|Rest}}, and a hidden {{DL|Potion|Hyper Potion}} lies on the bed in the far-left room. | |||
| | |||
| | |||
| | |||
=== 1F === | |||
Follow the hallway to the front of the ship, then turn left to reach the galley. Check the third trash can to find a {{ball|Great}}, a stronger version of the regular Poké Ball. Leave the galley and climb up the next stairway. | |||
=== 2F === | |||
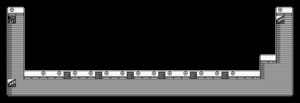
To the south is another stairway; this one leads to the deck of the ship, where two Sailors are waiting to battle. Step inside the second room from the left for a {{DL|Ether|Max Ether}}, and the fourth room from the left for a {{DL|Vitamin|Rare Candy}}. When you approach the Captain's quarters at the back of the ship, your rival is just leaving. | |||
His {{p|Pidgeotto}} is not much of a threat, even though it is only one level lower than his starter Pokémon. Conversely, his newly evolved {{p|Raticate}} has an improved {{stat|Attack}} stat, allowing it to deal even more damage with {{m|Hyper Fang}}. Its {{m|Tail Whip}} lowers its foe's {{stat|Defense}}, making Hyper Fang even more painful. Despite the {{t|Psychic}} type having only {{t|Bug|one}} weakness, {{p|Kadabra}}'s low {{stat|Defense}} leaves it vulnerable to physical moves. His starter Pokémon has recently evolved as well; avoid pitting your own against it, and use Pokémon with a type advantage instead. | |||
{| align="center" | |||
If the {{ | ! {{MSP|001|Bulbasaur}} If the {{player}} chose {{p|Bulbasaur}}: | ||
{{Party|color={{ | ! {{MSP|004|Charmander}} If the {{player}} chose {{p|Charmander}}: | ||
! {{MSP|007|Squirtle}} If the {{player}} chose {{p|Squirtle}}: | |||
|- | |||
|{{Party/Single | |||
|color={{blue color}} | |||
|headcolor={{blue color light}} | |||
|bordercolor={{blue color dark}} | |||
|sprite=Spr RG Blue 2.png | |||
|prize={{PDollar}}1330 | |||
|name=Blue | |||
|game=RGB | |||
|location=S.S. Anne | |||
|pokemon=4 | |||
}} | }} | ||
|{{Pokémon/1 | |||
|game=Blue | |||
|ndex=017 | |||
|pokemon=Pidgeotto | |||
|level=19 | |||
|type1=Normal | |||
|type2=Flying | |||
|move1=Gust|move1type=Normal | |||
|move2=Sand-Attack|move2type=Normal | |||
|move3=Quick Attack|move3type=Normal}} | |||
|{{Pokémon/1 | |||
|game=Blue | |||
|ndex=020 | |||
|pokemon=Raticate | |||
|level=16 | |||
|type1=Normal | |||
|move1=Tackle|move1type=Normal | |||
|move2=Tail Whip|move2type=Normal | |||
|move3=Quick Attack|move3type=Normal | |||
|move4=Hyper Fang|move4type=Normal}} | |||
{{Party/Div|color={{blue color}}}} | |||
|{{Pokémon/1 | |||
|game=Blue | |||
|ndex=064 | |||
|pokemon=Kadabra | |||
|level=18 | |||
|type1=Psychic | |||
|move1=Teleport|move1type=Psychic | |||
|move2=Confusion|move2type=Psychic | |||
|move3=Disable|move3type=Normal}} | |||
|{{Pokémon/1 | |||
|game=Blue | |||
|ndex=005 | |||
|pokemon=Charmeleon | |||
|level=20 | |||
|type1=Fire | |||
|move1=Scratch|move1type=Normal | |||
|move2=Growl|move2type=Normal | |||
|move3=Ember|move3type=Fire | |||
|move4=Leer|move4type=Normal}} | |||
{{Party/Footer}} | |||
|{{Party/Single | |||
{{Party|color={{ | |color={{blue color}} | ||
|headcolor={{blue color light}} | |||
|bordercolor={{blue color dark}} | |||
|sprite=Spr RG Blue 2.png | |||
|prize={{PDollar}}1330 | |||
|name=Blue | |||
|game=RGB | |||
|location=S.S. Anne | |||
|pokemon=4 | |||
}} | }} | ||
|{{Pokémon/1 | |||
|game=Blue | |||
|ndex=017 | |||
|pokemon=Pidgeotto | |||
|level=19 | |||
|type1=Normal|type2=Flying | |||
|move1=Gust|move1type=Normal | |||
|move2=Sand-Attack|move2type=Normal | |||
|move3=Quick Attack|move3type=Normal}} | |||
| | |||
{{Pokémon/1 | |||
|game=Blue | |||
|ndex=020 | |||
|pokemon=Raticate | |||
|level=16 | |||
|type1=Normal | |||
|move1=Tackle|move1type=Normal | |||
|move2=Tail Whip|move2type=Normal | |||
|move3=Quick Attack|move3type=Normal | |||
|move4=Hyper Fang|move4type=Normal}} | |||
{{Party/Div|color={{blue color}}}} | |||
|{{Pokémon/1 | |||
|game=Blue | |||
|ndex=064 | |||
|pokemon=Kadabra | |||
|level=18 | |||
|type1=Psychic | |||
|move1=Teleport|move1type=Psychic | |||
|move2=Confusion|move2type=Psychic | |||
|move3=Disable|move3type=Normal}} | |||
| | |||
{{Pokémon/1 | |||
|game=Blue | |||
|ndex=008 | |||
|pokemon=Wartortle | |||
|level=20 | |||
|type1=Water | |||
|move1=Tackle|move1type=Normal | |||
|move2=Tail Whip|move2type=Normal | |||
|move3=Bubble|move3type=Water | |||
|move4=Water Gun|move4type=Water}} | |||
{{Party/Footer}} | |||
|{{Party/Single | |||
{{Party|color={{ | |color={{blue color}} | ||
|headcolor={{blue color light}} | |||
|bordercolor={{blue color dark}} | |||
|sprite=Spr RG Blue 2.png | |||
|prize={{PDollar}}1330 | |||
|name=Blue | |||
|game=RGB | |||
|location=S.S. Anne | |||
|pokemon=4 | |||
}} | }} | ||
|{{Pokémon/1 | |||
|game=Blue | |||
|ndex=017 | |||
|pokemon=Pidgeotto | |||
|level=19 | |||
|type1=Normal|type2=Flying | |||
|move1=Gust|move1type=Normal | |||
|move2=Sand-Attack|move2type=Normal | |||
|move3=Quick Attack|move3type=Normal}} | |||
| | |||
{{Pokémon/1 | |||
|game=Blue | |||
|ndex=020 | |||
|pokemon=Raticate | |||
|level=16 | |||
|type1=Normal | |||
|move1=Tackle|move1type=Normal | |||
|move2=Tail Whip|move2type=Normal | |||
|move3=Quick Attack|move3type=Normal | |||
|move4=Hyper Fang|move4type=Normal}} | |||
{{Party/Div|color={{blue color}}}} | |||
|{{Pokémon/1 | |||
|game=Blue | |||
|ndex=064 | |||
|pokemon=Kadabra | |||
|level=18 | |||
|type1=Psychic | |||
|move1=Teleport|move1type=Psychic | |||
|move2=Confusion|move2type=Psychic | |||
|move3=Disable|move3type=Normal}} | |||
|{{Pokémon/1 | |||
|game=Blue | |||
|ndex=002 | |||
|pokemon=Ivysaur | |||
|level=20 | |||
|type1=Grass|type2=Poison | |||
|move1=Tackle|move1type=Normal | |||
|move2=Growl|move2type=Normal | |||
|move3=Leech Seed|move3type=Grass | |||
|move4=Vine Whip|move4type=Grass}} | |||
{{Party/Footer}} | |||
|} | |||
Even though he lost, he taunts you again before running off. Enter the Captain's quarters to find him hunched over a trash can; it looks like he got seasick. Talk to him to give him a quick backrub, which is all it takes to settle his stomach. He rewards you with {{HM|01|Cut}}. This move lets you chop down those thin trees to reach new areas! Make sure that you've collected all the items before disembarking, as the ferry glides out of the harbor when you do. Use HM01 to teach Cut to Bulbasaur or Charmander, and set out for the Gym. | |||
== Vermilion City == | |||
== Vermilion Gym == | === Vermilion Gym === | ||
[[ | [[File:Vermilion Gym RBY.png|thumb|Vermilion Gym]] | ||
{{sign|RBY|header}} | {{sign|RBY|header}} | ||
{{sign|RBY|VERMILION CITY <br> POKéMON GYM <br> LEADER: LT. SURGE | {{sign|RBY|title|VERMILION CITY<br>POKéMON GYM<br>LEADER: LT. SURGE}} | ||
{{sign|RBY|The Lightning<br>American!}} | |||
{{sign|RBY|footer}} | {{sign|RBY|footer}} | ||
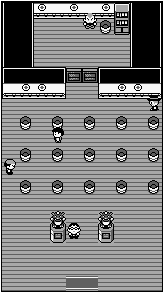
The [[Vermilion Gym]] specializes in {{type|Electric}} Pokémon. {{t|Ground}} Pokémon like {{p|Geodude}} and {{p|Sandshrew}} are immune to electrical attacks, and can inflict serious damage with their Ground-type attacks. Avoid using {{t|Flying}}- or {{type|Water}} Pokémon. [[Lt. Surge]] forces challengers to flip two switches hidden randomly in the trash cans to reach him. If the second switch is not flipped, the trap resets. | |||
{| | {| align="center" | ||
|- style="background: #{{electric color}};" | |- align="center" valign="top" | ||
| | |||
! | {| align="center" style="background: #{{electric color}}; {{roundy}}; border: 5px solid #{{electric color light}};" | ||
|- align="center" | |||
| | ! Vermilion Gym <br /> [[File:Thunder Badge.png|35px|Thunder Badge]] <br /><br /> | ||
| Sailor | |- | ||
| | | | ||
{| align="center" class="expandable" style="background: #{{electric color}}; {{roundy}}; border: 5px solid #{{electric color light}};" | |||
| | |- align="center" | ||
| Rocker | ! Trainers | ||
| | |- | ||
| | |||
| | {{Trainerheader|Electric}} | ||
| Gentleman | {{Trainerentry|Spr RG Sailor.png|Sailor||630|2|025|Pikachu||21|None|025|Pikachu||21|None}} | ||
| | {{Trainerdiv|Electric}} | ||
{{Trainerentry|Spr RG Rocker.png|Rocker||500|3|100|Voltorb||20|None|081|Magnemite||20|None|100|Voltorb||20|None}} | |||
{{Trainerdiv|Electric}} | |||
{{Trainerentry|Spr RG Gentleman.png|Gentleman||1610|1|025|Pikachu||23|None}} | |||
{{Trainerfooter|Electric|1|inside}} | |||
|} | |} | ||
{{Party|color={{electric color}}|bordercolor={{electric color dark}}|headcolor={{electric color light}} | |||
|sprite= | {{Party/Single|color={{electric color}}|bordercolor={{electric color dark}}|headcolor={{electric color light}} | ||
|prize={{ | |sprite=Spr RG Lt Surge.png | ||
| | |prize={{PDollar}}2376 | ||
| | |name={{color2|000000|Lt. Surge}} | ||
|game= | |game=RGB | ||
|location= | |location=Vermilion Gym | ||
|pokemon=3 | |pokemon=3}} | ||
| | |{{Pokémon/1|game=Red and Blue|ndex=100|pokemon=Voltorb | ||
|level=21|type1=Electric | |level=21|type1=Electric | ||
|move1=Tackle|move1type=Normal | |move1=Tackle|move1type=Normal | ||
|move2=Screech|move2type=Normal | |move2=Screech|move2type=Normal | ||
|move3=SonicBoom|move3type=Normal}} | |move3=SonicBoom|move3type=Normal}} | ||
| | |{{Pokémon/1|game=Red and Blue|ndex=025|pokemon=Pikachu | ||
|level= | |level=18|type1=Electric | ||
|move1=ThunderShock|move1type=Electric | |move1=ThunderShock|move1type=Electric | ||
|move2= | |move2=Growl|move2type=Normal | ||
|move3= | |move3=Thunder Wave|move3type=Electric | ||
|move4=Quick Attack|move4type=Normal}} | |move4=Quick Attack|move4type=Normal}} | ||
| | |{{Pokémon/1|game=Red and Blue|ndex=026|pokemon=Raichu | ||
|level=24|type1=Electric | |level=24|type1=Electric | ||
|move1= | |move1=ThunderShock|move1type=Electric | ||
|move2= | |move2=Growl|move2type=Normal | ||
|move3= | |move3=Thunderbolt|move3type=Electric}} | ||
{{Party/Footer}} | |||
|} | |||
|} | |||
Defeated, [[Lt. Surge]] presents you with the {{badge|Thunder}}. This badge gives a slight {{stat|Speed}} boost in battle, and enables the use of {{m|Fly}} in the field. He also gives you {{TM|24|Thunderbolt}}, the second-strongest {{type|Electric}} attack, as a prize. | |||
Rest up at the Pokémon Center, then set out for {{rt|11|Kanto}} to the east. | |||
{{ | {{WalkthroughPrevNext | ||
game=Red | | |game=Red | ||
|game2=Blue | |||
prevsection=5 | | |gamename=Red and Blue | ||
prevname=Cerulean City | |prev=yes | ||
|prevsection=5 | |||
nextname=Route 11 | |prevname=Cerulean City, Cerulean Gym, Route 24, Route 25, Route 5 | ||
|next=yes | |||
|nextsection=7 | |||
|nextname=Route 11, Route 2, Pewter City, Cerulean City, Route 9, Route 10 | |||
}} | }} | ||
<br> | <br /> | ||
{{Project Walkthroughs notice}} | {{Project Walkthroughs notice}} | ||
[[Category:Red and Blue walkthrough]] | [[Category:Red and Blue walkthrough|R06]] | ||
Revision as of 20:53, 27 September 2016
Route 6
This area has six Trainers total, but only the last two are unavoidable. The wild Pokémon here are all the same as on Route 5, though certain water-dwelling Pokémon will be available later with the right fishing rod. Continue south to Vermilion City.
| Trainers | ||||||||||||||||||||||||||||||||||||||||||||||||||||||||||||||||||||||||||||||||||||||||||||||||||||||||||||||||||||||||||||||||
|---|---|---|---|---|---|---|---|---|---|---|---|---|---|---|---|---|---|---|---|---|---|---|---|---|---|---|---|---|---|---|---|---|---|---|---|---|---|---|---|---|---|---|---|---|---|---|---|---|---|---|---|---|---|---|---|---|---|---|---|---|---|---|---|---|---|---|---|---|---|---|---|---|---|---|---|---|---|---|---|---|---|---|---|---|---|---|---|---|---|---|---|---|---|---|---|---|---|---|---|---|---|---|---|---|---|---|---|---|---|---|---|---|---|---|---|---|---|---|---|---|---|---|---|---|---|---|---|---|
| ||||||||||||||||||||||||||||||||||||||||||||||||||||||||||||||||||||||||||||||||||||||||||||||||||||||||||||||||||||||||||||||||
| Available Pokémon | ||||||||||||||||||||||||||||||||||||||||||||||||||||||||||||||||||||||||||||||||||||||||||||||||||||||||||
|---|---|---|---|---|---|---|---|---|---|---|---|---|---|---|---|---|---|---|---|---|---|---|---|---|---|---|---|---|---|---|---|---|---|---|---|---|---|---|---|---|---|---|---|---|---|---|---|---|---|---|---|---|---|---|---|---|---|---|---|---|---|---|---|---|---|---|---|---|---|---|---|---|---|---|---|---|---|---|---|---|---|---|---|---|---|---|---|---|---|---|---|---|---|---|---|---|---|---|---|---|---|---|---|---|---|---|
| ||||||||||||||||||||||||||||||||||||||||||||||||||||||||||||||||||||||||||||||||||||||||||||||||||||||||||
Vermilion City
Vermilion City is a major port city, and the harbor is always busy. The Vermilion Gym is blocked off by a small tree, so you can't claim your third badge just yet. The luxury cruiseliner S.S. Anne visits the city once a year, and has just docked in the harbor.
| ||||||||||||||||||||||||||
| Available Pokémon | ||||||||||||||||||||||||||||||||||||||||||||||||||||||||||||||||||||||||||||||||||||||||
|---|---|---|---|---|---|---|---|---|---|---|---|---|---|---|---|---|---|---|---|---|---|---|---|---|---|---|---|---|---|---|---|---|---|---|---|---|---|---|---|---|---|---|---|---|---|---|---|---|---|---|---|---|---|---|---|---|---|---|---|---|---|---|---|---|---|---|---|---|---|---|---|---|---|---|---|---|---|---|---|---|---|---|---|---|---|---|---|---|
| ||||||||||||||||||||||||||||||||||||||||||||||||||||||||||||||||||||||||||||||||||||||||
| Items | ||||||||||||||||||||
|---|---|---|---|---|---|---|---|---|---|---|---|---|---|---|---|---|---|---|---|---|
| ||||||||||||||||||||
Fishing Guru #1
Visit the house to the west of the Pokémon Center and talk to the fisherman inside. Convince him that you love fishing as much as he does to receive the Old Rod. All you can really catch with it is Magikarp, but at least you can find them for free now. The Good Rod and Super Rod are better, but you won't get those until later.
Time for a Trade
A little girl in the house next to the Fan Club would like to trade. She is hoping to receive a Spearow in exchange for her Farfetch'd. This is the only one of its kind, and though it may not be the best choice in battle, it can learn two field moves to help navigate the countryside.
Pokémon Fan Club
The building just north of the Vermilion Gym is the Pokémon Fan Club. Listen to the Chairman's rambling thoughts to receive a Bike Voucher for your time. Go back to the Bike Shop in Cerulean to finally get a bicycle.
Cerulean City
Bike Shop
Use your Bike Voucher to trade it for a bicycle. Now you can travel faster. Go back to Vermilion and enter the S.S. Anne.
| Items | ||||||||||||
|---|---|---|---|---|---|---|---|---|---|---|---|---|
| ||||||||||||
S.S. Anne
This cruise ship caters to the world's best Pokémon Trainers, so expect some heavy battling on board.
| Available Pokémon | |||||||||||||||||||||||||||||||||||||||||||||||||||||||||
|---|---|---|---|---|---|---|---|---|---|---|---|---|---|---|---|---|---|---|---|---|---|---|---|---|---|---|---|---|---|---|---|---|---|---|---|---|---|---|---|---|---|---|---|---|---|---|---|---|---|---|---|---|---|---|---|---|---|
| |||||||||||||||||||||||||||||||||||||||||||||||||||||||||
| Trainers | ||||||||||||||||||||||||||||||||||||||||||||||||||||||||||||||||||||||||||||||||||||||||||||||||||||||||||||||||||||||||||||||||||||||||||||||||||||||||||||||||||||||||||||||||||||||||||||||||||||||||||||||||||||||||||||||||||||||||||||||||||||||||||||||||||||||||||||||||||||||||||||||||||||||||||||||||||||||||||||||||||||||||||||||||||||||||||||||||
|---|---|---|---|---|---|---|---|---|---|---|---|---|---|---|---|---|---|---|---|---|---|---|---|---|---|---|---|---|---|---|---|---|---|---|---|---|---|---|---|---|---|---|---|---|---|---|---|---|---|---|---|---|---|---|---|---|---|---|---|---|---|---|---|---|---|---|---|---|---|---|---|---|---|---|---|---|---|---|---|---|---|---|---|---|---|---|---|---|---|---|---|---|---|---|---|---|---|---|---|---|---|---|---|---|---|---|---|---|---|---|---|---|---|---|---|---|---|---|---|---|---|---|---|---|---|---|---|---|---|---|---|---|---|---|---|---|---|---|---|---|---|---|---|---|---|---|---|---|---|---|---|---|---|---|---|---|---|---|---|---|---|---|---|---|---|---|---|---|---|---|---|---|---|---|---|---|---|---|---|---|---|---|---|---|---|---|---|---|---|---|---|---|---|---|---|---|---|---|---|---|---|---|---|---|---|---|---|---|---|---|---|---|---|---|---|---|---|---|---|---|---|---|---|---|---|---|---|---|---|---|---|---|---|---|---|---|---|---|---|---|---|---|---|---|---|---|---|---|---|---|---|---|---|---|---|---|---|---|---|---|---|---|---|---|---|---|---|---|---|---|---|---|---|---|---|---|---|---|---|---|---|---|---|---|---|---|---|---|---|---|---|---|---|---|---|---|---|---|---|---|---|---|---|---|---|---|---|---|---|---|---|---|---|---|---|---|---|---|---|---|---|---|---|---|---|---|---|---|---|---|---|---|---|---|---|---|---|---|---|---|---|---|---|---|---|---|---|---|---|---|---|---|
| ||||||||||||||||||||||||||||||||||||||||||||||||||||||||||||||||||||||||||||||||||||||||||||||||||||||||||||||||||||||||||||||||||||||||||||||||||||||||||||||||||||||||||||||||||||||||||||||||||||||||||||||||||||||||||||||||||||||||||||||||||||||||||||||||||||||||||||||||||||||||||||||||||||||||||||||||||||||||||||||||||||||||||||||||||||||||||||||||
| Items | ||||||||||||||||||||||||||||||||||||||||||||
|---|---|---|---|---|---|---|---|---|---|---|---|---|---|---|---|---|---|---|---|---|---|---|---|---|---|---|---|---|---|---|---|---|---|---|---|---|---|---|---|---|---|---|---|---|
| ||||||||||||||||||||||||||||||||||||||||||||
1F
Check the second cabin from the left to find TM08 (Body Slam), then follow the hallway to the right and go down the stairs.
B1F
This part of the ship is a dead-end hallway with five rooms. Check the far-right room for a Max Potion, and the center room for an Ether. The fourth room from the stairs has TM44 (Rest), and a hidden Hyper Potion lies on the bed in the far-left room.
1F
Follow the hallway to the front of the ship, then turn left to reach the galley. Check the third trash can to find a Great Ball, a stronger version of the regular Poké Ball. Leave the galley and climb up the next stairway.
2F
To the south is another stairway; this one leads to the deck of the ship, where two Sailors are waiting to battle. Step inside the second room from the left for a Max Ether, and the fourth room from the left for a Rare Candy. When you approach the Captain's quarters at the back of the ship, your rival is just leaving.
His Pidgeotto is not much of a threat, even though it is only one level lower than his starter Pokémon. Conversely, his newly evolved Raticate has an improved Attack stat, allowing it to deal even more damage with Hyper Fang. Its Tail Whip lowers its foe's Defense, making Hyper Fang even more painful. Despite the Psychic type having only one weakness, Kadabra's low Defense leaves it vulnerable to physical moves. His starter Pokémon has recently evolved as well; avoid pitting your own against it, and use Pokémon with a type advantage instead.
Even though he lost, he taunts you again before running off. Enter the Captain's quarters to find him hunched over a trash can; it looks like he got seasick. Talk to him to give him a quick backrub, which is all it takes to settle his stomach. He rewards you with HM01 (Cut). This move lets you chop down those thin trees to reach new areas! Make sure that you've collected all the items before disembarking, as the ferry glides out of the harbor when you do. Use HM01 to teach Cut to Bulbasaur or Charmander, and set out for the Gym.
Vermilion City
Vermilion Gym
VERMILION CITY
POKéMON GYM
LEADER: LT. SURGE
The Lightning
American!
The Vermilion Gym specializes in Electric-type Pokémon. Ground Pokémon like Geodude and Sandshrew are immune to electrical attacks, and can inflict serious damage with their Ground-type attacks. Avoid using Flying- or Water-type Pokémon. Lt. Surge forces challengers to flip two switches hidden randomly in the trash cans to reach him. If the second switch is not flipped, the trap resets.
| |||||||||||||||||||||||||||||||||||||||||||||||||||||||||||||||||||||||||||||||||||||||||||||||||||||||||||||||||||||||||||||||||||||||||||||||||||||
Defeated, Lt. Surge presents you with the Thunder Badge. This badge gives a slight Speed boost in battle, and enables the use of Fly in the field. He also gives you TM24 (Thunderbolt), the second-strongest Electric-type attack, as a prize.
Rest up at the Pokémon Center, then set out for Route 11 to the east.
|
Red and Blue walkthrough |
|

|
This article is part of Project Walkthroughs, a Bulbapedia project that aims to write comprehensive step-by-step guides on each Pokémon game. |
