Appendix:Red and Blue walkthrough/Section 16: Difference between revisions
mNo edit summary |
|||
| (6 intermediate revisions by 5 users not shown) | |||
| Line 1: | Line 1: | ||
{{WalkthroughNotice}} | |||
== Indigo Plateau == | == Indigo Plateau == | ||
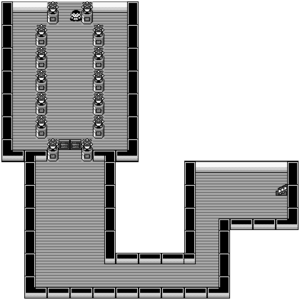
[[File:Indigo Plateau Center I.png|thumb|Indigo Plateau]] | [[File:Indigo Plateau Center I.png|thumb|[[Indigo Plateau]]]] | ||
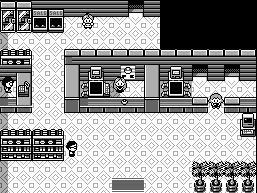
The front room doubles as a Pokémon Center and Poké Mart, allowing Trainers to prepare themselves and their Pokémon for the gauntlet ahead. The {{ka|Elite Four}} is a group of talented Pokémon Trainers second only to the [[Pokémon Champion|Pokémon League Champion]] in terms of power. The title of Champion designates a person as the strongest Trainer in the region, having defeated the Elite Four and the previous Champion to claim it. The next five battles will not be easy, but with a strong team and a decent supply of {{DL|Potion|Full Restore}}s and [[Revive]]s, you may finally reach the [[Hall of Fame]]. | The front room doubles as a Pokémon Center and Poké Mart, allowing Trainers to prepare themselves and their Pokémon for the gauntlet ahead. The {{ka|Elite Four}} is a group of talented Pokémon Trainers second only to the [[Pokémon Champion|Pokémon League Champion]] in terms of power. The title of Champion designates a person as the strongest Trainer in the region, having defeated the Elite Four and the previous Champion to claim it. The next five battles will not be easy, but with a strong team and a decent supply of {{DL|Potion|Full Restore}}s and [[Revive]]s, you may finally reach the [[Hall of Fame]]. | ||
| Line 9: | Line 8: | ||
{| align="center" | {| align="center" | ||
| | | | ||
{{shop| | {{shop|Poké Mart}} | ||
{{shoprow|{{shopitem| | {{shoprow|{{shopitem|Ultra Ball|1200}}|{{shopitem|Great Ball|600}}}} | ||
{{shoprow|{{shopitem| | {{shoprow|{{shopitem|Full Restore|3000}}|{{shopitem|Max Potion|2500}}}} | ||
{{shoprow|{{shopitem|Full Heal|600}}|{{shopitem|Revive|1500}}}} | {{shoprow|{{shopitem|Full Heal|600}}|{{shopitem|Revive|1500}}}} | ||
{{shoprow|{{shopitem|Max Repel|700}}}} | {{shoprow|{{shopitem|Max Repel|700}}|}} | ||
{{shopfooter}} | {{shopfooter}} | ||
|} | |} | ||
Take the hallway past the Poké Mart counter, and step into the first room. Lorelei's {{t|Ice|sub-zero}} army awaits! | |||
=== First room === | |||
[[File:Lorelei Room RBY.png|thumb|First Room]] | |||
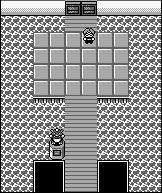
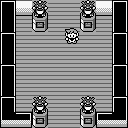
The first member of the Elite Four is [[Lorelei]], a master {{type|Ice}} Trainer. Three of her five Pokémon are {{2t|Water|Ice}}-types, so be wary of type-matchups. {{type|Grass}}s may seem like a good idea, but they'll only be useful against her {{p|Slowbro}}. A better option is using {{type|Electric}} Pokémon, as most of her team share the Water type. As an {{2t|Ice|Psychic}}-type, her {{p|Jynx}} is vulnerable to {{t|Fire}} and {{t|Rock}} attacks. {{p|Zapdos}} and {{p|Moltres}} are great candidates to use against Lorelei; Zapdos learns {{m|Thunder}} at level 51, and Moltres can learn {{m|Fire Blast}} through [[TM38]]. Keep in mind that their secondary {{t|Flying}} type makes Zapdos vulnerable to Ice moves, while Moltres' Fire type eliminates its weakness. | |||
[[ | |||
{| class="expandable" align="center" style="background: #{{blue color light}}; {{roundy}}; border: 5px solid #{{red color light}};" | |||
|- align="center" | |||
! Available Pokémon | |||
|- | |||
| | |||
{{Catch/header|water|no}} | |||
{{Catch/div|water|Fishing}} | |||
{{Catch/entry1|129|Magikarp|yes|yes|no|Fish Old|5|100%|type1=Water}} | |||
{{Catch/entry1|118|Goldeen|yes|yes|no|Fish Good|10|50%|type1=Water}} | |||
{{Catch/entry1|060|Poliwag|yes|yes|no|Fish Good|10|50%|type1=Water}} | |||
{{Catch/footer|water}} | |||
|} | |||
{| align="center" | {| align="center" | ||
| | | | ||
{{Party|color={{ice color}}|headcolor={{ice color light}}|bordercolor={{ice color dark}} | {{Party/Single | ||
|color={{ice color}} | |||
|headcolor={{ice color light}} | |||
|bordercolor={{ice color dark}} | |||
|sprite=Spr RG Lorelei.png | |sprite=Spr RG Lorelei.png | ||
|prize={{PDollar}}5544 | |prize={{PDollar}}5544 | ||
|name=Lorelei | |name={{color2|000|Lorelei}} | ||
|game=RGB|location=Indigo Plateau | |game=RGB | ||
|pokemon=5 | |location=Indigo Plateau | ||
|pokemon=5}} | |||
| | |{{Pokémon/1 | ||
|ndex=087|pokemon=Dewgong | |game=Red | ||
|ndex=087 | |||
|pokemon=Dewgong | |||
|level=54 | |||
|type1=Water|type2=Ice | |type1=Water|type2=Ice | ||
|move1=Growl|move1type=Normal | |move1=Growl|move1type=Normal | ||
|move2=Aurora Beam|move2type=Ice | |move2=Aurora Beam|move2type=Ice | ||
|move3=Rest|move3type=Psychic | |move3=Rest|move3type=Psychic | ||
|move4=Take Down|move4type=Normal}} | |move4=Take Down|move4type=Normal}} | ||
|{{Pokémon/1 | |||
| | |game=Red | ||
|ndex=091|pokemon=Cloyster | |ndex=091 | ||
|pokemon=Cloyster | |||
|level=53 | |||
|type1=Water|type2=Ice | |type1=Water|type2=Ice | ||
|move1=Supersonic|move1type=Normal | |move1=Supersonic|move1type=Normal | ||
|move2=Clamp|move2type=Water | |move2=Clamp|move2type=Water | ||
|move3=Aurora Beam|move3type=Ice | |move3=Aurora Beam|move3type=Ice | ||
|move4=Spike Cannon|move4type=Normal}} | |move4=Spike Cannon|move4type=Normal}} | ||
|{{Pokémon/1 | |||
| | |game=Red | ||
|ndex=080|pokemon=Slowbro | |ndex=080 | ||
|pokemon=Slowbro | |||
|level=54 | |||
|type1=Water|type2=Psychic | |type1=Water|type2=Psychic | ||
|move1=Growl|move1type=Normal | |||
|move1= | |move2=Water Gun|move2type=Water | ||
|move2= | |move3=Withdraw|move3type=Water | ||
|move3=Withdraw|move3type= | |||
|move4=Amnesia|move4type=Psychic}} | |move4=Amnesia|move4type=Psychic}} | ||
{{Party/Div|color={{ice color}}}} | |||
| | | style="margin:auto" |{{Pokémon/1 | ||
|ndex=124|pokemon=Jynx | |game=Red | ||
|ndex=124 | |||
|pokemon=Jynx | |||
|level=56 | |||
|type1=Ice|type2=Psychic | |type1=Ice|type2=Psychic | ||
|move1=DoubleSlap|move1type=Normal | |move1=DoubleSlap|move1type=Normal | ||
|move2=Ice Punch|move2type=Ice | |move2=Ice Punch|move2type=Ice | ||
|move3=Body Slam|move3type=Normal | |move3=Body Slam|move3type=Normal | ||
|move4=Thrash|move4type=Normal}} | |move4=Thrash|move4type=Normal}} | ||
| style="margin:auto" |{{Pokémon/1 | |||
| | |game=Red | ||
|ndex=131|pokemon=Lapras | |ndex=131 | ||
|pokemon=Lapras | |||
|level=56 | |||
|type1=Water|type2=Ice | |type1=Water|type2=Ice | ||
|move1=Body Slam|move1type=Normal | |move1=Body Slam|move1type=Normal | ||
|move2=Confuse Ray|move2type=Ghost | |move2=Confuse Ray|move2type=Ghost | ||
|move3= | |move3=Blizzard|move3type=Ice | ||
|move4= | |move4=Hydro Pump|move4type=Water}} | ||
}} | {{Party/Footer}} | ||
|} | |} | ||
Defeating Lorelei opens the door to the second room. Bruno's team of {{t|Fighting|martial artists}} awaits! | Defeating Lorelei opens the door to the second room. Bruno's team of {{t|Fighting|martial artists}} awaits! | ||
=== | === Second room === | ||
[[File:Bruno Room RBY.png|thumb| | [[File:Bruno Room RBY.png|thumb|Second room]] | ||
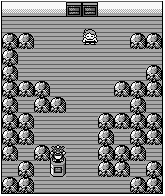
The second member of the Elite Four is [[Bruno]], a master {{type|Fighting}} Trainer. | The second member of the Elite Four is [[Bruno]], a master {{type|Fighting}} Trainer. That being said, only three of his five Pokémon are actually part of the Fighting type. {{t|Flying}} Pokémon can wreak havoc against his {{p|Hitmonlee}} and {{p|Machamp}}, but {{p|Hitmonchan}} can fight back with {{m|Ice Punch}} and {{m|ThunderPunch}}. A strong {{t|Water}} Pokémon can flood the battlefield with {{m|Surf}}, leaving his two {{p|Onix}} waterlogged. For reinforcements, consider bringing a {{p|Slowbro}} or {{p|Starmie}} along, as their {{2t|Water|Psychic}} typing will prove useful here. | ||
{| align="center" | {| align="center" | ||
| | | | ||
{{Party|color={{fighting color}}|headcolor={{fighting color light}}|bordercolor={{fighting color dark}} | {{Party/Single | ||
|color={{fighting color}} | |||
|headcolor={{fighting color light}} | |||
|bordercolor={{fighting color dark}} | |||
|sprite=Spr RG Bruno.png | |sprite=Spr RG Bruno.png | ||
|prize={{PDollar}}5742 | |prize={{PDollar}}5742 | ||
|name=Bruno | |name={{color2|000|Bruno}} | ||
|game=RGB|location=Indigo Plateau | |game=RGB | ||
|pokemon=5 | |location=Indigo Plateau | ||
|pokemon=5}} | |||
| | |{{Pokémon/1 | ||
|ndex=095|pokemon=Onix | |game=Red | ||
|ndex=095 | |||
|pokemon=Onix | |||
|level=53 | |||
|type1=Rock|type2=Ground | |type1=Rock|type2=Ground | ||
|move1=Rock Throw|move1type=Rock | |move1=Rock Throw|move1type=Rock | ||
|move2=Rage|move2type=Normal | |move2=Rage|move2type=Normal | ||
|move3=Slam|move3type=Normal | |move3=Slam|move3type=Normal | ||
|move4=Harden|move4type=Normal}} | |move4=Harden|move4type=Normal}} | ||
|{{Pokémon/1 | |||
| | |game=Red | ||
|ndex=107|pokemon=Hitmonchan | |ndex=107 | ||
|pokemon=Hitmonchan | |||
|level=55 | |||
|type1=Fighting | |type1=Fighting | ||
|move1=Ice Punch|move1type=Ice | |move1=Ice Punch|move1type=Ice | ||
|move2= | |move2=ThunderPunch|move2type=Electric | ||
|move3= | |move3=Mega Punch|move3type=Normal | ||
|move4=Counter|move4type=Fighting}} | |move4=Counter|move4type=Fighting}} | ||
|{{Pokémon/1 | |||
| | |game=Red | ||
|ndex=106|pokemon=Hitmonlee | |ndex=106 | ||
|pokemon=Hitmonlee | |||
|level=55 | |||
|type1=Fighting | |type1=Fighting | ||
|move1=Jump Kick|move1type=Fighting | |move1=Jump Kick|move1type=Fighting | ||
|move2=Focus Energy|move2type=Normal | |move2=Focus Energy|move2type=Normal | ||
|move3=Hi Jump Kick|move3type=Fighting | |move3=Hi Jump Kick|move3type=Fighting | ||
|move4=Mega Kick|move4type=Normal}} | |move4=Mega Kick|move4type=Normal}} | ||
{{Party/Div|color={{fighting color}}}} | |||
| | | style="margin:auto" |{{Pokémon/1 | ||
|ndex=095|pokemon=Onix | |game=Red | ||
|ndex=095 | |||
|pokemon=Onix | |||
|level=56 | |||
|type1=Rock|type2=Ground | |type1=Rock|type2=Ground | ||
|move1=Rock Throw|move1type=Rock | |move1=Rock Throw|move1type=Rock | ||
|move2=Rage|move2type=Normal | |move2=Rage|move2type=Normal | ||
|move3=Slam|move3type=Normal | |move3=Slam|move3type=Normal | ||
|move4=Harden|move4type=Normal}} | |move4=Harden|move4type=Normal}} | ||
| style="margin:auto" |{{Pokémon/1 | |||
| | |game=Red | ||
|ndex=068|pokemon=Machamp | |ndex=068 | ||
|pokemon=Machamp | |||
|level=58 | |||
|type1=Fighting | |type1=Fighting | ||
|move1=Leer|move1type=Normal | |move1=Leer|move1type=Normal | ||
|move2=Focus Energy|move2type=Normal | |move2=Focus Energy|move2type=Normal | ||
|move3=Fissure|move3type=Ground | |move3=Fissure|move3type=Ground | ||
|move4=Submission|move4type=Fighting}} | |move4=Submission|move4type=Fighting}} | ||
}} | {{Party/Footer}} | ||
|} | |} | ||
Defeating Bruno opens the door to the third room. Agatha's team from the {{t|Ghost|spirit world}} awaits! | Defeating Bruno opens the door to the third room. Agatha's team from the {{t|Ghost|spirit world}} awaits! | ||
=== | === Third room === | ||
[[File:Agatha Room RBY.png|thumb| | [[File:Agatha Room RBY.png|thumb|Third room]] | ||
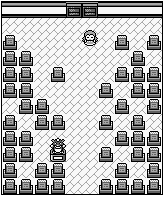
The third member of the Elite Four is [[Agatha]], a master {{type|Ghost}} Trainer. The only type that can effectively combat her ghosts is the {{t|Ghost}} type itself, though attacks of any type but {{t|Normal}} and {{t|Fighting}} can still damage them. {{type|Ground}} moves like {{m|Earthquake}} can deal some heavy damage, but are totally ineffective against her {{p|Golbat}}, which is less immune to {{t|Ice}} or {{t|Electric}} attacks. As all of Agatha's Pokémon are also part {{t|Poison}}, powerful {{type|Psychic}} attacks, such as {{m|Psychic}} or {{m|Psybeam}}, should be able to take care of them as well. Take out her two {{p|Gengar}} as soon as possible, or risk getting hit with {{m|Hypnosis}} or {{m|Confuse Ray}}. | The third member of the Elite Four is [[Agatha]], a master {{type|Ghost}} Trainer. The only type that can effectively combat her ghosts is the {{t|Ghost}} type itself, though attacks of any type but {{t|Normal}} and {{t|Fighting}} can still damage them. {{type|Ground}} moves like {{m|Earthquake}} can deal some heavy damage, but are totally ineffective against her {{p|Golbat}}, which is less immune to {{t|Ice}} or {{t|Electric}} attacks. As all of Agatha's Pokémon are also part {{t|Poison}}, powerful {{type|Psychic}} attacks, such as {{m|Psychic}} or {{m|Psybeam}}, should be able to take care of them as well. Take out her two {{p|Gengar}} as soon as possible, or risk getting hit with {{m|Hypnosis}} or {{m|Confuse Ray}}. | ||
| Line 156: | Line 184: | ||
{| align="center" | {| align="center" | ||
| | | | ||
{{Party|color={{ghost color}}|headcolor={{ghost color light}}|bordercolor={{ghost color dark}} | {{Party/Single | ||
|color={{ghost color}} | |||
|headcolor={{ghost color light}} | |||
|bordercolor={{ghost color dark}} | |||
|sprite=Spr RG Agatha.png | |sprite=Spr RG Agatha.png | ||
|prize={{PDollar}}5940 | |prize={{PDollar}}5940 | ||
|name=Agatha | |name={{color2|000|Agatha}} | ||
|game=RGB|location=Indigo Plateau | |game=RGB | ||
|pokemon=5 | |location=Indigo Plateau | ||
|pokemon=5}} | |||
| | |{{Pokémon/1 | ||
|ndex=094|pokemon=Gengar | |game=Red | ||
|ndex=094 | |||
|pokemon=Gengar | |||
|level=56 | |||
|type1=Ghost|type2=Poison | |type1=Ghost|type2=Poison | ||
|move1=Confuse Ray|move1type=Ghost | |move1=Confuse Ray|move1type=Ghost | ||
|move2=Night Shade|move2type=Ghost | |move2=Night Shade|move2type=Ghost | ||
|move3=Hypnosis|move3type=Psychic | |move3=Hypnosis|move3type=Psychic | ||
|move4=Dream Eater|move4type=Psychic}} | |move4=Dream Eater|move4type=Psychic}} | ||
|{{Pokémon/1 | |||
| | |game=Red | ||
|ndex=042|pokemon=Golbat | |ndex=042 | ||
|pokemon=Golbat | |||
|level=56 | |||
|type1=Poison|type2=Flying | |type1=Poison|type2=Flying | ||
|move1=Supersonic|move1type=Normal | |move1=Supersonic|move1type=Normal | ||
|move2=Confuse Ray|move2type=Ghost | |move2=Confuse Ray|move2type=Ghost | ||
|move3=Wing Attack|move3type=Flying | |move3=Wing Attack|move3type=Flying | ||
|move4=Haze|move4type=Ice}} | |move4=Haze|move4type=Ice}} | ||
|{{Pokémon/1 | |||
| | |game=Red | ||
|ndex=093|pokemon=Haunter | |ndex=093 | ||
|pokemon=Haunter | |||
|level=55 | |||
|type1=Ghost|type2=Poison | |type1=Ghost|type2=Poison | ||
|move1=Confuse Ray|move1type=Ghost | |move1=Confuse Ray|move1type=Ghost | ||
|move2=Night Shade|move2type=Ghost | |move2=Night Shade|move2type=Ghost | ||
|move3=Hypnosis|move3type=Psychic | |move3=Hypnosis|move3type=Psychic | ||
|move4=Dream Eater|move4type=Psychic}} | |move4=Dream Eater|move4type=Psychic}} | ||
{{Party/Div|color={{ghost color}}}} | |||
| | |style="margin:auto"|{{Pokémon/1 | ||
|ndex=024|pokemon=Arbok | |game=Red | ||
|ndex=024 | |||
|pokemon=Arbok | |||
|level=58 | |||
|type1=Poison | |type1=Poison | ||
|move1=Bite|move1type=Normal | |move1=Bite|move1type=Normal | ||
|move2=Glare|move2type=Normal | |move2=Glare|move2type=Normal | ||
|move3=Screech|move3type=Normal | |move3=Screech|move3type=Normal | ||
|move4=Acid|move4type=Poison}} | |move4=Acid|move4type=Poison}} | ||
|style="margin:auto"|{{Pokémon/1 | |||
| | |game=Red | ||
|ndex=094|pokemon=Gengar | |ndex=094 | ||
|pokemon=Gengar | |||
|level=60 | |||
|type1=Ghost|type2=Poison | |type1=Ghost|type2=Poison | ||
|move1=Confuse Ray|move1type=Ghost | |move1=Confuse Ray|move1type=Ghost | ||
|move2=Night Shade|move2type=Ghost | |move2=Night Shade|move2type=Ghost | ||
|move3=Toxic|move3type=Poison | |move3=Toxic|move3type=Poison | ||
|move4=Dream Eater|move4type=Psychic}} | |move4=Dream Eater|move4type=Psychic}} | ||
}} | {{Party/Footer}} | ||
|} | |} | ||
Defeating Agatha unlocks the door to the fourth room. Lance and his ferocious {{t|dragon}}s await your challenge! | Defeating Agatha unlocks the door to the fourth room. Lance and his ferocious {{t|dragon}}s await your challenge! | ||
=== | === Fourth room === | ||
[[File:Lance Room RBY.png|thumb| | [[File:Lance Room RBY.png|thumb|Fourth room]] | ||
The fourth and final member of the Elite Four is [[Lance]], a master {{type|Dragon}} Trainer, and leader of the Elite Four. | The fourth and final member of the Elite Four is [[Lance]], a master {{type|Dragon}} Trainer, and leader of the Elite Four. The Dragon type is probably the strongest type in the game, since it resists {{t|Electric}}-, {{t|Grass}}-, {{t|Fire}}-, and {{type|Water}} moves, and is only vulnerable to {{t|Dragon}}- and {{type|Ice}} attacks. A formidable opposing team, though only three of the five are actually part of the Dragon type. Take out his two {{p|Dragonair}} and {{p|Dragonite}} with an {{m|Ice Beam}} or {{m|Blizzard}}, and the bulk of his team is finished. Due to their secondary {{t|Flying}} type, his {{p|Gyarados}} and {{p|Aerodactyl}} are also vulnerable to {{t|Ice}} moves, though there are other options to defeat them. Gyarados will take quadruple damage from electricity, so fire off a few {{m|Thunderbolt}}s to ground it. Aerodactyl is part-{{t|Rock}}, so {{m|Surf}} is one way to get past it. {{p|Articuno}} and {{p|Zapdos}} can be some of the best choices to use against Lance's dragons. | ||
{| align="center" | {| align="center" | ||
| | | | ||
{{Party|color={{dragon color}}|bordercolor={{dragon color dark}}|headcolor={{dragon color light}} | {{Party/Single | ||
|color={{dragon color}} | |||
|bordercolor={{dragon color dark}} | |||
|headcolor={{dragon color light}} | |||
|sprite=Spr RG Lance.png | |sprite=Spr RG Lance.png | ||
|prize={{ | |prize={{pdollar}}6138 | ||
|name=Lance | |name={{color2|000|Lance}} | ||
|game=RGB|location=Indigo Plateau | |game=RGB | ||
|pokemon=5 | |location=Indigo Plateau | ||
|pokemon=5}} | |||
| | |{{Pokémon/1 | ||
|ndex=130| | |pokemon=Gyarados | ||
|ndex=130 | |||
|level=58 | |||
|game=Red | |||
|type1=Water|type2=Flying | |type1=Water|type2=Flying | ||
|move1=Hydro Pump|move1type=Water | |move1=Hydro Pump|move1type=Water | ||
|move2=Dragon Rage|move2type=Dragon | |move2=Dragon Rage|move2type=Dragon | ||
|move3=Leer|move3type=Normal | |move3=Leer|move3type=Normal | ||
|move4=Hyper Beam|move4type=Normal}} | |move4=Hyper Beam|move4type=Normal}} | ||
|{{Pokémon/1 | |||
| | |pokemon=Dragonair | ||
|ndex=148| | |ndex=148 | ||
|level=56 | |||
|game=Red | |||
|type1=Dragon | |type1=Dragon | ||
|move1=Agility|move1type=Psychic | |move1=Agility|move1type=Psychic | ||
|move2=Slam|move2type=Normal | |move2=Slam|move2type=Normal | ||
|move3=Dragon Rage|move3type=Dragon | |move3=Dragon Rage|move3type=Dragon | ||
|move4=Hyper Beam|move4type=Normal}} | |move4=Hyper Beam|move4type=Normal}} | ||
{{Party/Div|color={{dragon color}}}} | |||
| | | style="margin:auto" |{{Pokémon/1 | ||
|ndex=142| | |pokemon=Aerodactyl | ||
|ndex=142 | |||
|level=60 | |||
|game=Red | |||
|type1=Rock|type2=Flying | |type1=Rock|type2=Flying | ||
|move1=Supersonic|move1type=Normal | |move1=Supersonic|move1type=Normal | ||
|move2= | |move2=Bite|move2type=Normal | ||
|move3= | |move3=Take Down|move3type=Normal | ||
|move4=Hyper Beam|move4type=Normal}} | |move4=Hyper Beam|move4type=Normal}} | ||
| style="margin:auto" |{{Pokémon/1 | |||
| | |pokemon=Dragonite | ||
|ndex=149| | |ndex=149 | ||
|level=62 | |||
|game=Red | |||
|type1=Dragon|type2=Flying | |type1=Dragon|type2=Flying | ||
|move1=Agility|move1type=Psychic | |move1=Agility|move1type=Psychic | ||
|move2=Slam|move2type=Normal | |move2=Slam|move2type=Normal | ||
|move3=Barrier|move3type=Psychic | |move3=Barrier|move3type=Psychic | ||
|move4=Hyper Beam|move4type=Normal}} | |move4=Hyper Beam|move4type=Normal}} | ||
}} | {{Party/Footer}} | ||
|} | |} | ||
| Line 277: | Line 324: | ||
With the Elite Four defeated, the door to this unknown Champion's room is unlocked. Don't enter just yet, though; you are drawn into battle immediately after exiting Lance's room, so use any items now. Only one person stands between you and the title of Champion! | With the Elite Four defeated, the door to this unknown Champion's room is unlocked. Don't enter just yet, though; you are drawn into battle immediately after exiting Lance's room, so use any items now. Only one person stands between you and the title of Champion! | ||
=== Champion's room === | |||
[[File:Champion Room RBY.png|thumb|Champion room | [[File:Champion Room RBY.png|thumb|left|Champion's room]] | ||
[[File:Hall of Fame RBY.png|thumb|Hall of Fame]] | |||
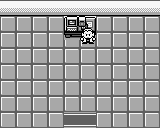
{{ga|Blue}} defeated the Elite Four before you even set foot in {{ka|Victory Road}}, and now the title of Indigo League Champion rests with him. | {{ga|Blue}} defeated the Elite Four before you even set foot in {{ka|Victory Road}}, and now the title of Indigo League Champion rests with him. The first half of his team will always consist of {{p|Pidgeot}}, {{p|Alakazam}}, and {{p|Rhydon}}, so plan accordingly. The second half changes depending on which starter Pokémon he chose. {{type|Electric}} attacks terrorize his Pidgeot and {{p|Gyarados}} (or {{p|Blastoise}}), and a crackling {{m|Thunderbolt}} will send them reeling. A strong {{t|Water}} Pokémon can wash away his Rhydon and {{p|Arcanine}} (or {{p|Charizard}}) with {{m|Surf}}. His {{p|Exeggutor}} (or {{p|Venusaur}}) can't survive long in extreme {{t|Fire|heat}} or {{t|Ice|cold}}, so a {{m|Flamethrower}} or {{m|Ice Beam}} can do the trick. The most annoying opponent may be his Alakazam with its {{m|Recover}} move; its {{stat|Defense}} is fairly low, so hit it with a physical move like {{m|Earthquake}}. | ||
{| align="center" | {| align="center" | ||
! {{MSP|001|Bulbasaur}} | ! {{MSP|001|Bulbasaur}} Player chose {{p|Bulbasaur}}: | ||
! {{MSP|004|Charmander}} | ! {{MSP|004|Charmander}} Player chose {{p|Charmander}}: | ||
! {{MSP|007|Squirtle}} | ! {{MSP|007|Squirtle}} Player chose {{p|Squirtle}}: | ||
|- | |- | ||
|{{Party|color={{ | |{{Party/Single | ||
|color={{blue color}} | |||
|headcolor={{blue color light}} | |||
|bordercolor={{blue color dark}} | |||
|sprite=Spr RG Blue 3.png | |sprite=Spr RG Blue 3.png | ||
|prize={{PDollar}}6435 | |prize={{PDollar}}6435 | ||
|name=Blue | |name={{color2|000|Blue (game)|Blue}} | ||
|game=RGB|location=Indigo Plateau | |game=RGB | ||
|pokemon=6 | |location=Indigo Plateau | ||
|pokemon=6}} | |||
| | |{{Pokémon/1 | ||
|ndex=018|pokemon=Pidgeot | |game=Blue | ||
|ndex=018 | |||
|pokemon=Pidgeot | |||
|level=61 | |||
|type1=Normal|type2=Flying | |type1=Normal|type2=Flying | ||
|move1=Whirlwind|move1type=Normal | |||
|move1= | |move2=Wing Attack|move2type=Flying | ||
|move2= | |||
|move3=Sky Attack|move3type=Flying | |move3=Sky Attack|move3type=Flying | ||
|move4= | |move4=Mirror Move|move4type=Flying}} | ||
|{{Pokémon/1 | |||
| | |game=Blue | ||
|ndex=065|pokemon=Alakazam | |ndex=065 | ||
|pokemon=Alakazam | |||
|level=59 | |||
|type1=Psychic | |type1=Psychic | ||
|move1=Psybeam|move1type=Psychic | |move1=Psybeam|move1type=Psychic | ||
|move2= | |move2=Recover|move2type=Normal | ||
|move3= | |move3=Psychic|move3type=Psychic | ||
|move4= | |move4=Reflect|move4type=Psychic}} | ||
|{{Pokémon/1 | |||
| | |game=Blue | ||
|ndex=112|pokemon=Rhydon | |ndex=112 | ||
|pokemon=Rhydon | |||
|level=61 | |||
|type1=Ground|type2=Rock | |type1=Ground|type2=Rock | ||
|move1=Tail Whip|move1type=Normal | |||
|move2=Fury Attack|move2type=Normal | |||
|move3=Horn Drill|move3type=Normal | |||
|move4=Leer|move4type=Normal}} | |||
{{Party/Div|color={{blue color}}}} | |||
|{{Pokémon/1 | |||
|game=Blue | |||
|ndex=103 | |||
|pokemon=Exeggutor | |||
|level=61 | |level=61 | ||
|move1= | |type1=Grass|type2=Psychic | ||
|move2= | |move1=Barrage|move1type=Normal | ||
|move3= | |move2=Hypnosis|move2type=Psychic | ||
|move3=Stomp|move3type=Normal}} | |||
|{{Pokémon/1 | |||
| | |game=Blue | ||
|ndex=130|pokemon=Gyarados | |ndex=130 | ||
|pokemon=Gyarados | |||
|level=63 | |||
|type1=Water|type2=Flying | |type1=Water|type2=Flying | ||
|move1=Dragon Rage|move1type=Dragon | |move1=Dragon Rage|move1type=Dragon | ||
|move2= | |move2=Leer|move2type=Normal | ||
|move3= | |move3=Hydro Pump|move3type=Water | ||
|move4= | |move4=Hyper Beam|move4type=Normal}} | ||
|{{Pokémon/1 | |||
| | |game=Blue | ||
|ndex=006 | |||
|pokemon=Charizard | |||
|ndex=006|pokemon=Charizard | |||
|level=65 | |level=65 | ||
|move1= | |type1=Fire | ||
|move2= | |type2=Flying | ||
|move3= | |move1=Rage|move1type=Normal | ||
|move2=Slash|move2type=Normal | |||
|move3=Fire Blast|move3type=Fire | |||
|move4=Fire Spin|move4type=Fire}} | |move4=Fire Spin|move4type=Fire}} | ||
}} | {{Party/Footer}} | ||
|{{Party/Single | |||
|{{Party|color={{ | |color={{blue color}} | ||
|headcolor={{blue color light}} | |||
|bordercolor={{blue color dark}} | |||
|sprite=Spr RG Blue 3.png | |sprite=Spr RG Blue 3.png | ||
|prize={{PDollar}}6435 | |prize={{PDollar}}6435 | ||
|name=Blue | |name={{color2|000|Blue (game)|Blue}} | ||
|game=RGB|location=Indigo Plateau | |game=RGB | ||
|pokemon=6 | |location=Indigo Plateau | ||
|pokemon=6}} | |||
| | |{{Pokémon/1|game=Blue | ||
|ndex=018|pokemon=Pidgeot | |ndex=018 | ||
|pokemon=Pidgeot | |||
|level=61 | |level=61 | ||
|move1= | |type1=Normal | ||
|move2= | |type2=Flying | ||
|move1=Whirlwind|move1type=Normal | |||
|move2=Wing Attack|move2type=Flying | |||
|move3=Sky Attack|move3type=Flying | |move3=Sky Attack|move3type=Flying | ||
|move4= | |move4=Mirror Move|move4type=Flying}} | ||
|{{Pokémon/1 | |||
| | |game=Blue | ||
|ndex=065|pokemon=Alakazam | |ndex=065 | ||
|pokemon=Alakazam | |||
|level=59 | |||
|type1=Psychic | |type1=Psychic | ||
|move1=Psybeam|move1type=Psychic | |move1=Psybeam|move1type=Psychic | ||
|move2= | |move2=Recover|move2type=Normal | ||
|move3= | |move3=Psychic|move3type=Psychic | ||
|move4= | |move4=Reflect|move4type=Psychic}} | ||
|{{Pokémon/1 | |||
| | |game=Blue | ||
|ndex=112|pokemon=Rhydon | |ndex=112 | ||
|pokemon=Rhydon | |||
|level=61 | |||
|type1=Ground|type2=Rock | |type1=Ground|type2=Rock | ||
|move1=Tail Whip|move1type=Normal | |||
|move2=Fury Attack|move2type=Normal | |||
|move3=Horn Drill|move3type=Normal | |||
|move4=Leer|move4type=Normal}} | |||
{{Party/Div|color={{blue color}}}} | |||
|{{Pokémon/1 | |||
|game=Blue | |||
|ndex=059 | |||
|pokemon=Arcanine | |||
|level=61 | |level=61 | ||
|type1=Fire | |type1=Fire | ||
|move1=Roar|move1type=Normal | |move1=Roar|move1type=Normal | ||
|move2= | |move2=Ember|move2type=Fire | ||
|move3= | |move3=Leer|move3type=Normal | ||
|move4=Take Down|move4type=Normal}} | |move4=Take Down|move4type=Normal}} | ||
|{{Pokémon/1 | |||
| | |game=Blue | ||
|ndex=009|pokemon=Blastoise | |ndex=103 | ||
|pokemon=Exeggutor | |||
|level=63 | |||
|type1=Grass|type2=Psychic | |||
|move1=Barrage|move1type=Normal | |||
|move2=Hypnosis|move2type=Psychic | |||
|move3=Stomp|move3type=Normal}} | |||
|{{Pokémon/1 | |||
|game=Blue | |||
|ndex=009 | |||
|pokemon=Blastoise | |||
|level=65 | |||
|type1=Water | |type1=Water | ||
|move1=Bite|move1type=Normal | |||
|move1= | |move2=Withdraw|move2type=Water | ||
|move2= | |move3=Blizzard|move3type=Ice | ||
|move3= | |move4=Hydro Pump|move4type=Water}} | ||
|move4= | {{Party/Footer}} | ||
}} | |{{Party/Single | ||
|color={{blue color}} | |||
|{{Party|color={{ | |headcolor={{blue color light}} | ||
|bordercolor={{blue color dark}} | |||
|sprite=Spr RG Blue 3.png | |sprite=Spr RG Blue 3.png | ||
|prize={{PDollar}}6435 | |prize={{PDollar}}6435 | ||
|name=Blue | |name={{color2|000|Blue (game)|Blue}} | ||
|game=RGB|location=Indigo Plateau | |game=RGB | ||
|pokemon=6 | |location=Indigo Plateau | ||
|pokemon=6}} | |||
| | |{{Pokémon/1 | ||
|ndex=018|pokemon=Pidgeot | |game=Blue | ||
|ndex=018 | |||
|pokemon=Pidgeot | |||
|level=61 | |||
|type1=Normal|type2=Flying | |type1=Normal|type2=Flying | ||
|move1=Whirlwind|move1type=Normal | |||
|move1= | |move2=Wing Attack|move2type=Flying | ||
|move2= | |||
|move3=Sky Attack|move3type=Flying | |move3=Sky Attack|move3type=Flying | ||
|move4= | |move4=Mirror Move|move4type=Flying}} | ||
|{{Pokémon/1 | |||
| | |game=Blue | ||
|ndex=065|pokemon=Alakazam | |ndex=065 | ||
|pokemon=Alakazam | |||
|level=59 | |||
|type1=Psychic | |type1=Psychic | ||
|move1=Psybeam|move1type=Psychic | |move1=Psybeam|move1type=Psychic | ||
|move2= | |move2=Recover|move2type=Normal | ||
|move3= | |move3=Psychic|move3type=Psychic | ||
|move4= | |move4=Reflect|move4type=Psychic}} | ||
|{{Pokémon/1 | |||
| | |game=Blue | ||
|ndex=112|pokemon=Rhydon | |ndex=112 | ||
|pokemon=Rhydon | |||
|level=61 | |||
|type1=Ground|type2=Rock | |type1=Ground|type2=Rock | ||
|move1=Tail Whip|move1type=Normal | |||
|move2=Fury Attack|move2type=Normal | |||
|move3=Horn Drill|move3type=Normal | |||
|move4=Leer|move4type=Normal}} | |||
{{Party/Div|color={{blue color}}}} | |||
|{{Pokémon/1 | |||
|game=Blue | |||
|ndex=130 | |||
|pokemon=Gyarados | |||
|level=61 | |level=61 | ||
|move1= | |type1=Water|type2=Flying | ||
|move2= | |move1=Dragon Rage|move1type=Dragon | ||
|move3= | |move2=Leer|move2type=Normal | ||
|move4= | |move3=Hydro Pump|move3type=Water | ||
|move4=Hyper Beam|move4type=Normal}} | |||
| | |{{Pokémon/1 | ||
|ndex=059|pokemon=Arcanine | |game=Blue | ||
|ndex=059 | |||
|pokemon=Arcanine | |||
|level=63 | |||
|type1=Fire | |type1=Fire | ||
|move1=Roar|move1type=Normal | |move1=Roar|move1type=Normal | ||
|move2= | |move2=Ember|move2type=Fire | ||
|move3= | |move3=Leer|move3type=Normal | ||
|move4=Take Down|move4type=Normal}} | |move4=Take Down|move4type=Normal}} | ||
|{{Pokémon/1 | |||
| | |game=Blue | ||
|ndex=003 | |||
|pokemon=Venusaur | |||
|ndex=003|pokemon=Venusaur | |||
|level=65 | |level=65 | ||
|move1= | |type1=Grass | ||
|move2= | |type2=Poison | ||
|move3= | |move1=Razor Leaf|move1type=Grass | ||
|move2=Growth|move2type=Normal | |||
|move3=Mega Drain|move3type=Grass | |||
|move4=SolarBeam|move4type=Grass}} | |move4=SolarBeam|move4type=Grass}} | ||
}} | {{Party/Footer}} | ||
|} | |} | ||
Congratulations, you've charged through the Elite Four, and snatched the title of Indigo League Champion away from your rival! After the battle, {{prof|Oak}} appears and leads you past the Champion's room and into the [[Hall of Fame]] room. It is here that you and your victorious team will be recorded, as a testament to their power and perseverance. After Oak enters your team's information, the game saves, and the credits roll... | Congratulations, you've charged through the Elite Four, and snatched the title of Indigo League Champion away from your rival! After the battle, {{prof|Oak}} appears and leads you past the Champion's room and into the [[Hall of Fame]] room. It is here that you and your victorious team will be recorded, as a testament to their power and perseverance. After Oak enters your team's information, the game saves, and the credits roll... | ||
But the game's not over yet. | But the game's not over yet. When you find yourself back in [[Pallet Town]], {{m|fly}} off to {{ci|Cerulean}}. | ||
{{WalkthroughPrevNext | {{WalkthroughPrevNext | ||
| Line 491: | Line 569: | ||
}} | }} | ||
<br> | <br /> | ||
{{Project Walkthroughs notice}} | {{Project Walkthroughs notice}} | ||
[[Category:Red and Blue walkthrough]] | |||
[[Category:Red and Blue walkthrough|R16]] | |||
Revision as of 22:09, 20 June 2015
Indigo Plateau
The front room doubles as a Pokémon Center and Poké Mart, allowing Trainers to prepare themselves and their Pokémon for the gauntlet ahead. The Elite Four is a group of talented Pokémon Trainers second only to the Pokémon League Champion in terms of power. The title of Champion designates a person as the strongest Trainer in the region, having defeated the Elite Four and the previous Champion to claim it. The next five battles will not be easy, but with a strong team and a decent supply of Full Restores and Revives, you may finally reach the Hall of Fame.
| |||||||||||||||||||||||||||||||
Take the hallway past the Poké Mart counter, and step into the first room. Lorelei's sub-zero army awaits!
First room
The first member of the Elite Four is Lorelei, a master Ice-type Trainer. Three of her five Pokémon are Water/Ice-types, so be wary of type-matchups. Grass-types may seem like a good idea, but they'll only be useful against her Slowbro. A better option is using Electric-type Pokémon, as most of her team share the Water type. As an Ice/Psychic-type, her Jynx is vulnerable to Fire and Rock attacks. Zapdos and Moltres are great candidates to use against Lorelei; Zapdos learns Thunder at level 51, and Moltres can learn Fire Blast through TM38. Keep in mind that their secondary Flying type makes Zapdos vulnerable to Ice moves, while Moltres' Fire type eliminates its weakness.
| Available Pokémon | |||||||||||||||||||||||||||||||||||||||||||||||||||||||||||||||||||||||||||||||||||||||||
|---|---|---|---|---|---|---|---|---|---|---|---|---|---|---|---|---|---|---|---|---|---|---|---|---|---|---|---|---|---|---|---|---|---|---|---|---|---|---|---|---|---|---|---|---|---|---|---|---|---|---|---|---|---|---|---|---|---|---|---|---|---|---|---|---|---|---|---|---|---|---|---|---|---|---|---|---|---|---|---|---|---|---|---|---|---|---|---|---|---|
| |||||||||||||||||||||||||||||||||||||||||||||||||||||||||||||||||||||||||||||||||||||||||
| ||||||||||||||||||||||||||||||||||||||||||||||||||||||||||||||||||||||||||||||||||||||||||||||||||||||||||||||||||||||||||||||
Defeating Lorelei opens the door to the second room. Bruno's team of martial artists awaits!
Second room
The second member of the Elite Four is Bruno, a master Fighting-type Trainer. That being said, only three of his five Pokémon are actually part of the Fighting type. Flying Pokémon can wreak havoc against his Hitmonlee and Machamp, but Hitmonchan can fight back with Ice Punch and ThunderPunch. A strong Water Pokémon can flood the battlefield with Surf, leaving his two Onix waterlogged. For reinforcements, consider bringing a Slowbro or Starmie along, as their Water/Psychic typing will prove useful here.
| ||||||||||||||||||||||||||||||||||||||||||||||||||||||||||||||||||||||||||||||||||||||||||||||||||||||||||||||||||||||||
Defeating Bruno opens the door to the third room. Agatha's team from the spirit world awaits!
Third room
The third member of the Elite Four is Agatha, a master Ghost-type Trainer. The only type that can effectively combat her ghosts is the Ghost type itself, though attacks of any type but Normal and Fighting can still damage them. Ground-type moves like Earthquake can deal some heavy damage, but are totally ineffective against her Golbat, which is less immune to Ice or Electric attacks. As all of Agatha's Pokémon are also part Poison, powerful Psychic-type attacks, such as Psychic or Psybeam, should be able to take care of them as well. Take out her two Gengar as soon as possible, or risk getting hit with Hypnosis or Confuse Ray.
| ||||||||||||||||||||||||||||||||||||||||||||||||||||||||||||||||||||||||||||||||||||||||||||||||||||||||||||||||||||||||||||
Defeating Agatha unlocks the door to the fourth room. Lance and his ferocious dragons await your challenge!
Fourth room
The fourth and final member of the Elite Four is Lance, a master Dragon-type Trainer, and leader of the Elite Four. The Dragon type is probably the strongest type in the game, since it resists Electric-, Grass-, Fire-, and Water-type moves, and is only vulnerable to Dragon- and Ice-type attacks. A formidable opposing team, though only three of the five are actually part of the Dragon type. Take out his two Dragonair and Dragonite with an Ice Beam or Blizzard, and the bulk of his team is finished. Due to their secondary Flying type, his Gyarados and Aerodactyl are also vulnerable to Ice moves, though there are other options to defeat them. Gyarados will take quadruple damage from electricity, so fire off a few Thunderbolts to ground it. Aerodactyl is part-Rock, so Surf is one way to get past it. Articuno and Zapdos can be some of the best choices to use against Lance's dragons.
| ||||||||||||||||||||||||||||||||||||||||||||||||||||||||||||||||||||||||||||||||||||||||||||||||||||||||||||||||||||||||||
With the Elite Four defeated, the door to this unknown Champion's room is unlocked. Don't enter just yet, though; you are drawn into battle immediately after exiting Lance's room, so use any items now. Only one person stands between you and the title of Champion!
Champion's room
Blue defeated the Elite Four before you even set foot in Victory Road, and now the title of Indigo League Champion rests with him. The first half of his team will always consist of Pidgeot, Alakazam, and Rhydon, so plan accordingly. The second half changes depending on which starter Pokémon he chose. Electric-type attacks terrorize his Pidgeot and Gyarados (or Blastoise), and a crackling Thunderbolt will send them reeling. A strong Water Pokémon can wash away his Rhydon and Arcanine (or Charizard) with Surf. His Exeggutor (or Venusaur) can't survive long in extreme heat or cold, so a Flamethrower or Ice Beam can do the trick. The most annoying opponent may be his Alakazam with its Recover move; its Defense is fairly low, so hit it with a physical move like Earthquake.
Congratulations, you've charged through the Elite Four, and snatched the title of Indigo League Champion away from your rival! After the battle, Oak appears and leads you past the Champion's room and into the Hall of Fame room. It is here that you and your victorious team will be recorded, as a testament to their power and perseverance. After Oak enters your team's information, the game saves, and the credits roll...
But the game's not over yet. When you find yourself back in Pallet Town, fly off to Cerulean.
|
Red and Blue walkthrough |
|

|
This article is part of Project Walkthroughs, a Bulbapedia project that aims to write comprehensive step-by-step guides on each Pokémon game. |
