Appendix:Red and Blue walkthrough/Section 14: Difference between revisions
m (→Viridian Gym) |
mNo edit summary |
||
| (15 intermediate revisions by 11 users not shown) | |||
| Line 1: | Line 1: | ||
{{WalkthroughNotice}} | |||
== The Power Plant == | == The Power Plant == | ||
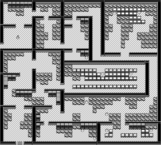
[[File:RBY | [[File:Power Plant interior RBY.png|161px|thumb|Inside the [[Kanto Power Plant|Power Plant]]]] | ||
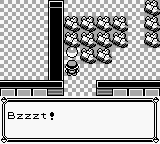
[[File:Fake item RBY.png|thumb|left|Look out for those Voltorb!]] | [[File:Fake item RBY.png|thumb|left|Look out for those Voltorb!]] | ||
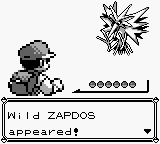
[[File:Zapdos battle.png|thumb|Zapdos, the legendary bird of lightning]] | [[File:Zapdos battle.png|thumb|Zapdos, the legendary bird of lightning]] | ||
With the first of the [[legendary birds]] caught, let's hunt down the second. | With the first of the [[legendary birds]] caught, let's hunt down the second. Like with {{p|Articuno}}, it's best to bring a large supply of {{ball|Ultra}}s. | ||
{| class="expandable" align="center" style="background: #{{ | {| class="expandable" align="center" style="background: #{{blue color light}}; {{roundy}}; border: 5px solid #{{red color light}};" | ||
|- align="center" | |- align="center" | ||
! Available Pokémon | ! Available Pokémon | ||
|- | |- | ||
| | | | ||
{{catch/header|building|no}} | {{catch/header|building|no}} | ||
{{Catch/entry1|100|Voltorb|yes|yes|no|Building|21 | {{Catch/entry1|100|Voltorb|yes|yes|no|Building|21, 23|35%|type1=Electric}} | ||
{{Catch/entry1|025|Pikachu|yes|yes|no|Building|20 | {{Catch/entry1|025|Pikachu|yes|yes|no|Building|20, 24|25%|type1=Electric}} | ||
{{Catch/entry1|081|Magnemite|yes|yes|no|Building|21 | {{Catch/entry1|081|Magnemite|yes|yes|no|Building|21, 23|25%|type1=Electric}} | ||
{{Catch/entry1|082|Magneton|yes|yes|no|Building|32 | {{Catch/entry1|082|Magneton|yes|yes|no|Building|32, 35|10%|type1=Electric}} | ||
{{Catch/entry1|125|Electabuzz|yes|no|no|Building|33 | {{Catch/entry1|125|Electabuzz|yes|no|no|Building|33, 36|5%|type1=Electric}} | ||
{{Catch/entry1|026|Raichu|no|yes|no|Building|33 | {{Catch/entry1|026|Raichu|no|yes|no|Building|33, 36|5%|type1=Electric}} | ||
{{catch/div|building|Special}} | {{catch/div|building|Special}} | ||
{{Catch/entry1|100|Voltorb|yes|yes|no|Fake|40|Six|type1=Electric}} | {{Catch/entry1|100|Voltorb|yes|yes|no|Fake|40|Six|type1=Electric}} | ||
| Line 36: | Line 26: | ||
{{Catch/footer|building}} | {{Catch/footer|building}} | ||
|} | |} | ||
{| class="expandable" align="center" style="background: #{{ | |||
{| class="expandable" align="center" style="background: #{{blue color light}}; {{roundy}}; border: 5px solid #{{red color light}};" | |||
|- align="center" | |- align="center" | ||
! Items | ! Items | ||
|- | |- | ||
| | | | ||
{{itlisth|building}} | {{itlisth|building}} | ||
{{ | {{Itemlist|Carbos|Near the entrance, the first item visible|R=yes|B=yes|display={{DL|Vitamin|Carbos}}}} | ||
{{ | {{Itemlist|TM Psychic|Down the first and second road forks|R=yes|B=yes|display={{TM|33|Reflect}}}} | ||
{{ | {{Itemlist|TM Electric|In the bottom right room|R=yes|B=yes|display={{TM|25|Thunder}}}} | ||
{{ | {{Itemlist|Rare Candy|In the top right room|R=yes|B=yes|display={{DL|Vitamin|Rare Candy}}}} | ||
{{ | {{Itemlist|HP Up|In the top right room|R=yes|B=yes|display={{DL|Vitamin|HP Up}}}} | ||
{{ | {{Itemlist|PP Up|In a rock, in the room northeast of Zapdos ''(hidden)''|R=yes|B=yes|display={{DL|Vitamin|PP Up}}}} | ||
{{ | {{Itemlist|Max Elixer|In a rock past the Voltorb and the Electrode that are in the long, central room ''(hidden)''|R=yes|B=yes|display=[[Max Elixir|Max Elixer]]|sprite=Bag Max Elixir Sprite}} | ||
{{catch/div|building|Fake items}} | {{catch/div|building|Fake items}} | ||
{{ | {{Itemlist|None|sprite=100MS| | ||
* | * In the first road fork | ||
* | * Down the first and second road forks | ||
* In the | * In the dead-end room in the middle of the plant | ||
* | * Left the second road fork ×2 | ||
* In the | * In the bottom right room|R=yes|B=yes|display={{p|Voltorb}} ×6}} | ||
{{ | {{Itemlist|None|sprite=101MS| | ||
* In the | * In the dead-end room in the middle of the plant | ||
* In the dead-end room | * In the dead-end room in the north part of the plant | ||
|R=yes|B=yes|display={{p|Electrode}} ×2}} | |||
{{itlistfoot|building}} | {{itlistfoot|building}} | ||
|} | |} | ||
This old abandoned building still has a few items lying around, but beware: some of the items are actually {{p|Voltorb}} and {{p|Electrode}} in disguise. Just past the entrance room is a {{DL|Vitamin|Carbos}}, and further along is a second "item", a Voltorb. The room to the right is a dead-end with both a Voltorb and Electrode, just waiting to pounce on an unsuspecting Trainer. Continue south to the exterior wall, and pick up {{TM|33|Reflect}}. Head to the east, and grab {{TM|25|Thunder}} in the southeast room. Follow the narrow hallway to the north and west to find a {{DL|Vitamin|Rare Candy}} and an {{DL|Vitamin|HP Up}} in the northeast room. Continue west and zigzag a bit to reach the final room. | |||
{{p|Zapdos}} makes its nest in the deepest room of the Power Plant. Like with Articuno, save your progress before battling it. It won't go down without a fight, so whittle its health down and try inflicting a status condition before attempting to capture it. | |||
{{p|Zapdos}} makes its nest in the deepest room of the Power Plant. | |||
{| align="center" | {| align="center" | ||
| Line 73: | Line 64: | ||
|type1=Electric|type2=Flying | |type1=Electric|type2=Flying | ||
|level=50 | |level=50 | ||
|move1= | |move1=Drill Peck|move1type=Flying | ||
|move2= | |move2=ThunderShock|move2type=Electric | ||
}} | |||
|} | |} | ||
Once the battle is done, take the side exit, and fly back to {{ci|Viridian}}. It's time to claim the final badge! | |||
== Viridian City == | |||
=== Viridian Gym === | === Viridian Gym === | ||
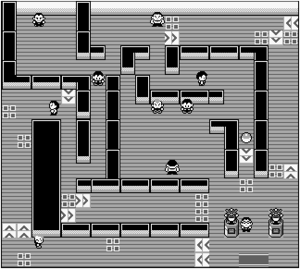
[[File:Viridian Gym RBY.png|thumb|Viridian Gym]] | [[File:Viridian Gym RBY.png|thumb|Viridian Gym]] | ||
{{sign|RBY|header}} | {{sign|RBY|header}} | ||
{{sign|RBY|VIRIDIAN CITY<br>POKéMON GYM}} | {{sign|RBY|title|VIRIDIAN CITY<br />POKéMON GYM}} | ||
{{sign|RBY|footer}} | {{sign|RBY|footer}} | ||
In the time it took to collect the seven other badges, the leader of [[Viridian Gym]] has finally returned. | In the time it took to collect the seven other badges, the leader of [[Viridian Gym]] has finally returned. None of the locals seem to know the identity of this mysterious figure, but it's certainly a familiar face. | ||
{| class="expandable" align="center" style="background: #{{blue color light}}; {{roundy}}; border: 5px solid #{{red color light}};" | |||
|- align="center" | |||
! Items | |||
|- | |||
| | |||
{{Itlisth|Ground}} | |||
{{Itemlist|TM Ground|Reward for defeating the Gym Leader|R=yes|B=yes|display={{TM|27|Fissure}}}} | |||
{{Itemlist|Revive|Behind the [[spin tile]] north of the doorway|R=yes|B=yes|display={{DL|Revive|Revive}}}} | |||
{{Itlistfoot|Ground}} | |||
|} | |||
{{ | [[Giovanni]] returned to his Gym Leader position after his defeat in [[Saffron City]]. His Gym turns out to be a favorite training spot for those who favor {{type|Ground}} Pokémon, so {{t|Grass}}-, {{t|Water}}-, and {{type|Ice}} attacks will see the greatest effectiveness. {{t|Flying}} Pokémon are immune to Ground-type attacks, and can deal major damage to the several {{t|Fighting}} types here. The same Water Pokémon that put a damper on the [[Cinnabar Gym]] can use moves like {{m|Surf}} to terrorize their terrestrial opponents. {{t|Psychic}} moves will work wonders against foes like {{p|Arbok}}, {{p|Nidoking}}, and {{p|Nidoqueen}}. Take out Giovanni's {{p|Rhydon}} quickly; its {{m|Fissure}} and {{m|Horn Drill}} moves can knock out an opponent in [[One-hit knockout move|one hit]]! | ||
| | |||
| | |||
|type | |||
| | {| align="center" | ||
{{trainerentry|Spr RG Tamer.png|Tamer||1560|2|024|Arbok||39|None|128|Tauros||39|None}} | |- align="center" valign="top" | ||
| | |||
{| align="center" style="background: #{{ground color}}; {{roundy}}; border: 5px solid #{{ground color light}};" | |||
|- align="center" | |||
! Viridian Gym <br> [[File:Earth Badge.png|35px|The Earth Badge]] <br/><br/> | |||
|- | |||
| | |||
{| align="center" class="expandable" style="background: #{{ground color}}; {{roundy}}; border: 5px solid #{{ground color light}};" | |||
|- align="center" | |||
! Trainers | |||
|- | |||
| | |||
{{trainerheader|Ground}} | |||
{{trainerentry|Spr RG Tamer.png|Tamer||1560|2|024|Arbok||39|None|128|Tauros||39|None|}} | |||
{{trainerdiv|Ground}} | {{trainerdiv|Ground}} | ||
{{trainerentry|Spr RG Blackbelt.png| | {{trainerentry|Spr RG Blackbelt.png|Blackbelt||1075|1|067|Machoke||43|None|}} | ||
{{trainerdiv|Ground}} | {{trainerdiv|Ground}} | ||
{{trainerentry|Spr RG Cooltrainer M.png|Cooltrainer||1365|2|033|Nidorino||39|None|034|Nidoking||39|None}} | {{trainerentry|Spr RG Cooltrainer M.png|Cooltrainer||1365|2|033|Nidorino||39|None|034|Nidoking||39|None|}} | ||
{{trainerdiv|Ground}} | {{trainerdiv|Ground}} | ||
{{trainerentry|Spr RG Tamer.png|Tamer||1720|1|111|Rhyhorn||43|None}} | {{trainerentry|Spr RG Tamer.png|Tamer||1720|1|111|Rhyhorn||43|None|}} | ||
{{trainerdiv|Ground}} | {{trainerdiv|Ground}} | ||
{{trainerentry|Spr RG Blackbelt.png| | {{trainerentry|Spr RG Blackbelt.png|Blackbelt||1000|2|066|Machop||40|None|067|Machoke||40|None|}} | ||
{{trainerdiv|Ground}} | {{trainerdiv|Ground}} | ||
{{trainerentry|Spr RG Cooltrainer M.png|Cooltrainer||1365|2|028|Sandslash||39|None|051|Dugtrio||39|None}} | {{trainerentry|Spr RG Cooltrainer M.png|Cooltrainer||1365|2|028|Sandslash||39|None|051|Dugtrio||39|None|}} | ||
{{trainerdiv|Ground}} | {{trainerdiv|Ground}} | ||
{{trainerentry|Spr RG Cooltrainer M.png|Cooltrainer||1505|1|111|Rhyhorn||43|None}} | {{trainerentry|Spr RG Cooltrainer M.png|Cooltrainer||1505|1|111|Rhyhorn||43|None|}} | ||
{{trainerdiv|Ground}} | {{trainerdiv|Ground}} | ||
{{trainerentry|Spr RG Blackbelt.png| | {{trainerentry|Spr RG Blackbelt.png|Blackbelt||950|3|067|Machoke||38|None|066|Machop||38|None|067|Machoke||38|None|}} | ||
{{trainerfooter|Ground| | {{trainerfooter|Ground|1|inside}} | ||
|} | |||
{{Party/Single | |||
|color={{ground color}} | |||
|headcolor={{ground color light}} | |||
|bordercolor={{ground color dark}} | |||
|sprite=Spr RG Giovanni.png | |sprite=Spr RG Giovanni.png | ||
|prize={{Pdollar}}4950 | |prize={{Pdollar}}4950 | ||
<!--GEN I HAD NO CLASSES--> | |||
|name={{color2|000000|Giovanni}} | |name={{color2|000000|Giovanni}} | ||
|game=RGB|location=Viridian Gym | |game=RGB | ||
|pokemon=5 | |location=Viridian Gym | ||
|pokemon=5}} | |||
| | |{{Pokémon/1 | ||
|ndex=111|pokemon=Rhyhorn | |game=Blue | ||
|ndex=111 | |||
|pokemon=Rhyhorn | |||
|level=45 | |||
|type1=Ground|type2=Rock | |type1=Ground|type2=Rock | ||
|move1=Stomp|move1type=Normal | |move1=Stomp|move1type=Normal | ||
|move2=Tail Whip|move2type=Normal | |move2=Tail Whip|move2type=Normal | ||
|move3=Fury Attack|move3type=Normal | |move3=Fury Attack|move3type=Normal | ||
|move4=Horn Attack|move4type=Normal}} | |move4=Horn Attack|move4type=Normal}} | ||
|{{Pokémon/1 | |||
| | |game=Blue | ||
|ndex=051|pokemon=Dugtrio | |ndex=051 | ||
|pokemon=Dugtrio | |||
|level=42 | |||
|type1=Ground | |type1=Ground | ||
|move1=Growl|move1type=Normal | |move1=Growl|move1type=Normal | ||
|move2=Dig|move2type=Ground | |move2=Dig|move2type=Ground | ||
|move3=Sand-Attack|move3type=Normal | |move3=Sand-Attack|move3type=Normal | ||
|move4=Slash|move4type=Normal}} | |move4=Slash|move4type=Normal}} | ||
|{{Pokémon/1 | |||
| | |game=Blue | ||
|ndex=031|pokemon=Nidoqueen | |ndex=031 | ||
|pokemon=Nidoqueen | |||
|level=44 | |||
|type1=Poison|type2=Ground | |type1=Poison|type2=Ground | ||
|move1=Scratch|move1type=Normal | |move1=Scratch|move1type=Normal | ||
|move2=Tail Whip|move2type=Normal | |move2=Tail Whip|move2type=Normal | ||
|move3= | |move3=Body Slam|move3type=Normal | ||
|move4= | |move4=Poison Sting|move4type=Poison}} | ||
{{Party/Div|color={{ground color}}}} | |||
| | | style="margin:auto" |{{Pokémon/1 | ||
|ndex=034|pokemon=Nidoking | |game=Blue | ||
|ndex=034 | |||
|pokemon=Nidoking | |||
|level=45 | |||
|type1=Poison|type2=Ground | |type1=Poison|type2=Ground | ||
|move1=Tackle|move1type=Normal | |move1=Tackle|move1type=Normal | ||
|move2=Horn Attack|move2type=Normal | |move2=Horn Attack|move2type=Normal | ||
|move3=Poison Sting|move3type=Poison | |move3=Poison Sting|move3type=Poison | ||
|move4=Thrash|move4type=Normal}} | |move4=Thrash|move4type=Normal}} | ||
| style="margin:auto" |{{Pokémon/1 | |||
| | |game=Blue | ||
|ndex=112|pokemon=Rhydon | |ndex=112 | ||
|pokemon=Rhydon | |||
|level=50 | |||
|type1=Ground|type2=Rock | |type1=Ground|type2=Rock | ||
|move1=Stomp|move1type=Normal | |move1=Stomp|move1type=Normal | ||
|move2=Tail Whip|move2type=Normal | |move2=Tail Whip|move2type=Normal | ||
|move3=Fissure|move3type=Ground | |move3=Fissure|move3type=Ground | ||
|move4=Horn Drill|move4type=Normal}} | |move4=Horn Drill|move4type=Normal}} | ||
}} | {{Party/Footer}} | ||
}} | |} | ||
|} | |||
Congratulations on defeating the eighth and final Gym! | Congratulations on defeating the eighth and final Gym! The {{badge|Earth}} commands attention of all Pokémon, regardless of level. Giovanni gives you {{TM|27|Fissure}}, a TM he claims to have made when he originally acted as Gym Leader. He seems remorseful of his actions with [[Team Rocket]], and he officially disbands the gang before disappearing. | ||
With all eight Gym badges collected, the way to [[Indigo Plateau]] is finally open. | With all eight Gym badges collected, the way to [[Indigo Plateau]] is finally open. Gather a team with access to {{m|Surf}} and {{m|Strength}}, and stop by a Poké Mart to replenish your supply of Potions and Ultra Balls. The elite Trainers at Indigo Plateau are tough enough, but you'll never defeat them if you can't first get through {{ka|Victory Road}}, a grueling tunnel with {{p|Moltres|the third legendary bird}} roosting deep inside. | ||
Head west to {{rt|22|Kanto}}. | Head west to {{rt|22|Kanto}}. | ||
{{WalkthroughPrevNext | {{WalkthroughPrevNext | ||
| Line 191: | Line 211: | ||
}} | }} | ||
<br> | <br /> | ||
{{Project Walkthroughs notice}} | {{Project Walkthroughs notice}} | ||
[[Category:Red and Blue walkthrough]] | |||
[[Category:Red and Blue walkthrough|R14]] | |||
Revision as of 04:15, 28 April 2017
The Power Plant

With the first of the legendary birds caught, let's hunt down the second. Like with Articuno, it's best to bring a large supply of Ultra Balls.
| Available Pokémon | |||||||||||||||||||||||||||||||||||||||||||||||||||||||||||||||||||||||||||||||||||||||||||||||||||||||||||||||||||||||||||||||||||||||||||||||||||||||||||||||||||||||||||||||||||||||||
|---|---|---|---|---|---|---|---|---|---|---|---|---|---|---|---|---|---|---|---|---|---|---|---|---|---|---|---|---|---|---|---|---|---|---|---|---|---|---|---|---|---|---|---|---|---|---|---|---|---|---|---|---|---|---|---|---|---|---|---|---|---|---|---|---|---|---|---|---|---|---|---|---|---|---|---|---|---|---|---|---|---|---|---|---|---|---|---|---|---|---|---|---|---|---|---|---|---|---|---|---|---|---|---|---|---|---|---|---|---|---|---|---|---|---|---|---|---|---|---|---|---|---|---|---|---|---|---|---|---|---|---|---|---|---|---|---|---|---|---|---|---|---|---|---|---|---|---|---|---|---|---|---|---|---|---|---|---|---|---|---|---|---|---|---|---|---|---|---|---|---|---|---|---|---|---|---|---|---|---|---|---|---|---|---|---|
| |||||||||||||||||||||||||||||||||||||||||||||||||||||||||||||||||||||||||||||||||||||||||||||||||||||||||||||||||||||||||||||||||||||||||||||||||||||||||||||||||||||||||||||||||||||||||
| Items | |||||||||||||||||||||||||||||||||||||||||||||||||||||||||||
|---|---|---|---|---|---|---|---|---|---|---|---|---|---|---|---|---|---|---|---|---|---|---|---|---|---|---|---|---|---|---|---|---|---|---|---|---|---|---|---|---|---|---|---|---|---|---|---|---|---|---|---|---|---|---|---|---|---|---|---|
| |||||||||||||||||||||||||||||||||||||||||||||||||||||||||||
This old abandoned building still has a few items lying around, but beware: some of the items are actually Voltorb and Electrode in disguise. Just past the entrance room is a Carbos, and further along is a second "item", a Voltorb. The room to the right is a dead-end with both a Voltorb and Electrode, just waiting to pounce on an unsuspecting Trainer. Continue south to the exterior wall, and pick up TM33 (Reflect). Head to the east, and grab TM25 (Thunder) in the southeast room. Follow the narrow hallway to the north and west to find a Rare Candy and an HP Up in the northeast room. Continue west and zigzag a bit to reach the final room.
Zapdos makes its nest in the deepest room of the Power Plant. Like with Articuno, save your progress before battling it. It won't go down without a fight, so whittle its health down and try inflicting a status condition before attempting to capture it.
| ||||||||||||||||||||||||||||
Once the battle is done, take the side exit, and fly back to Viridian. It's time to claim the final badge!
Viridian City
Viridian Gym
VIRIDIAN CITY
POKéMON GYM
In the time it took to collect the seven other badges, the leader of Viridian Gym has finally returned. None of the locals seem to know the identity of this mysterious figure, but it's certainly a familiar face.
| Items | ||||||||||||||||
|---|---|---|---|---|---|---|---|---|---|---|---|---|---|---|---|---|
| ||||||||||||||||
Giovanni returned to his Gym Leader position after his defeat in Saffron City. His Gym turns out to be a favorite training spot for those who favor Ground-type Pokémon, so Grass-, Water-, and Ice-type attacks will see the greatest effectiveness. Flying Pokémon are immune to Ground-type attacks, and can deal major damage to the several Fighting types here. The same Water Pokémon that put a damper on the Cinnabar Gym can use moves like Surf to terrorize their terrestrial opponents. Psychic moves will work wonders against foes like Arbok, Nidoking, and Nidoqueen. Take out Giovanni's Rhydon quickly; its Fissure and Horn Drill moves can knock out an opponent in one hit!
Congratulations on defeating the eighth and final Gym! The Earth Badge commands attention of all Pokémon, regardless of level. Giovanni gives you TM27 (Fissure), a TM he claims to have made when he originally acted as Gym Leader. He seems remorseful of his actions with Team Rocket, and he officially disbands the gang before disappearing.
With all eight Gym badges collected, the way to Indigo Plateau is finally open. Gather a team with access to Surf and Strength, and stop by a Poké Mart to replenish your supply of Potions and Ultra Balls. The elite Trainers at Indigo Plateau are tough enough, but you'll never defeat them if you can't first get through Victory Road, a grueling tunnel with the third legendary bird roosting deep inside.
Head west to Route 22.
|
Red and Blue walkthrough |
|

|
This article is part of Project Walkthroughs, a Bulbapedia project that aims to write comprehensive step-by-step guides on each Pokémon game. |


