Appendix:Platinum walkthrough/Section 8: Difference between revisions
m (→Route 209: updating) |
|||
| (14 intermediate revisions by 8 users not shown) | |||
| Line 1: | Line 1: | ||
==Route 207== | ==Route 207== | ||
[[File:Sinnoh Route 207 | [[File:Sinnoh Route 207 Pt.png|right|thumb|275px|Route 207]] | ||
{| class="expandable" align="center" style="background: #{{platinum color}}; {{roundy|10px}}; border: 5px solid #{{platinum color light}};" | {| class="expandable" align="center" style="background: #{{platinum color}}; {{roundy|10px}}; border: 5px solid #{{platinum color light}};" | ||
|- align="center" | |- align="center" | ||
| Line 33: | Line 33: | ||
{{trainerentry|Spr DP Hiker.png|Hiker|Kevin|608|4|074|Geodude|♂|17|None|074|Geodude|♂|19|None|074|Geodude|♂|17|None|095|Onix|♂|19|None}} | {{trainerentry|Spr DP Hiker.png|Hiker|Kevin|608|4|074|Geodude|♂|17|None|074|Geodude|♂|19|None|074|Geodude|♂|17|None|095|Onix|♂|19|None}} | ||
{{trainerdiv|mountain}} | {{trainerdiv|mountain}} | ||
{{trainerentry|Spr DP Battle Girl.png|Battle Girl|Helen|336|2|066|Machop|♂|21|None|307|Meditite|♀|21|None}} | {{trainerentry|Spr DP Battle Girl.png|Battle Girl|Helen|336|2|066|Machop|♂|21|None|307|Meditite|♀|21|None|38=Vs. Seeker}} | ||
{{trainerfooter|mountain}} | {{trainerfooter|mountain}} | ||
|} | |} | ||
| Line 41: | Line 41: | ||
|- | |- | ||
|{{itlisth|mountain}} | |{{itlisth|mountain}} | ||
{{Itemlist|Oran Berry|Berry patch in the northwest corner|Pt=yes|display={{DL|Berry|Oran Berry}} x2}} | |||
{{Itemlist|Cheri Berry|Berry patch in the northwest corner|Pt=yes|display={{DL|Berry|Cheri Berry}}}} | |||
{{Itemlist|Bluk Berry|Berry patch in the northwest corner|Pt=yes|display={{DL|Berry|Bluk Berry}}}} | |||
{{Itemlist|Super Potion|Between two air vents in the northern part of the route|Pt=yes|display={{DL|Potion|Super Potion}}}} | {{Itemlist|Super Potion|Between two air vents in the northern part of the route|Pt=yes|display={{DL|Potion|Super Potion}}}} | ||
{{Itemlist|Dowsing MCHN|Obtained from {{ga|Dawn}}/{{ga|Lucas}} near entrance to Mount Coronet.|Pt=yes|display={{DL|Pokétch|Dowsing Machine}}|sprite=Bag Dowsing MCHN IV Sprite}} | {{Itemlist|Dowsing MCHN|Obtained from {{ga|Dawn}}/{{ga|Lucas}} near entrance to Mount Coronet.|Pt=yes|display={{DL|Pokétch|Dowsing Machine}}|sprite=Bag Dowsing MCHN IV Sprite}} | ||
| Line 54: | Line 57: | ||
|} | |} | ||
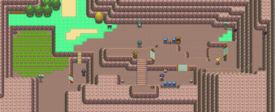
The [[Bike obstacles#Muddy slopes|muddy slope]] at the | The [[Bike obstacles#Muddy slopes|muddy slope]] at the western end of the route leads to [[Oreburgh City]] - now that you have a bicycle, consider making a quick detour to the basement floor of [[Oreburgh Gate]] for {{TM|31|Brick Break}}, before heading east along {{rt|207|Sinnoh}}. Take the narrow path directly south of the [[Honey#Honey_trees|Honey Tree]] to find a slew of items and trainers. As you try to enter [[Mt. Coronet]]'s south entrance, at the eastern end of the route, Dawn/Lucas will appear and give you the [[Vs. Seeker]] and the [[Itemfinder#Generation IV|Dowsing Machine]] app for your Pokétch. Proceed into Mt. Coronet. | ||
==Mt. Coronet (South Area Part 1)== | ==Mt. Coronet (South Area Part 1)== | ||
| Line 97: | Line 100: | ||
|} | |} | ||
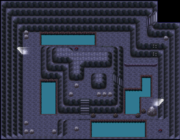
In here, you'll find [[Cyrus]] ranting about perfecting the world before leaving. | In here, you'll find [[Cyrus]] ranting about perfecting the world before leaving. Collect all the items you can, and simply walk to the other side of this small section of Mt. Coronet, then out of the exit to {{rt|208|Sinnoh}}. You won't be able to do anything important here until much later in the game. | ||
==Route 208== | ==Route 208== | ||
[[File:Sinnoh Route 208 | [[File:Sinnoh Route 208 Pt.png|thumb|370px|Route 208]] | ||
{| class="expandable" align="center" style="background: #{{platinum color}}; {{roundy|10px}}; border: 5px solid #{{platinum color light}};" | {| class="expandable" align="center" style="background: #{{platinum color}}; {{roundy|10px}}; border: 5px solid #{{platinum color light}};" | ||
|- align="center" | |- align="center" | ||
| Line 168: | Line 176: | ||
|} | |} | ||
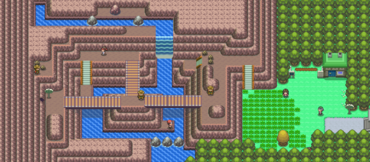
There are many Trainers to battle on this route | There are many Trainers to battle on this route, however two of them cannot be fought until much later in the game, when you have the necessary HMs. Go across the first section of the bridge, make a quick detour north to grab a Great Ball, then continue east down the stairs, and through the tall grass, and you will be at the entrance of [[Hearthome City]]. | ||
Also on this Route is the [[Berry Master#Generation IV|Berry Master's house]]. Each day, he will give you a fresh [[Berry]]. You may also get the Berry Searcher Pokétch app that shows where there are Berries ready to pick. | Also on this Route is the [[Berry Master#Generation IV|Berry Master's house]]. Each day, he will give you a fresh [[Berry]]. You may also get the Berry Searcher Pokétch app that shows where there are Berries ready to pick. His wife sells [[Mulch]], which affects the growth of Berries. | ||
{| class="expandable" align="center" style="background: #{{platinum color}}; {{roundy|10px}}; border: 5px solid #{{platinum color light}};" | {| class="expandable" align="center" style="background: #{{platinum color}}; {{roundy|10px}}; border: 5px solid #{{platinum color light}};" | ||
| Line 196: | Line 204: | ||
{{itlistfoot|road}} | {{itlistfoot|road}} | ||
|} | |} | ||
On arriving at [[Hearthome City]], a lost {{p|Buneary}} will run into you, shortly followed by [[Keira|its Trainer]], who will thank you for catching her Buneary, and suggest that you visit the [[Super Contest Hall]] (the large building near the [[Hearthome Gym]]). Once you get there, you'll find her talking to your [[Johanna|mom]]. They will both talk to you about [[Super Contest]]s, and leave. Go to the front desk and talk to the woman dressed in purple. She will reveal herself as [[Fantina]], this city's [[Gym Leader]], and return to the Gym where you will be able to challenge her. | |||
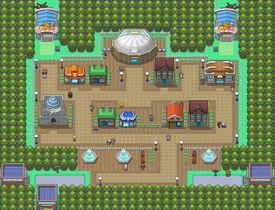
After that, you can take a look around the city. Next to the [[Pokémon Center]] is [[Bebe]]'s house, where [[Sinnoh]]'s administrator of the [[Pokémon Storage System|PC box system]] lives. If you talk to her and have a spare slot in your party, | After that, you can take a look around the city. Next to the [[Pokémon Center]] is [[Bebe]]'s house, where [[Sinnoh]]'s administrator of the [[Pokémon Storage System|PC box system]] lives. If you talk to her and have a spare slot in your party, she'll hand over an {{p|Eevee}}. If you're into [[Pokémon breeding]], consider saving your game before you receive the Eevee, since there is an only a 12.5% chance it will be a female and otherwise, you'll have to wait until you have the National Dex to find a {{p|Ditto}} or another Eevee. | ||
{| style="margin: auto;" | |||
| | |||
{{Catch/header|city|4}} | {{Catch/header|city|4}} | ||
{{catch/div|road|Gift Pokémon}} | {{catch/div|road|Gift Pokémon}} | ||
{{catch/entry4|133|Eevee|no|no|yes|Gift|20|all=One}} | {{catch/entry4|133|Eevee|no|no|yes|Gift|20|all=One}} | ||
{{catch/footer|city}} | {{catch/footer|city}} | ||
|} | |||
East of the [[Poké Mart]] is the [[Pokémon Fan Club]]. Go inside and talk to the man with the hat inside. After listening to his rambles, he will give you the {{DL|List of key items in Generation IV|Poffin Case}}, which is essential for making [[Poffin]]s. Poffins can be made in the building west of the Poké Mart, known as the [[Poffin House]]. Near the [[Poffin House]] is [[Mr. Goods]]. Although he claims he can't remember who he is or his real name, he has dedicated himself to seeking rarities. He gives [[goods]] to {{pkmn|Trainer}}s once they have met certain requirements. These items can be placed in the Trainer's [[Secret Base]] located in [[The Underground]]. | |||
Next to | Next to the [[Pokémon Fan Club]] is the Pokémon Hotel. If you go to the second floor and talk to the woman with the {{p|Clefairy}}, she will give you a {{DL|In-battle effect item|Shell Bell}}, which heals the user by 1/8 of its max HP when it inflicts damage. | ||
===Amity Square=== | ===Amity Square=== | ||
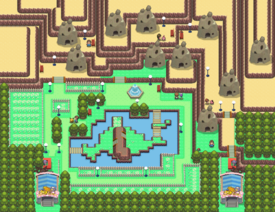
[[File:Amity Square Pt.png|thumb| | [[File:Amity Square Pt.png|thumb|right|275px|Amity Square]] | ||
{| class="expandable" align="center" style="background: #{{platinum color}}; {{roundy|10px}}; border: 5px solid #{{platinum color light}};" | {| class="expandable" align="center" style="background: #{{platinum color}}; {{roundy|10px}}; border: 5px solid #{{platinum color light}};" | ||
|- align="center" | |- align="center" | ||
| Line 223: | Line 234: | ||
|} | |} | ||
At the northwest and northeast of the city | At the northwest and northeast of the city are the entrances to [[Amity Square]], where you can find some [[Accessory|Accessories]], an {{DL|In-battle effect item|Amulet Coin}}, {{TM|43|Secret Power}}, and {{TM|45|Attract}}, but you'll need to make a trip from each entrance to get all the items. Keep in mind that you'll need a "cute" Pokémon to enter - your starter in any of its evolutionary forms will work. Additionally, each hut contains three teleporters that can warp you to a different hut. To access them, enter the hut but stop on the tile just inside the entrance. Take a step forward, right, or left to access the hidden teleporters. It is the only way to access the area where you can obtain the {{DL|Plate|Spooky Plate}}. A chubby man in overalls goes around Amity Square every day. To reach him, players must go through the east gate and use the teleporters. When found, he will give the player five [[Berry|Berries]] or one [[Accessory]]. | ||
==Hearthome Gym== | ==Hearthome Gym== | ||
[[File:Hearthome Gym Pt.png|thumb|right|275px|Hearthome City Gym]] | [[File:Hearthome Gym Pt.png|thumb|right|275px|Hearthome City Gym]] | ||
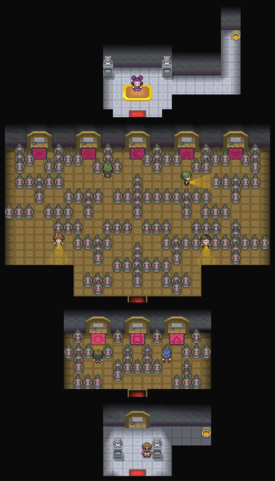
Once you're done exploring the town, | Once you're done exploring the town, head to the [[Hearthome Gym]], located in the northeast corner of the city. The Gym leader, [[Fantina]], uses {{type|Ghost}} Pokémon, which are weak to {{t|Dark}}- and {{t|Ghost}}-type moves. Ghost-types are also immune to {{t|Normal}}- and {{t|Fighting}}-type moves, but Normal-type Pokémon are immune to Ghost-type moves in return. The gym's structure is two darkened rooms each with a maze of {{p|Duskull}} lamps. Although you're given a flashlight at the entrance, it's still easy to see everything on the screen. The goal of the puzzle is to find a blue tile, note down the shape on it, then go to the door that has the same pattern. If you pick the wrong door, you'll find yourself back at the beginning (note that if you leave the gym and reenter, the symbol on the blue tile is randomized, so it probably won't be the same). After the second maze, you'll find Fantina - challenge her to a battle to earn the {{badge|Relic}}. | ||
{| align="center" | {| align="center" | ||
| Line 310: | Line 321: | ||
|} | |} | ||
Fantina | Typically of Ghost-types, Fantina's Pokémon are all pain to deal with, particularly her {{p|Mismagius}}. If you chose Turtwig as your starter or have added a [[Shinx]] to your team, their jaws should be able to [[Bite]] through Fatina's team with little problem. Her {{p|Duskull}} has high defense stats and may take a few hits to take down. It has {{m|Will-O-Wisp}} to [[burn]] and halv the Attack stat of an affected Pokémon, making it lose 1/8 of its HP each turn. Apply [[Burn Heal]]s right away. It also has {{m|Pursuit}} and {{m|Shadow Sneak}}, Pursuit doing more damage if you try to [[Recall|switch out]] and Shadow Sneak [[Priority#Generation IV|always going first]], like {{m|Quick Attack}}. {{m|Future Sight}} will do damage to any Pokémon, regardless of type, after two turns. Do not forget Future Sight, as it could take you out just as you think you're winning and have low HP. Contrary to he Duskull, her {{p|Haunter}} has very high Special Attack and Speed, but has no Special based attacks, and has quite low defenses. It has {{m|Shadow Claw}}, a Ghost type attack with a high critical hit ratio, and {{m|Sucker Punch}}, which will strike before you for 80 power, but only works if you are attacking that turn. Like Duskull, Haunter's role is annoyance, and it will disrupt you with {{m|Confuse Ray}} before going in for {{m|Hypnosis}} to set you up for Fantina's Mismagius. Mismagius comes packing the powerful move {{m|Shadow Ball}}, a Ghost-type attack that synergises with Mismagius' high Sp. Atk. Not good! It also has {{m|Psybeam}} and {{m|Magical Leaf}} backing it up, with Confuse Ray to disrupt as well. Staravia would do well here as it is immune to Shadow Ball and its typing halves the damage from Magical Leaf. | ||
Once Fantina is defeated, she gives you the Relic Badge and {{tm|65|Shadow Claw}}. You can | Once Fantina is defeated, she gives you the Relic Badge and {{tm|65|Shadow Claw}}. You can also use {{m|Defog}} outside of battle, which will come in handy later on {{rt|210|Sinnoh}}. | ||
==Route 209== | ==Route 209== | ||
| Line 325: | Line 336: | ||
{{trainerentry|Spr DP Pokémon Breeder M.png|Pokémon Breeder|Albert|960|4|406|Budew|♂|20|None|133|Eevee|♂|20|None|438|Bonsly|♂|20|None|172|Pichu|♂|20|38=Vs. Seeker}} | {{trainerentry|Spr DP Pokémon Breeder M.png|Pokémon Breeder|Albert|960|4|406|Budew|♂|20|None|133|Eevee|♂|20|None|438|Bonsly|♂|20|None|172|Pichu|♂|20|38=Vs. Seeker}} | ||
{{trainerdiv}} | {{trainerdiv}} | ||
{{trainerentry|Spr DP Jogger.png|Jogger|Richard|736|1|404|Luxio|♂|23|None}} | {{trainerentry|Spr DP Jogger.png|Jogger|Richard<br><small>({{DL|Time|Morning 2|Morning}} only)</small>|736|1|404|Luxio|♂|23|None}} | ||
{{trainerdiv}} | {{trainerdiv}} | ||
{{trainerentry|Spr DP Twins.png|Twins|Emma & Lil|704|2|438|Bonsly|♀|22|None|439|Mime Jr.|♀|22|None}} | {{trainerentry|Spr DP Twins.png|Twins|Emma & Lil|704|2|438|Bonsly|♀|22|None|439|Mime Jr.|♀|22|None}} | ||
| Line 331: | Line 342: | ||
{{trainerentry|Spr DP Poké Kid.png|Poké Kid|Danielle|176|1|172|Pichu|♀|22|38=Vs. Seeker}} | {{trainerentry|Spr DP Poké Kid.png|Poké Kid|Danielle|176|1|172|Pichu|♀|22|38=Vs. Seeker}} | ||
{{trainerdiv}} | {{trainerdiv}} | ||
{{trainerentry|Spr DP Jogger.png|Jogger|Raul|736|1|397|Staravia|♂|23|None}} | {{trainerentry|Spr DP Jogger.png|Jogger|Raul<br><small>({{DL|Time|Morning 2|Morning}} only)</small>|736|1|397|Staravia|♂|23|None}} | ||
{{trainerdiv}} | {{trainerdiv}} | ||
{{trainerentry|Spr DP Pokémon Breeder F.png|Pokémon Breeder|Jennifer|960|4|406|Budew|♀|20|None|173|Cleffa|♀|20|None|133|Eevee|♂|20|None|439|Mime Jr.|♀|20|38=Vs. Seeker}} | {{trainerentry|Spr DP Pokémon Breeder F.png|Pokémon Breeder|Jennifer|960|4|406|Budew|♀|20|None|173|Cleffa|♀|20|None|133|Eevee|♂|20|None|439|Mime Jr.|♀|20|38=Vs. Seeker}} | ||
| Line 346: | Line 357: | ||
| | | | ||
{{Catch/header|land|yes}} | {{Catch/header|land|yes}} | ||
{{Catch/entry4| | {{Catch/entry4|041|Zubat|no|no|yes|Grass|19|0%|0%|10%|type1=Poison|type2=Flying}} | ||
{{Catch/entry4|113|Chansey|no|no|yes|Grass|17,19|all=5%|type1=Normal}} | |||
{{Catch/entry4|280|Ralts|no|no|yes|Grass|17-19|20%|20%|0%|type1=Psychic}} | |||
{{Catch/entry4|280|Ralts|no|no|yes|Grass|18-19|0%|0%|10%|type1=Psychic}} | |||
{{Catch/entry4|315|Roselia|no|no|yes|Grass|19-20|all=25%|type1=Grass|type2=Poison}} | {{Catch/entry4|315|Roselia|no|no|yes|Grass|19-20|all=25%|type1=Grass|type2=Poison}} | ||
{{Catch/entry4| | {{Catch/entry4|355|Duskull|no|no|yes|Grass|17|0%|0%|10%|type1=Ghost}} | ||
{{Catch/entry4|397|Staravia|no|no|yes|Grass| | {{Catch/entry4|397|Staravia|no|no|yes|Grass|18-19|20%|20%|0%|type1=Normal|type2=Flying}} | ||
{{Catch/entry4| | {{Catch/entry4|397|Staravia|no|no|yes|Grass|18|0%|0%|10%|type1=Normal|type2=Flying}} | ||
{{Catch/entry4|400|Bibarel|no|no|yes|Grass|18-19|all=30%|type1=Normal|type2=Water}} | |||
{{Catch/entry4| | |||
{{catch/div|water|Surfing and Fishing}} | {{catch/div|water|Surfing and Fishing}} | ||
{{Catch/entry4|054|Psyduck|no|no|yes|Surf|20- | {{Catch/entry4|054|Psyduck|no|no|yes|Surf|20-30|all=90%|type1=Water}} | ||
{{Catch/entry4|055|Golduck|no|no|yes|Surf|20-40|all=10%|type1=Water}} | {{Catch/entry4|055|Golduck|no|no|yes|Surf|20-40|all=10%|type1=Water}} | ||
{{Catch/entry4|129|Magikarp|no|no|yes|Fish Old|3-15|all=100%|type1=Water}} | {{Catch/entry4|129|Magikarp|no|no|yes|Fish Old|3-15|all=100%|type1=Water}} | ||
| Line 362: | Line 375: | ||
{{Catch/entry4|119|Seaking|no|no|yes|Fish Super|30-55|all=35%|type1=Water}} | {{Catch/entry4|119|Seaking|no|no|yes|Fish Super|30-55|all=35%|type1=Water}} | ||
{{Catch/div|land|Special}} | {{Catch/div|land|Special}} | ||
{{Catch/entry4|209|Snubbull|no|no|yes|Swarm| | {{Catch/entry4|209|Snubbull|no|no|yes|Swarm|18-19|all=40%|type1=Normal}} | ||
{{Catch/entry4|281|Kirlia|no|no|yes|Poké Radar|19 | {{Catch/entry4|281|Kirlia|no|no|yes|Poké Radar|18-19|all=22%|type1=Psychic}} | ||
{{Catch/entry4|037|Vulpix|no|no|yes|LG| | {{Catch/entry4|037|Vulpix|no|no|yes|LG|17,19|all=8%|type1=Fire}} | ||
{{Catch/entry4|442|Spiritomb|no|no|yes|Special|25|all={{tt|One|Hallowed Tower (Requires Odd Keystone)}}|type1=Ghost|type2=Dark}} | {{Catch/entry4|442|Spiritomb|no|no|yes|Special|25|all={{tt|One|Hallowed Tower (Requires Odd Keystone)}}|type1=Ghost|type2=Dark}} | ||
{{Catch/footer|land}} | {{Catch/footer|land}} | ||
| Line 375: | Line 388: | ||
{{Itlisth}} | {{Itlisth}} | ||
{{Itemlist|Good Rod|{{tc|Fisherman}} by [[Hearthome City]] entrance.|Pt=yes|display=[[Fishing#Good Rod|Good Rod]]}} | {{Itemlist|Good Rod|{{tc|Fisherman}} by [[Hearthome City]] entrance.|Pt=yes|display=[[Fishing#Good Rod|Good Rod]]}} | ||
{{Itemlist|Great Ball|Northeast corner of tall grass by [[Hearthome City]] gate.|Pt=yes|display=[[Poké Ball#Generation I Poké Balls|Great Ball]]}} | {{Itemlist|Great Ball|Northeast corner of tall grass by [[Hearthome City]] gate.|Pt=yes|display=[[Poké Ball#Generation I Poké Balls|Great Ball]]}} | ||
{{Itemlist|Great Ball|In the center of the patch of grass just outside the [[Hearthome City]] gate. (''Hidden'')|Pt=yes|display=[[Poké Ball#Generation I Poké Balls|Great Ball]]}} | {{Itemlist|Great Ball|In the center of the patch of grass just outside the [[Hearthome City]] gate. (''Hidden'')|Pt=yes|display=[[Poké Ball#Generation I Poké Balls|Great Ball]]}} | ||
{{Itemlist|Super Repel|Right in front of the first tree west of {{tc|Twins}} Emma & Lil. (''Hidden'')|Pt=yes|display={{DL|Repel|Super Repel}}}} | |||
{{Itemlist|Chesto Berry|Patch of soil northwest of Jogger Richard||Pt=yes|display={{DL|Berry|Chesto Berry}}}} | |||
{{Itemlist|Leppa Berry|Patch of soil northwest of Jogger Richard||Pt=yes|display={{DL|Berry|Leppa Berry}}}} | |||
{{Itemlist|Hyper Potion|Due east (across the south bridge) of {{tc|Poké Kid}} Danielle.|Pt=yes|display={{DL|Potion|Hyper Potion}}}} | {{Itemlist|Hyper Potion|Due east (across the south bridge) of {{tc|Poké Kid}} Danielle.|Pt=yes|display={{DL|Potion|Hyper Potion}}}} | ||
{{Itemlist|Revive|Just southwest of the Honey Tree near {{tc|Pokémon Breeder}} Jennifer. (''Hidden'')|Pt=yes|display={{DL|Revive|Revive}}}} | |||
{{Itemlist|Ether|In the middle of the Pit near the Honey Tree.|Pt=yes|display={{DL|Ether|Ether}}}} | |||
{{Itemlist|Razz Berry|Patch of soil next to the first pit with the mudslide||Pt=yes|display={{DL|Berry|Razz Berry}} x2}} | |||
{{Itemlist|Stardust|On the rock in the first pit with the mudslide (''Hidden'')|Pt=yes|display=[[Valuable item#Stardust and Star Piece|Stardust]]}} | {{Itemlist|Stardust|On the rock in the first pit with the mudslide (''Hidden'')|Pt=yes|display=[[Valuable item#Stardust and Star Piece|Stardust]]}} | ||
{{Itemlist| | {{Itemlist|Calcium|In between trees to the north of the northernmost mudslide pit.|Pt=yes|display={{DL|Vitamin|Calcium}}}} | ||
{{Itemlist| | {{Itemlist|TM Steel|In between trees south of the [[Lost Tower]] (requires [[HM01]] {{m|Cut}}).|Pt=yes|display=[[TM47]] ({{m|Steel Wing}})}} | ||
{{Itemlist| | {{Itemlist|TM Grass|In between trees south of the [[Hallowed Tower]] (requires [[HM03]] {{m|Surf}}).|Pt=yes|display=[[TM19]] ({{m|Giga Drain}})}} | ||
{{Itlistfoot}} | {{Itlistfoot}} | ||
|} | |} | ||
Having earned your Relic Badge, you've now done everything there is to do in Hearthome. It's time for to move east to {{rt|209|Sinnoh}}, however before leaving, consider purchasing {{DL|Poké Ball|Great Ball}}s from the [[Poké Mart]] - they have a 50% higher catch rate than regular Poké Balls. Make sure your team is fully healed, because as you enter the Gate that separates Hearthome City from Route 209, you'll encounter [[Barry (game)|Barry]], who will challenge you to another battle. | |||
{| align="center" | {| align="center" | ||
| Line 394: | Line 410: | ||
! {{MS|393|Piplup (Pokémon)}} If the {{player}} chose {{p|Piplup}}: | ! {{MS|393|Piplup (Pokémon)}} If the {{player}} chose {{p|Piplup}}: | ||
|- | |- | ||
|{{Party/Single | |{{Party/Single | ||
|color=E08040 | |color=E08040 | ||
|bordercolor=629C20 | |bordercolor=629C20 | ||
| Line 400: | Line 416: | ||
|sprite=Spr Pt Barry.png | |sprite=Spr Pt Barry.png | ||
|prize={{pdollar}}2700 | |prize={{pdollar}}2700 | ||
|class=Pokémon Trainer | |class={{PK}}{{MN}} Trainer | ||
|name=Barry | |classlink=Pokémon Trainer | ||
|name={{color2|000000|Barry (game)|Barry}} | |||
|game=Pt | |game=Pt | ||
|location=Hearthome City | |location=Hearthome City | ||
| Line 411: | Line 428: | ||
|gender=male | |gender=male | ||
|spritegender=male | |spritegender=male | ||
|type1=Normal | |type1=Normal|type2=Flying | ||
|type2=Flying | |||
|ability=Intimidate | |ability=Intimidate | ||
|level=25 | |level=25 | ||
| Line 419: | Line 435: | ||
|move3=Quick Attack|move3type=Normal|move3cat=Physical | |move3=Quick Attack|move3type=Normal|move3cat=Physical | ||
|move4=Endeavor|move4type=Normal|move4cat=Physical}} | |move4=Endeavor|move4type=Normal|move4cat=Physical}} | ||
|{{Pokémon/4 | |{{Pokémon/4 | ||
|ndex=418 | |ndex=418 | ||
| Line 433: | Line 448: | ||
|move3=Growl|move3type=Normal|move3cat=Status | |move3=Growl|move3type=Normal|move3cat=Status | ||
|move4=Pursuit|move4type=Dark|move4cat=Physical}} | |move4=Pursuit|move4type=Dark|move4cat=Physical}} | ||
{{Party/Div|color=E08040}} | {{Party/Div|color=E08040}} | ||
|{{Pokémon/4 | |{{Pokémon/4 | ||
| Line 441: | Line 455: | ||
|gender=male | |gender=male | ||
|spritegender=male | |spritegender=male | ||
|type1=Grass | |type1=Grass|type2=Poison | ||
|type2=Poison | |||
|ability=Natural Cure | |ability=Natural Cure | ||
|level=23 | |level=23 | ||
| Line 449: | Line 462: | ||
|move3=Poison Sting|move3type=Poison|move3cat=Physical | |move3=Poison Sting|move3type=Poison|move3cat=Physical | ||
|move4=Leech Seed|move4type=Grass|move4cat=Status}} | |move4=Leech Seed|move4type=Grass|move4cat=Status}} | ||
|{{Pokémon/4 | |{{Pokémon/4 | ||
|ndex=391 | |ndex=391 | ||
| Line 455: | Line 467: | ||
|game=Platinum | |game=Platinum | ||
|gender=male | |gender=male | ||
|type1=Fire | |type1=Fire|type2=Fighting | ||
|type2=Fighting | |||
|ability=Blaze | |ability=Blaze | ||
|level=27 | |level=27 | ||
| Line 462: | Line 473: | ||
|move2=Leer|move2type=Normal|move2cat=Status | |move2=Leer|move2type=Normal|move2cat=Status | ||
|move3=Flame Wheel|move3type=Fire|move3cat=Physical | |move3=Flame Wheel|move3type=Fire|move3cat=Physical | ||
|move4= | |move4=Fury Swipes|move4type=Normal|move4cat=Physical}} | ||
{{Party/Footer}} | {{Party/Footer}} | ||
| Line 471: | Line 482: | ||
|sprite=Spr Pt Barry.png | |sprite=Spr Pt Barry.png | ||
|prize={{pdollar}}2700 | |prize={{pdollar}}2700 | ||
|class=Pokémon Trainer | |class={{PK}}{{MN}} Trainer | ||
|name=Barry | |classlink=Pokémon Trainer | ||
|name={{color2|000000|Barry (game)|Barry}} | |||
|game=Pt | |game=Pt | ||
|location=Hearthome City | |location=Hearthome City | ||
| Line 482: | Line 494: | ||
|gender=male | |gender=male | ||
|spritegender=male | |spritegender=male | ||
|type1=Normal | |type1=Normal|type2=Flying | ||
|type2=Flying | |||
|ability=Intimidate | |ability=Intimidate | ||
|level=25 | |level=25 | ||
| Line 490: | Line 501: | ||
|move3=Quick Attack|move3type=Normal|move3cat=Physical | |move3=Quick Attack|move3type=Normal|move3cat=Physical | ||
|move4=Endeavor|move4type=Normal|move4cat=Physical}} | |move4=Endeavor|move4type=Normal|move4cat=Physical}} | ||
|{{Pokémon/4 | |{{Pokémon/4 | ||
|ndex=077 | |ndex=077 | ||
| Line 499: | Line 509: | ||
|ability=Flash Fire | |ability=Flash Fire | ||
|level=23 | |level=23 | ||
|move1= | |move1=Tackle|move1type=Normal|move1cat=Physical | ||
|move2= | |move2=Ember|move2type=Fire|move2cat=Special | ||
|move3=Growl|move3type=Normal|move3cat=Status | |move3=Growl|move3type=Normal|move3cat=Status | ||
|move4=Tail Whip|move4type=Normal|move4cat=Status}} | |move4=Tail Whip|move4type=Normal|move4cat=Status}} | ||
{{Party/Div|color=E08040}} | {{Party/Div|color=E08040}} | ||
|{{Pokémon/4 | |{{Pokémon/4 | ||
| Line 511: | Line 520: | ||
|gender=male | |gender=male | ||
|spritegender=male | |spritegender=male | ||
|type1=Grass | |type1=Grass|type2=Poison | ||
|type2=Poison | |||
|ability=Natural Cure | |ability=Natural Cure | ||
|level=23 | |level=23 | ||
| Line 519: | Line 527: | ||
|move3=Poison Sting|move3type=Poison|move3cat=Physical | |move3=Poison Sting|move3type=Poison|move3cat=Physical | ||
|move4=Leech Seed|move4type=Grass|move4cat=Status}} | |move4=Leech Seed|move4type=Grass|move4cat=Status}} | ||
|{{Pokémon/4 | |{{Pokémon/4 | ||
|ndex=394 | |ndex=394 | ||
| Line 528: | Line 535: | ||
|ability=Torrent | |ability=Torrent | ||
|level=27 | |level=27 | ||
|move1= | |move1=Growl|move1type=Normal|move1cat=Status | ||
|move2=Peck|move2type=Flying|move2cat=Physical | |move2=Peck|move2type=Flying|move2cat=Physical | ||
|move3=BubbleBeam|move3type=Water|move3cat=Special | |move3=BubbleBeam|move3type=Water|move3cat=Special | ||
| Line 540: | Line 547: | ||
|sprite=Spr Pt Barry.png | |sprite=Spr Pt Barry.png | ||
|prize={{pdollar}}2700 | |prize={{pdollar}}2700 | ||
|class=Pokémon Trainer | |class={{PK}}{{MN}} Trainer | ||
|name=Barry | |classlink=Pokémon Trainer | ||
|name={{color2|000000|Barry (game)|Barry}} | |||
|game=Pt | |game=Pt | ||
|location=Hearthome City | |location=Hearthome City | ||
| Line 551: | Line 559: | ||
|gender=male | |gender=male | ||
|spritegender=male | |spritegender=male | ||
|type1=Normal | |type1=Normal|type2=Flying | ||
|type2=Flying | |||
|ability=Intimidate | |ability=Intimidate | ||
|level=25 | |level=25 | ||
| Line 559: | Line 566: | ||
|move3=Quick Attack|move3type=Normal|move3cat=Physical | |move3=Quick Attack|move3type=Normal|move3cat=Physical | ||
|move4=Endeavor|move4type=Normal|move4cat=Physical}} | |move4=Endeavor|move4type=Normal|move4cat=Physical}} | ||
|{{Pokémon/4 | |{{Pokémon/4 | ||
|ndex=418 | |ndex=418 | ||
| Line 573: | Line 579: | ||
|move3=Growl|move3type=Normal|move3cat=Status | |move3=Growl|move3type=Normal|move3cat=Status | ||
|move4=Pursuit|move4type=Dark|move4cat=Physical}} | |move4=Pursuit|move4type=Dark|move4cat=Physical}} | ||
{{Party/Div|color=E08040}} | {{Party/Div|color=E08040}} | ||
|{{Pokémon/4 | |{{Pokémon/4 | ||
| Line 583: | Line 588: | ||
|ability=Flash Fire | |ability=Flash Fire | ||
|level=23 | |level=23 | ||
|move1= | |move1=Tackle|move1type=Normal|move1cat=Physical | ||
|move2= | |move2=Ember|move2type=Fire|move2cat=Special | ||
|move3=Growl|move3type=Normal|move3cat=Status | |move3=Growl|move3type=Normal|move3cat=Status | ||
|move4=Tail Whip|move4type=Normal|move4cat=Status}} | |move4=Tail Whip|move4type=Normal|move4cat=Status}} | ||
|{{Pokémon/4 | |{{Pokémon/4 | ||
|ndex=388 | |ndex=388 | ||
| Line 596: | Line 600: | ||
|ability=Overgrow | |ability=Overgrow | ||
|level=27 | |level=27 | ||
|move1= | |move1=Tackle|move1type=Normal|move1cat=Physical | ||
|move2=Razor Leaf|move2type=Grass|move2cat=Physical | |move2=Razor Leaf|move2type=Grass|move2cat=Physical | ||
|move3=Absorb|move3type=Grass|move3cat=Special | |move3=Absorb|move3type=Grass|move3cat=Special | ||
|move4= | |move4=Withdraw|move4type=Water|move4cat=Status}} | ||
{{Party/Footer}} | {{Party/Footer}} | ||
|} | |} | ||
This time around he'll have two | This time around he'll have two new Pokémon that represent the types of the [[Starter Pokémon]] that he didn't pick at the beginning of the game. Additionally both his starter Pokémon and his {{p|Starly}} have evolved into their second forms. He shouldn't be that tough if you have a well leveled team, since your selection of Pokémon is much greater than it was last time. | ||
From the entrance, go east, then north to travel directly to [[Solaceon Town]], collecting any items that are of interest to you. On this route, there is the Broken Tower, which becomes the [[Hallowed Tower]] when an [[Odd Keystone]] (available from a Black Belt on {{rt|208|Sinnoh}}, hidden in [[Twinleaf Town]], or mineable in the [[Sinnoh Underground]]) is placed in it. After speaking to 32 people in the [[Underground]], a [[level]] 25 {{p|Spiritomb}} will appear to battle you. You will pass the [[Lost Tower]] near the end of the route, but you will need to get {{hm|05|Defog}} first for dealing with the [[fog]] on the higher floors. Fortunately, HM05 is available not far from here, so pass it by for now. Follow the path north to reach [[Solaceon Town]]. | |||
{{WalkthroughPrevNext | | {{WalkthroughPrevNext | | ||
Revision as of 10:53, 31 January 2016
Route 207
| Available Pokémon | ||||||||||||||||||||||||||||||||||||||||||||||||||||||||||||||||||||||||||||||||||||||||||||||||||||||||||||||||||||||||||||||||||||||||||||||||||||||||||||||||||||||||||||||||||||||||||||||||||||||||||||
|---|---|---|---|---|---|---|---|---|---|---|---|---|---|---|---|---|---|---|---|---|---|---|---|---|---|---|---|---|---|---|---|---|---|---|---|---|---|---|---|---|---|---|---|---|---|---|---|---|---|---|---|---|---|---|---|---|---|---|---|---|---|---|---|---|---|---|---|---|---|---|---|---|---|---|---|---|---|---|---|---|---|---|---|---|---|---|---|---|---|---|---|---|---|---|---|---|---|---|---|---|---|---|---|---|---|---|---|---|---|---|---|---|---|---|---|---|---|---|---|---|---|---|---|---|---|---|---|---|---|---|---|---|---|---|---|---|---|---|---|---|---|---|---|---|---|---|---|---|---|---|---|---|---|---|---|---|---|---|---|---|---|---|---|---|---|---|---|---|---|---|---|---|---|---|---|---|---|---|---|---|---|---|---|---|---|---|---|---|---|---|---|---|---|---|---|---|---|---|---|---|---|---|---|---|
| ||||||||||||||||||||||||||||||||||||||||||||||||||||||||||||||||||||||||||||||||||||||||||||||||||||||||||||||||||||||||||||||||||||||||||||||||||||||||||||||||||||||||||||||||||||||||||||||||||||||||||||
| Trainers | ||||||||||||||||||||||||||||||||||||||||||||||||||||||||||||||||||||||||||||||||||||||||||||||||||||||||||||||||||||||||||||||||||||
|---|---|---|---|---|---|---|---|---|---|---|---|---|---|---|---|---|---|---|---|---|---|---|---|---|---|---|---|---|---|---|---|---|---|---|---|---|---|---|---|---|---|---|---|---|---|---|---|---|---|---|---|---|---|---|---|---|---|---|---|---|---|---|---|---|---|---|---|---|---|---|---|---|---|---|---|---|---|---|---|---|---|---|---|---|---|---|---|---|---|---|---|---|---|---|---|---|---|---|---|---|---|---|---|---|---|---|---|---|---|---|---|---|---|---|---|---|---|---|---|---|---|---|---|---|---|---|---|---|---|---|---|---|
| ||||||||||||||||||||||||||||||||||||||||||||||||||||||||||||||||||||||||||||||||||||||||||||||||||||||||||||||||||||||||||||||||||||
| Items | ||||||||||||||||||||||||||||||||||||||||||||||||||||
|---|---|---|---|---|---|---|---|---|---|---|---|---|---|---|---|---|---|---|---|---|---|---|---|---|---|---|---|---|---|---|---|---|---|---|---|---|---|---|---|---|---|---|---|---|---|---|---|---|---|---|---|---|
| ||||||||||||||||||||||||||||||||||||||||||||||||||||
The muddy slope at the western end of the route leads to Oreburgh City - now that you have a bicycle, consider making a quick detour to the basement floor of Oreburgh Gate for TM31 (Brick Break), before heading east along Route 207. Take the narrow path directly south of the Honey Tree to find a slew of items and trainers. As you try to enter Mt. Coronet's south entrance, at the eastern end of the route, Dawn/Lucas will appear and give you the Vs. Seeker and the Dowsing Machine app for your Pokétch. Proceed into Mt. Coronet.
Mt. Coronet (South Area Part 1)
| Available Pokémon | ||||||||||||||||||||||||||||||||||||||||||||||||||||||||||||||||||||||||||||||||||||||||||||||||||||||||||||||||||||||||||||||||||||||||||||||||||||||||||||||||||||||||||||||||||||||||||||||||||||||||||||||||||||||||||||||||||||||||||||||||||||||||||||||||||||||||||||||||||||||||||||||||||||||||||||||||||||||||||||||||||||||||||||
|---|---|---|---|---|---|---|---|---|---|---|---|---|---|---|---|---|---|---|---|---|---|---|---|---|---|---|---|---|---|---|---|---|---|---|---|---|---|---|---|---|---|---|---|---|---|---|---|---|---|---|---|---|---|---|---|---|---|---|---|---|---|---|---|---|---|---|---|---|---|---|---|---|---|---|---|---|---|---|---|---|---|---|---|---|---|---|---|---|---|---|---|---|---|---|---|---|---|---|---|---|---|---|---|---|---|---|---|---|---|---|---|---|---|---|---|---|---|---|---|---|---|---|---|---|---|---|---|---|---|---|---|---|---|---|---|---|---|---|---|---|---|---|---|---|---|---|---|---|---|---|---|---|---|---|---|---|---|---|---|---|---|---|---|---|---|---|---|---|---|---|---|---|---|---|---|---|---|---|---|---|---|---|---|---|---|---|---|---|---|---|---|---|---|---|---|---|---|---|---|---|---|---|---|---|---|---|---|---|---|---|---|---|---|---|---|---|---|---|---|---|---|---|---|---|---|---|---|---|---|---|---|---|---|---|---|---|---|---|---|---|---|---|---|---|---|---|---|---|---|---|---|---|---|---|---|---|---|---|---|---|---|---|---|---|---|---|---|---|---|---|---|---|---|---|---|---|---|---|---|---|---|---|---|---|---|---|---|---|---|---|---|---|---|---|---|---|---|---|---|---|---|---|---|---|---|---|---|---|---|---|---|---|---|---|---|---|---|---|---|---|---|---|---|---|---|---|---|---|---|---|---|---|
| ||||||||||||||||||||||||||||||||||||||||||||||||||||||||||||||||||||||||||||||||||||||||||||||||||||||||||||||||||||||||||||||||||||||||||||||||||||||||||||||||||||||||||||||||||||||||||||||||||||||||||||||||||||||||||||||||||||||||||||||||||||||||||||||||||||||||||||||||||||||||||||||||||||||||||||||||||||||||||||||||||||||||||||
| Items | ||||||||||||||||||||||||||||
|---|---|---|---|---|---|---|---|---|---|---|---|---|---|---|---|---|---|---|---|---|---|---|---|---|---|---|---|---|
| ||||||||||||||||||||||||||||
In here, you'll find Cyrus ranting about perfecting the world before leaving. Collect all the items you can, and simply walk to the other side of this small section of Mt. Coronet, then out of the exit to Route 208. You won't be able to do anything important here until much later in the game.
Route 208
| Available Pokémon | ||||||||||||||||||||||||||||||||||||||||||||||||||||||||||||||||||||||||||||||||||||||||||||||||||||||||||||||||||||||||||||||||||||||||||||||||||||||||||||||||||||||||||||||||||||||||||||||||||||||||||||||||||||||||||||||||||||||||||||||||||||||||||||||||||||||||||||||||||||||||||||||||||||||||||||||||||||||||||||||||||||||||||||||||||||||||||||||||||||||||||
|---|---|---|---|---|---|---|---|---|---|---|---|---|---|---|---|---|---|---|---|---|---|---|---|---|---|---|---|---|---|---|---|---|---|---|---|---|---|---|---|---|---|---|---|---|---|---|---|---|---|---|---|---|---|---|---|---|---|---|---|---|---|---|---|---|---|---|---|---|---|---|---|---|---|---|---|---|---|---|---|---|---|---|---|---|---|---|---|---|---|---|---|---|---|---|---|---|---|---|---|---|---|---|---|---|---|---|---|---|---|---|---|---|---|---|---|---|---|---|---|---|---|---|---|---|---|---|---|---|---|---|---|---|---|---|---|---|---|---|---|---|---|---|---|---|---|---|---|---|---|---|---|---|---|---|---|---|---|---|---|---|---|---|---|---|---|---|---|---|---|---|---|---|---|---|---|---|---|---|---|---|---|---|---|---|---|---|---|---|---|---|---|---|---|---|---|---|---|---|---|---|---|---|---|---|---|---|---|---|---|---|---|---|---|---|---|---|---|---|---|---|---|---|---|---|---|---|---|---|---|---|---|---|---|---|---|---|---|---|---|---|---|---|---|---|---|---|---|---|---|---|---|---|---|---|---|---|---|---|---|---|---|---|---|---|---|---|---|---|---|---|---|---|---|---|---|---|---|---|---|---|---|---|---|---|---|---|---|---|---|---|---|---|---|---|---|---|---|---|---|---|---|---|---|---|---|---|---|---|---|---|---|---|---|---|---|---|---|---|---|---|---|---|---|---|---|---|---|---|---|---|---|---|---|---|---|---|---|---|---|---|---|---|---|---|---|---|---|---|---|---|---|---|---|---|---|---|---|---|---|---|---|---|
| ||||||||||||||||||||||||||||||||||||||||||||||||||||||||||||||||||||||||||||||||||||||||||||||||||||||||||||||||||||||||||||||||||||||||||||||||||||||||||||||||||||||||||||||||||||||||||||||||||||||||||||||||||||||||||||||||||||||||||||||||||||||||||||||||||||||||||||||||||||||||||||||||||||||||||||||||||||||||||||||||||||||||||||||||||||||||||||||||||||||||||
| Trainers | |||||||||||||||||||||||||||||||||||||||||||||||||||||||||||||||||||||||||||||||||||||||||||||||||||||||||||||||||||||||||||||||||||
|---|---|---|---|---|---|---|---|---|---|---|---|---|---|---|---|---|---|---|---|---|---|---|---|---|---|---|---|---|---|---|---|---|---|---|---|---|---|---|---|---|---|---|---|---|---|---|---|---|---|---|---|---|---|---|---|---|---|---|---|---|---|---|---|---|---|---|---|---|---|---|---|---|---|---|---|---|---|---|---|---|---|---|---|---|---|---|---|---|---|---|---|---|---|---|---|---|---|---|---|---|---|---|---|---|---|---|---|---|---|---|---|---|---|---|---|---|---|---|---|---|---|---|---|---|---|---|---|---|---|---|---|
| |||||||||||||||||||||||||||||||||||||||||||||||||||||||||||||||||||||||||||||||||||||||||||||||||||||||||||||||||||||||||||||||||||
| Items | ||||||||||||||||||||||||||||||||||||||||||||||||||||
|---|---|---|---|---|---|---|---|---|---|---|---|---|---|---|---|---|---|---|---|---|---|---|---|---|---|---|---|---|---|---|---|---|---|---|---|---|---|---|---|---|---|---|---|---|---|---|---|---|---|---|---|---|
| ||||||||||||||||||||||||||||||||||||||||||||||||||||
There are many Trainers to battle on this route, however two of them cannot be fought until much later in the game, when you have the necessary HMs. Go across the first section of the bridge, make a quick detour north to grab a Great Ball, then continue east down the stairs, and through the tall grass, and you will be at the entrance of Hearthome City.
Also on this Route is the Berry Master's house. Each day, he will give you a fresh Berry. You may also get the Berry Searcher Pokétch app that shows where there are Berries ready to pick. His wife sells Mulch, which affects the growth of Berries.
| Mulch | ||||||||||||||||||
|---|---|---|---|---|---|---|---|---|---|---|---|---|---|---|---|---|---|---|
| ||||||||||||||||||
Hearthome City
| Items | ||||||||||||||||||||||||||||
|---|---|---|---|---|---|---|---|---|---|---|---|---|---|---|---|---|---|---|---|---|---|---|---|---|---|---|---|---|
| ||||||||||||||||||||||||||||
On arriving at Hearthome City, a lost Buneary will run into you, shortly followed by its Trainer, who will thank you for catching her Buneary, and suggest that you visit the Super Contest Hall (the large building near the Hearthome Gym). Once you get there, you'll find her talking to your mom. They will both talk to you about Super Contests, and leave. Go to the front desk and talk to the woman dressed in purple. She will reveal herself as Fantina, this city's Gym Leader, and return to the Gym where you will be able to challenge her.
After that, you can take a look around the city. Next to the Pokémon Center is Bebe's house, where Sinnoh's administrator of the PC box system lives. If you talk to her and have a spare slot in your party, she'll hand over an Eevee. If you're into Pokémon breeding, consider saving your game before you receive the Eevee, since there is an only a 12.5% chance it will be a female and otherwise, you'll have to wait until you have the National Dex to find a Ditto or another Eevee.
| |||||||||||||||||||||||||||||||||||||||||||||||||||||||||
East of the Poké Mart is the Pokémon Fan Club. Go inside and talk to the man with the hat inside. After listening to his rambles, he will give you the Poffin Case, which is essential for making Poffins. Poffins can be made in the building west of the Poké Mart, known as the Poffin House. Near the Poffin House is Mr. Goods. Although he claims he can't remember who he is or his real name, he has dedicated himself to seeking rarities. He gives goods to Trainers once they have met certain requirements. These items can be placed in the Trainer's Secret Base located in The Underground.
Next to the Pokémon Fan Club is the Pokémon Hotel. If you go to the second floor and talk to the woman with the Clefairy, she will give you a Shell Bell, which heals the user by 1/8 of its max HP when it inflicts damage.
Amity Square
| Items | ||||||||||||||||||||||||
|---|---|---|---|---|---|---|---|---|---|---|---|---|---|---|---|---|---|---|---|---|---|---|---|---|
| ||||||||||||||||||||||||
At the northwest and northeast of the city are the entrances to Amity Square, where you can find some Accessories, an Amulet Coin, TM43 (Secret Power), and TM45 (Attract), but you'll need to make a trip from each entrance to get all the items. Keep in mind that you'll need a "cute" Pokémon to enter - your starter in any of its evolutionary forms will work. Additionally, each hut contains three teleporters that can warp you to a different hut. To access them, enter the hut but stop on the tile just inside the entrance. Take a step forward, right, or left to access the hidden teleporters. It is the only way to access the area where you can obtain the Spooky Plate. A chubby man in overalls goes around Amity Square every day. To reach him, players must go through the east gate and use the teleporters. When found, he will give the player five Berries or one Accessory.
Hearthome Gym
Once you're done exploring the town, head to the Hearthome Gym, located in the northeast corner of the city. The Gym leader, Fantina, uses Ghost-type Pokémon, which are weak to Dark- and Ghost-type moves. Ghost-types are also immune to Normal- and Fighting-type moves, but Normal-type Pokémon are immune to Ghost-type moves in return. The gym's structure is two darkened rooms each with a maze of Duskull lamps. Although you're given a flashlight at the entrance, it's still easy to see everything on the screen. The goal of the puzzle is to find a blue tile, note down the shape on it, then go to the door that has the same pattern. If you pick the wrong door, you'll find yourself back at the beginning (note that if you leave the gym and reenter, the symbol on the blue tile is randomized, so it probably won't be the same). After the second maze, you'll find Fantina - challenge her to a battle to earn the Relic Badge.
| |||||||||||||||||||||||||||||||||||||||||||||||||||||||||||||||||||||||||||||||||||||||||||||||||||||||||||||||||||||||||||||||||||||||||||||||||||||||||||||||||||||||||||||||||||||||||||||||||||||||||||||||||||||||||||||||||||||||||||||||
Typically of Ghost-types, Fantina's Pokémon are all pain to deal with, particularly her Mismagius. If you chose Turtwig as your starter or have added a Shinx to your team, their jaws should be able to Bite through Fatina's team with little problem. Her Duskull has high defense stats and may take a few hits to take down. It has Will-O-Wisp to burn and halv the Attack stat of an affected Pokémon, making it lose 1/8 of its HP each turn. Apply Burn Heals right away. It also has Pursuit and Shadow Sneak, Pursuit doing more damage if you try to switch out and Shadow Sneak always going first, like Quick Attack. Future Sight will do damage to any Pokémon, regardless of type, after two turns. Do not forget Future Sight, as it could take you out just as you think you're winning and have low HP. Contrary to he Duskull, her Haunter has very high Special Attack and Speed, but has no Special based attacks, and has quite low defenses. It has Shadow Claw, a Ghost type attack with a high critical hit ratio, and Sucker Punch, which will strike before you for 80 power, but only works if you are attacking that turn. Like Duskull, Haunter's role is annoyance, and it will disrupt you with Confuse Ray before going in for Hypnosis to set you up for Fantina's Mismagius. Mismagius comes packing the powerful move Shadow Ball, a Ghost-type attack that synergises with Mismagius' high Sp. Atk. Not good! It also has Psybeam and Magical Leaf backing it up, with Confuse Ray to disrupt as well. Staravia would do well here as it is immune to Shadow Ball and its typing halves the damage from Magical Leaf.
Once Fantina is defeated, she gives you the Relic Badge and TM65 (Shadow Claw). You can also use Defog outside of battle, which will come in handy later on Route 210.
Route 209
| Trainers | ||||||||||||||||||||||||||||||||||||||||||||||||||||||||||||||||||||||||||||||||||||||||||||||||||||||||||||||||||||||||||||||||||||||||||||||||||||||||||||||||||||||||||
|---|---|---|---|---|---|---|---|---|---|---|---|---|---|---|---|---|---|---|---|---|---|---|---|---|---|---|---|---|---|---|---|---|---|---|---|---|---|---|---|---|---|---|---|---|---|---|---|---|---|---|---|---|---|---|---|---|---|---|---|---|---|---|---|---|---|---|---|---|---|---|---|---|---|---|---|---|---|---|---|---|---|---|---|---|---|---|---|---|---|---|---|---|---|---|---|---|---|---|---|---|---|---|---|---|---|---|---|---|---|---|---|---|---|---|---|---|---|---|---|---|---|---|---|---|---|---|---|---|---|---|---|---|---|---|---|---|---|---|---|---|---|---|---|---|---|---|---|---|---|---|---|---|---|---|---|---|---|---|---|---|---|---|---|---|---|---|---|---|---|---|
| ||||||||||||||||||||||||||||||||||||||||||||||||||||||||||||||||||||||||||||||||||||||||||||||||||||||||||||||||||||||||||||||||||||||||||||||||||||||||||||||||||||||||||
| Available Pokémon | |||||||||||||||||||||||||||||||||||||||||||||||||||||||||||||||||||||||||||||||||||||||||||||||||||||||||||||||||||||||||||||||||||||||||||||||||||||||||||||||||||||||||||||||||||||||||||||||||||||||||||||||||||||||||||||||||||||||||||||||||||||||||||||||||||||||||||||||||||||||||||||||||||||||||||||||||||||||||||||||||||||||||||||||||||||||||||||||||||||||||||||||||||||||||||
|---|---|---|---|---|---|---|---|---|---|---|---|---|---|---|---|---|---|---|---|---|---|---|---|---|---|---|---|---|---|---|---|---|---|---|---|---|---|---|---|---|---|---|---|---|---|---|---|---|---|---|---|---|---|---|---|---|---|---|---|---|---|---|---|---|---|---|---|---|---|---|---|---|---|---|---|---|---|---|---|---|---|---|---|---|---|---|---|---|---|---|---|---|---|---|---|---|---|---|---|---|---|---|---|---|---|---|---|---|---|---|---|---|---|---|---|---|---|---|---|---|---|---|---|---|---|---|---|---|---|---|---|---|---|---|---|---|---|---|---|---|---|---|---|---|---|---|---|---|---|---|---|---|---|---|---|---|---|---|---|---|---|---|---|---|---|---|---|---|---|---|---|---|---|---|---|---|---|---|---|---|---|---|---|---|---|---|---|---|---|---|---|---|---|---|---|---|---|---|---|---|---|---|---|---|---|---|---|---|---|---|---|---|---|---|---|---|---|---|---|---|---|---|---|---|---|---|---|---|---|---|---|---|---|---|---|---|---|---|---|---|---|---|---|---|---|---|---|---|---|---|---|---|---|---|---|---|---|---|---|---|---|---|---|---|---|---|---|---|---|---|---|---|---|---|---|---|---|---|---|---|---|---|---|---|---|---|---|---|---|---|---|---|---|---|---|---|---|---|---|---|---|---|---|---|---|---|---|---|---|---|---|---|---|---|---|---|---|---|---|---|---|---|---|---|---|---|---|---|---|---|---|---|---|---|---|---|---|---|---|---|---|---|---|---|---|---|---|---|---|---|---|---|---|---|---|---|---|---|---|---|---|---|---|---|---|---|---|---|---|---|---|---|---|---|---|---|---|---|---|
| |||||||||||||||||||||||||||||||||||||||||||||||||||||||||||||||||||||||||||||||||||||||||||||||||||||||||||||||||||||||||||||||||||||||||||||||||||||||||||||||||||||||||||||||||||||||||||||||||||||||||||||||||||||||||||||||||||||||||||||||||||||||||||||||||||||||||||||||||||||||||||||||||||||||||||||||||||||||||||||||||||||||||||||||||||||||||||||||||||||||||||||||||||||||||||
| Items | ||||||||||||||||||||||||||||||||||||||||||||||||||||||||||||||||
|---|---|---|---|---|---|---|---|---|---|---|---|---|---|---|---|---|---|---|---|---|---|---|---|---|---|---|---|---|---|---|---|---|---|---|---|---|---|---|---|---|---|---|---|---|---|---|---|---|---|---|---|---|---|---|---|---|---|---|---|---|---|---|---|---|
| ||||||||||||||||||||||||||||||||||||||||||||||||||||||||||||||||
Having earned your Relic Badge, you've now done everything there is to do in Hearthome. It's time for to move east to Route 209, however before leaving, consider purchasing Great Balls from the Poké Mart - they have a 50% higher catch rate than regular Poké Balls. Make sure your team is fully healed, because as you enter the Gate that separates Hearthome City from Route 209, you'll encounter Barry, who will challenge you to another battle.
This time around he'll have two new Pokémon that represent the types of the Starter Pokémon that he didn't pick at the beginning of the game. Additionally both his starter Pokémon and his Starly have evolved into their second forms. He shouldn't be that tough if you have a well leveled team, since your selection of Pokémon is much greater than it was last time.
From the entrance, go east, then north to travel directly to Solaceon Town, collecting any items that are of interest to you. On this route, there is the Broken Tower, which becomes the Hallowed Tower when an Odd Keystone (available from a Black Belt on Route 208, hidden in Twinleaf Town, or mineable in the Sinnoh Underground) is placed in it. After speaking to 32 people in the Underground, a level 25 Spiritomb will appear to battle you. You will pass the Lost Tower near the end of the route, but you will need to get HM05 (Defog) first for dealing with the fog on the higher floors. Fortunately, HM05 is available not far from here, so pass it by for now. Follow the path north to reach Solaceon Town.
|
Platinum walkthrough |
|
