Appendix:Platinum walkthrough/Section 13: Difference between revisions
m (→Route 218) |
Tyler53841 (talk | contribs) m (→Final Area) |
||
| (14 intermediate revisions by 11 users not shown) | |||
| Line 1: | Line 1: | ||
==Route 221== | ==Route 221== | ||
[[File:Sinnoh Route 221 | [[File:Sinnoh Route 221 Pt.png|thumb|350px|Route 221]] | ||
{| class="expandable" align="center" style="background: #{{platinum color}}; | {| class="expandable" align="center" style="background: #{{platinum color}}; {{roundy|10px}}; border: 5px solid #{{platinum color light}};" | ||
|- align="center" | |- align="center" | ||
! Available Pokémon | ! Available Pokémon | ||
| Line 31: | Line 31: | ||
{{Catch/footer|land}} | {{Catch/footer|land}} | ||
|} | |} | ||
{| class="expandable" align="center" style="background: #{{platinum color}}; | {| class="expandable" align="center" style="background: #{{platinum color}}; {{roundy|10px}}; border: 5px solid #{{platinum color light}};" | ||
|- align="center" | |- align="center" | ||
! Trainers | ! Trainers | ||
|- | |- | ||
|{{trainerheader}} | |{{trainerheader}} | ||
{{Trainerentry|Spr DP Swimmer F.png|Swimmer|Vanessa|560|1|055|Golduck|♀|35|None|36=ミナミ|37=Minami}} | |||
{{Trainerdiv}} | |||
{{Trainerentry|Spr DP Swimmer M.png|Swimmer|Dillon|528|2|223|Remoraid|♂|33|None|419|Floatzel|♂|33||None|36=リキオ|37=Rikio}} | {{Trainerentry|Spr DP Swimmer M.png|Swimmer|Dillon|528|2|223|Remoraid|♂|33|None|419|Floatzel|♂|33||None|36=リキオ|37=Rikio}} | ||
{{Trainerdiv}} | {{Trainerdiv}} | ||
{{Trainerentry|Spr DP Fisherman.png|Fisherman|Cory|1088|3|456|Finneon|♂|30|None|456|Finneon|♂|32|None|456|Finneon|♂|34|None|36=マサヒロ|37=Masahiro}} | {{Trainerentry|Spr DP Fisherman.png|Fisherman|Cory|1088|3|456|Finneon|♂|30|None|456|Finneon|♂|32|None|456|Finneon|♂|34|None|36=マサヒロ|37=Masahiro}} | ||
| Line 49: | Line 49: | ||
{{Trainerfooter}} | {{Trainerfooter}} | ||
|} | |} | ||
{| class="expandable" align="center" style="background: #{{platinum color}}; | {| class="expandable" align="center" style="background: #{{platinum color}}; {{roundy|10px}}; border: 5px solid #{{platinum color light}};" | ||
|- align="center" | |- align="center" | ||
! Items | ! Items | ||
| Line 61: | Line 61: | ||
* In the grass below the Berry patch ''(hidden)''|Pt=yes|display={{ball|Ultra}} ×2}} | * In the grass below the Berry patch ''(hidden)''|Pt=yes|display={{ball|Ultra}} ×2}} | ||
{{Itemlist|Hyper Potion|Near the southwest corner of the large southern patch of grass ''(hidden)''|Pt=yes|display={{DL|Potion|Hyper Potion}}}} | {{Itemlist|Hyper Potion|Near the southwest corner of the large southern patch of grass ''(hidden)''|Pt=yes|display={{DL|Potion|Hyper Potion}}}} | ||
{{Itemlist|Max Revive| | {{Itemlist|Max Revive|Just west of the berry patch ''(hidden)''|Pt=yes|display={{DL|Revive|Max Revive}}}} | ||
{{Itemlist|Leppa Berry|Berry patch southeast of the honey tree|Pt=yes|display={{DL|Berry|Leppa Berry}}}} | {{Itemlist|Leppa Berry|Berry patch southeast of the honey tree|Pt=yes|display={{DL|Berry|Leppa Berry}}}} | ||
{{Itemlist|Pecha Berry|Berry patch southeast of the honey tree|Pt=yes|display={{DL|Berry|Pecha Berry}}}} | {{Itemlist|Pecha Berry|Berry patch southeast of the honey tree|Pt=yes|display={{DL|Berry|Pecha Berry}}}} | ||
| Line 71: | Line 71: | ||
|} | |} | ||
Continue east from Route 220. Fight the male Swimmer, and continue east until you reach land. Head east on the northern section Route 221, stopping at the Level House (see below) to pick up the {{DL|Incense|Pure Incense}} which allows you to produce a {{p|Chingling}} Egg when breeding {{p|Chimecho}}. When you reach the Pal Park (inaccessible until after you defeat the Elite Four), head back along the southern part of the route, collecting all the items you missed when travelling on the northern part. Now that you're finished here, it's time to Fly back to [[Jubilife City]] and head northwest via {{rt|218|Sinnoh}} to reach [[Canalave City]]. | |||
===Level | ===Level House=== | ||
The only | The only house located on Route 221 belongs to an old man who will each ask for a Pokémon at a certain random [[level]] from 1 to 100 each day. The items he'll give you are the {{DL|Type-enhancing item|Black Belt}}, {{DL|In-battle effect item|Expert Belt}}, or {{DL|In-battle effect item|Focus Sash}}. Only one item is given to you out of that particular order when you complete his request, and after he gives you the Focus Sash, the cycle will start over. | ||
For days where the requirement is an extremely high-leveled Pokémon, there isn't much you can do. On some days you might get lucky and be able to use your | For days where the requirement is an extremely high-leveled Pokémon, there isn't much you can do. On some days you might get lucky and be able to use Pokémon from your regular team. For days where low-level Pokémon are needed, the quickest solution is to simply head to an earlier area with an Ultra Ball or two, catch a Pokémon of the appropriate level (if you don't have one in storage already), and bring it to him. | ||
==Route 218== | ==Route 218== | ||
[[File:Sinnoh Route 218 | [[File:Sinnoh Route 218 Pt.png|thumb|275px|Route 218]] | ||
{| class="expandable" align="center" style="background: #{{platinum color}}; | {| class="expandable" align="center" style="background: #{{platinum color}}; {{roundy|10px}}; border: 5px solid #{{platinum color light}};" | ||
|- align="center" | |- align="center" | ||
! Available Pokémon | ! Available Pokémon | ||
| Line 106: | Line 104: | ||
{{Catch/footer|water}} | {{Catch/footer|water}} | ||
|} | |} | ||
{| class="expandable" align="center" style="background: #{{platinum color}}; | {| class="expandable" align="center" style="background: #{{platinum color}}; {{roundy|10px}}; border: 5px solid #{{platinum color light}};" | ||
|- align="center" | |- align="center" | ||
! Trainers | ! Trainers | ||
| Line 120: | Line 118: | ||
{{trainerfooter|water}} | {{trainerfooter|water}} | ||
|} | |} | ||
{| class="expandable" align="center" style="background: #{{platinum color}}; | {| class="expandable" align="center" style="background: #{{platinum color}}; {{roundy|10px}}; border: 5px solid #{{platinum color light}};" | ||
|- align="center" | |- align="center" | ||
! Items | ! Items | ||
| Line 135: | Line 133: | ||
|} | |} | ||
Now that you have {{m|Surf}}, you're able to | Now that you have {{m|Surf}}, you're able to navigate the rest of Route 218 and reach [[Canalave City]], your next destination. There isn't much to do on this short route except for fighting the Trainers and catch [[Mr. Mime]] (this is the only location in Sinnoh where they can be found). | ||
When you enter the [[Gate#Generation IV|guard post]] separating Route 218 from Canalave City, | When you enter the [[Gate#Generation IV|guard post]] separating Route 218 from Canalave City, [[Professor Rowan]]'s assistant will approach and give you upgrade to your [[Pokédex]]. This will allow you to check the differences in appearance between the same Pokémon in their Pokédex entry, such as [[List of Pokémon with gender differences|gender]] or [[List of Pokémon with form differences|form differences]]. | ||
==Canalave City== | ==Canalave City== | ||
[[File:Canalave City Pt.png|thumb|250px|Canalave City]] | [[File:Canalave City Pt.png|thumb|250px|Canalave City]] | ||
{| class="expandable" align="center" style="background: #{{platinum color}}; | {| class="expandable" align="center" style="background: #{{platinum color}}; {{roundy|10px}}; border: 5px solid #{{platinum color light}};" | ||
|- align="center" | |- align="center" | ||
! Available Pokémon | ! Available Pokémon | ||
| Line 150: | Line 148: | ||
{{catch/entry4|073|Tentacruel|no|no|yes|Surf|20-40|all=9%|type1=Water|type2=Poison}} | {{catch/entry4|073|Tentacruel|no|no|yes|Surf|20-40|all=9%|type1=Water|type2=Poison}} | ||
{{catch/entry4|422|Shellos|no|no|yes|Surf|20-30|all=30%|type1=Water}} | {{catch/entry4|422|Shellos|no|no|yes|Surf|20-30|all=30%|type1=Water}} | ||
{{catch/entry4|423|Gastrodon|no|no|yes|Surf|20-40|all=1%|type1=Water}} | {{catch/entry4|423|Gastrodon|no|no|yes|Surf|20-40|all=1%|type1=Water|type2=Ground}} | ||
{{catch/div|water|Fishing}} | {{catch/div|water|Fishing}} | ||
{{catch/entry4|129|Magikarp|no|no|yes|Fish Old|3-15|all=100%|type1=Water}} | {{catch/entry4|129|Magikarp|no|no|yes|Fish Old|3-15|all=100%|type1=Water}} | ||
| Line 160: | Line 158: | ||
{{catch/footer|city}} | {{catch/footer|city}} | ||
|} | |} | ||
{| class="expandable" align="center" style="background: #{{platinum color}}; | {| class="expandable" align="center" style="background: #{{platinum color}}; {{roundy|10px}}; border: 5px solid #{{platinum color light}};" | ||
|- align="center" | |- align="center" | ||
! Items | ! Items | ||
| Line 171: | Line 169: | ||
|} | |} | ||
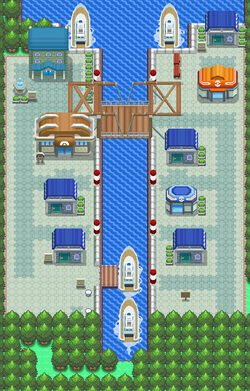
When you first enter Canalave City, | When you first enter Canalave City, be sure to visit the Pokémon Center to heal and prepare your team - when you try to cross the bridge your rival {{ga|Barry}} will show up and challenge you to test your skills. | ||
{| align="center" | {| align="center" | ||
| Line 412: | Line 410: | ||
|} | |} | ||
Barry now has a {{p|Heracross}} on his team, but a powerful {{type|Flying}} move can easily beat it. Unless you have an especially fast {{type|Psychic}} | Barry now has a {{p|Heracross}} on his team, but a powerful {{type|Flying}} move can easily beat it. Unless you have an especially fast one, avoid using {{type|Psychic}}-types as Heracross's {{type|Dark}} move {{m|Night Slash}} will counter it. Four members of Barry's team have reached their highest evolutionary form, but they shouldn't be too much of a problem as long as your party is at least at Level 35 and has good type coverage. After the battle, Barry will rant a bit (as usual) before heading off towards the library. | ||
The [[Move Deleter]] resides in the house just north of the [[Poké Mart]]. He will be able to remove any unwanted moves in your Pokémon's present moveset including [[HM]] moves. This is the only way for a Pokémon to forget a HM. | The [[Move Deleter]] resides in the house just north of the [[Poké Mart]]. He will be able to remove any unwanted moves in your Pokémon's present moveset including [[HM]] moves. This is the only way for a Pokémon to forget a HM. | ||
| Line 418: | Line 416: | ||
The southernmost house on the west side of town belongs to a {{tc|Sailor}} named [[Eldritch]], who handles the ferry in town. Nothing important will happen here until the post-game after obtaining the [[National Pokédex]]. Eldritch is waiting near his boat at the dock nearby, and he can take you to [[Iron Island]]. | The southernmost house on the west side of town belongs to a {{tc|Sailor}} named [[Eldritch]], who handles the ferry in town. Nothing important will happen here until the post-game after obtaining the [[National Pokédex]]. Eldritch is waiting near his boat at the dock nearby, and he can take you to [[Iron Island]]. | ||
You also have the option of challenging the [[Canalave Gym]] if you want, but let's go to Iron Island first for some training. Before talking to Eldritch, use {{m|Surf}} to travel south from the wharf to find a hidden area where {{TM|89|U-turn}} is located. Now use the ferry to travel to Iron Island. | You also have the option of challenging the [[Canalave Gym]] if you want, but let's go to Iron Island first for some training, as Barry suggests. Before talking to Eldritch, use {{m|Surf}} to travel south from the wharf to find a hidden area where {{TM|89|U-turn}} is located. Now use the ferry to travel to Iron Island. | ||
==Iron Island== | ==Iron Island== | ||
| Line 424: | Line 422: | ||
===Outside=== | ===Outside=== | ||
{| class="expandable" align="center" style="background: #{{platinum color}}; | {| class="expandable" align="center" style="background: #{{platinum color}}; {{roundy|10px}}; border: 5px solid #{{platinum color light}};" | ||
|- align="center" | |- align="center" | ||
! Available Pokémon (Outside) | ! Available Pokémon (Outside) | ||
| Line 443: | Line 441: | ||
{{catch/footer|water}} | {{catch/footer|water}} | ||
|} | |} | ||
{| class="expandable" align="center" style="background: #{{platinum color}}; | {| class="expandable" align="center" style="background: #{{platinum color}}; {{roundy|10px}}; border: 5px solid #{{platinum color light}};" | ||
|- align="center" | |- align="center" | ||
! Items (Outside) | ! Items (Outside) | ||
| Line 454: | Line 452: | ||
|} | |} | ||
Make sure your that [[party]] only contains five Pokémon since you'll receive a | Make sure your that [[party]] only contains five Pokémon since you'll receive a [[Pokémon Egg]] toward the end of the maze. Make sure your team is well-balanced and has {{t|Fire}}-, {{t|Flying}}-, {{t|Ground}}-, {{t|Water}}-, and {{t|Fighting}}-type moves, since they will be helpful here in the long run. Use the [[Dowsing Machine]] on your [[Pokétch]] to find a hidden {{DL|Exchangeable item|Star Piece}} that you can exchange at [[Fuego Ironworks]] for colored [[shard]]s. Interior {{DL|Exchangeable item|Star Piece}}s will regenerate each day. | ||
At the entrance to the mine you'll meet a man named [[Riley]], who will give you {{HM|04|Strength}}. He mentions he is training inside and | At the entrance to the mine you'll meet a man named [[Riley]], who will give you {{HM|04|Strength}}. He mentions he is training inside and proposes you join him. While receiving the HM is the only required part of your mission here, you'll find some good items, get valuable training, and {{p|Riolu|an extremely rare Pokémon}} if you explore the whole mine. | ||
===1F=== | ===1F=== | ||
[[File:Iron Island 1F Pt.png|left|thumb|180px|Iron Island 1F]] | [[File:Iron Island 1F Pt.png|left|thumb|180px|Iron Island 1F]] | ||
{| class="expandable" align="center" style="background: #{{platinum color}}; | {| class="expandable" align="center" style="background: #{{platinum color}}; {{roundy|10px}}; border: 5px solid #{{platinum color light}};" | ||
|- align="center" | |- align="center" | ||
! Available Pokémon (1F) | ! Available Pokémon (1F) | ||
| Line 478: | Line 476: | ||
[[File:Iron Island B1F L Pt.png|left|thumb|180px|Iron Island B1F Left]] | [[File:Iron Island B1F L Pt.png|left|thumb|180px|Iron Island B1F Left]] | ||
[[File:Iron Island B1F R Pt.png|right|thumb|180px|Iron Island B1F Right]] | [[File:Iron Island B1F R Pt.png|right|thumb|180px|Iron Island B1F Right]] | ||
{| class="expandable" align="center" style="background: #{{platinum color}}; | {| class="expandable" align="center" style="background: #{{platinum color}}; {{roundy|10px}}; border: 5px solid #{{platinum color light}};" | ||
|- align="center" | |- align="center" | ||
! Available Pokémon (B1F) | ! Available Pokémon (B1F) | ||
| Line 491: | Line 489: | ||
{{catch/footer|cave}} | {{catch/footer|cave}} | ||
|} | |} | ||
{| class="expandable" align="center" style="background: #{{platinum color}}; | {| class="expandable" align="center" style="background: #{{platinum color}}; {{roundy|10px}}; border: 5px solid #{{platinum color light}};" | ||
|- align="center" | |- align="center" | ||
! Trainers (B1F) | ! Trainers (B1F) | ||
| Line 501: | Line 499: | ||
{{Trainerfooter|cave|1}} | {{Trainerfooter|cave|1}} | ||
|} | |} | ||
{| class="expandable" align="center" style="background: #{{platinum color}}; | {| class="expandable" align="center" style="background: #{{platinum color}}; {{roundy|10px}}; border: 5px solid #{{platinum color light}};" | ||
|- align="center" | |- align="center" | ||
! Items (B1F) | ! Items (B1F) | ||
| Line 517: | Line 515: | ||
|} | |} | ||
In the west side of B1F there | In the west side of B1F there are just two items and a single Trainer. One of these items is the {{DL|Evolution-inducing held item|Protector}} which can evolve {{p|Rhydon}} into {{p|Rhyperior}} if it is held while traded. Afterwards, return to 1F and this time use the right-hand stairs to reach the east side of B1F. | ||
On the right-hand side of B1F, you will face one Trainer and find some more items, including another hidden Star Piece. Make sure to keep an eye on your bearings here since it is easy to get lost in this maze. You need to stay on the correct path to find the items and get to the small elevator that will take you down to B2F. Once again, there are two pathways. Since Riley can be found by taking the left stairs, let's go right first so afterwards Riley can heal your team. | On the right-hand side of B1F, you will again face one Trainer and find some more items, including another hidden Star Piece. Make sure to keep an eye on your bearings here since it is easy to get lost in this maze. You need to stay on the correct path to find the items and get to the small elevator that will take you down to B2F. Once again, there are two pathways. Since Riley can be found by taking the left stairs, let's go right first so afterwards Riley can heal your team. | ||
===B2F=== | ===B2F=== | ||
[[File:Iron Island B2F L Pt.png|left|thumb|180px|Iron Island B2F Left]] | [[File:Iron Island B2F L Pt.png|left|thumb|180px|Iron Island B2F Left]] | ||
[[File:Iron Island B2F R Pt.png|right|thumb|180px|Iron Island B2F Right]] | [[File:Iron Island B2F R Pt.png|right|thumb|180px|Iron Island B2F Right]] | ||
{| class="expandable" align="center" style="background: #{{platinum color}}; | {| class="expandable" align="center" style="background: #{{platinum color}}; {{roundy|10px}}; border: 5px solid #{{platinum color light}};" | ||
|- align="center" | |- align="center" | ||
! Available Pokémon (B2F) | ! Available Pokémon (B2F) | ||
| Line 541: | Line 539: | ||
{{catch/footer|cave}} | {{catch/footer|cave}} | ||
|} | |} | ||
{| class="expandable" align="center" style="background: #{{platinum color}}; | {| class="expandable" align="center" style="background: #{{platinum color}}; {{roundy|10px}}; border: 5px solid #{{platinum color light}};" | ||
|- align="center" | |- align="center" | ||
! Trainers (B2F) | ! Trainers (B2F) | ||
| Line 567: | Line 565: | ||
{{Trainerfooter|cave|1}} | {{Trainerfooter|cave|1}} | ||
|} | |} | ||
{| class="expandable" align="center" style="background: #{{platinum color}}; | {| class="expandable" align="center" style="background: #{{platinum color}}; {{roundy|10px}}; border: 5px solid #{{platinum color light}};" | ||
|- align="center" | |- align="center" | ||
! Items (B2F) | ! Items (B2F) | ||
| Line 589: | Line 587: | ||
|} | |} | ||
In B2F's east side you will face two Trainers, and also find {{TM|23|Iron Tail}}. If you follow the path that leads to the other side of where the TM was found and use your Dowsing Machine, you will find yet another hidden Star Piece. | |||
Once you reach the left side of B2F, Riley will team up with you to investigate the mystery of a disturbance here in the mine. Just like [[Cheryl]] and [[Mira]], he will heal your team after every battle, and double battles will also occur in the wild. Therefore, you should train as much as possible while he is with you. | |||
Once you reach the left side of B2F, Riley will team up with you to investigate the mystery of a disturbance here in the mine. Just like [[Cheryl]] and [[Mira]], he will heal your team after every battle. Therefore, you should train as much as possible while he is with you. | |||
{| style="margin: auto;" | |||
| | |||
{{Party/Single | {{Party/Single | ||
|color={{attack color}} | |color={{attack color}} | ||
| Line 621: | Line 619: | ||
|move4=Quick Attack|move4type=Normal|move4cat=Physical}} | |move4=Quick Attack|move4type=Normal|move4cat=Physical}} | ||
{{Party/Footer}} | {{Party/Footer}} | ||
|} | |||
Remember, like all [[ | Remember, like all [[Multi Battle]] situations, two wild Pokémon will appear at once and you can't catch a wild Pokémon unless you knock the other out. Since the Trainers in this room are positioned to where you could face them in a [[Double Battle]], do not waste the opportunity to do so, if you wish. | ||
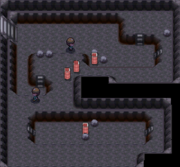
Just like B1F's east room, B2F's west room is also a maze so make sure to get your bearings for collecting items or facing Trainers. Your | Just like B1F's east room, B2F's west room is also a maze so make sure to get your bearings for collecting items or facing Trainers. Your final target is the pair of [[Galactic Grunt]]s in the south area of the room - be warned, Riley will leave after you face them. After defeating {{tc|Worker}}s Brendon and Quentin head southwest and follow the path to reach a ledge above them and then use the Dowsing Machine to find a fourth hidden Star Piece. Also in the southeastern area down some small stairs, the Dowsing Machine will reveal a hidden item, the {{DL|Plate|Iron Plate}}. | ||
After getting past the somewhat tricky {{tc|Ace Trainer}} duo Jonah and Brenda, you'll find the Galactic | After getting past the somewhat tricky {{tc|Ace Trainer}} duo Jonah and Brenda, you'll find the Galactic Grunts - the disturbance in the cave. | ||
{| class="expandable" align="center" style="background: #{{platinum color}}; | {| class="expandable" align="center" style="background: #{{platinum color}}; {{roundy|10px}}; border: 5px solid #{{platinum color light}};" | ||
|- align="center" | |- align="center" | ||
! Team Galactic | ! Team Galactic | ||
| Line 640: | Line 639: | ||
|} | |} | ||
After you defeat the grunts, Riley will thank you for your help and will give you a Pokémon | After you defeat the grunts, Riley will thank you for your help and will give you a Pokémon Egg containing {{p|Riolu}}, {{p|Lucario}}'s pre-evolution. As long as you remembered to only bring five Pokémon with you, there should be no problem; if not, you'll have to return to Canalave City first to empty a slot in your team and then backtrack to get the Egg. | ||
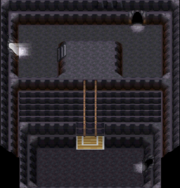
All that's left is taking the elevator down and entering the final room. | All that's left is taking the elevator down and entering the final room. | ||
| Line 647: | Line 646: | ||
[[File:Iron Island Exit Pt.png|left|thumb|180px|Iron Island final area]] | [[File:Iron Island Exit Pt.png|left|thumb|180px|Iron Island final area]] | ||
[[File:Iron Island Registeel Pt.png|right|thumb|180px|The empty Registeel room]] | [[File:Iron Island Registeel Pt.png|right|thumb|180px|The empty Registeel room]] | ||
{| class="expandable" align="center" style="background: #{{platinum color}}; | {| class="expandable" align="center" style="background: #{{platinum color}}; {{roundy|10px}}; border: 5px solid #{{platinum color light}};" | ||
|- align="center" | |- align="center" | ||
! Available Pokémon (Final Area) | ! Available Pokémon (Final Area) | ||
| Line 661: | Line 660: | ||
{{catch/footer|cave}} | {{catch/footer|cave}} | ||
|} | |} | ||
{| class="expandable" align="center" style="background: #{{platinum color}}; | {| class="expandable" align="center" style="background: #{{platinum color}}; {{roundy|10px}}; border: 5px solid #{{platinum color light}};" | ||
|- align="center" | |- align="center" | ||
! Items (Final Area) | ! Items (Final Area) | ||
| Line 674: | Line 673: | ||
Use the elevator here to go back up to ground level and you'll find the {{evostone|Shiny Stone}}, for evolving {{p|Togetic}} into {{p|Togekiss}} or {{p|Roselia}} into {{p|Roserade}}. Since you can only get one of these the regular way, you'll have to raise a Pokémon that has {{a|Pickup}} as far as Level 41 to have a chance of getting another Shiny Stone. | Use the elevator here to go back up to ground level and you'll find the {{evostone|Shiny Stone}}, for evolving {{p|Togetic}} into {{p|Togekiss}} or {{p|Roselia}} into {{p|Roserade}}. Since you can only get one of these the regular way, you'll have to raise a Pokémon that has {{a|Pickup}} as far as Level 41 to have a chance of getting another Shiny Stone. | ||
Also, you'll find the entrance to the [[Iron Ruins]], which will become a shrine to {{p|Registeel}} if you have an {{pkmn2|event}} {{p|Regigigas}}. If not, it will be an empty room where you can find a Metal Coat. Even if you ''do'' have the event Regigigas, you won't be able to face Registeel until you have the National Pokédex. | Also, you'll find the entrance to the [[Iron Ruins]], which will become a shrine to {{p|Registeel}} if you have an {{pkmn2|event}} {{p|Regigigas}}. If not, it will be an empty room where you can find a Metal Coat. Even if you ''do'' have the event Regigigas, you won't be able to {{DL|Appendix:Platinum walkthrough/Catching the Legendary titans|Iron Ruins|face Registeel}} until you have the National Pokédex. | ||
Leave Iron Island and return to Canalave City so you can have your Gym battle. If you have time, you could hatch the Egg and raise Riolu's [[happiness]] factor to evolve it since Lucario will be of great use in the next two Gym battles, especially since it learns {{m|Aura Sphere}} at Level 37. Just remember, Riolu only evolves during the [[Time#Generation IV|daytime]] once its happiness factor has been raised high enough. | |||
Revision as of 16:07, 6 October 2016
Route 221
| Available Pokémon | ||||||||||||||||||||||||||||||||||||||||||||||||||||||||||||||||||||||||||||||||||||||||||||||||||||||||||||||||||||||||||||||||||||||||||||||||||||||||||||||||||||||||||||||||||||||||||||||||||||||||||||||||||||||||||||||||||||||||||||||||||||||||||||||||||||||||||||||||||||||||||||||||||||||||||||||||||||||||||||||||||||||||||||||||||||||||||||||||||||||||||||||||||||||||||||||||||||||
|---|---|---|---|---|---|---|---|---|---|---|---|---|---|---|---|---|---|---|---|---|---|---|---|---|---|---|---|---|---|---|---|---|---|---|---|---|---|---|---|---|---|---|---|---|---|---|---|---|---|---|---|---|---|---|---|---|---|---|---|---|---|---|---|---|---|---|---|---|---|---|---|---|---|---|---|---|---|---|---|---|---|---|---|---|---|---|---|---|---|---|---|---|---|---|---|---|---|---|---|---|---|---|---|---|---|---|---|---|---|---|---|---|---|---|---|---|---|---|---|---|---|---|---|---|---|---|---|---|---|---|---|---|---|---|---|---|---|---|---|---|---|---|---|---|---|---|---|---|---|---|---|---|---|---|---|---|---|---|---|---|---|---|---|---|---|---|---|---|---|---|---|---|---|---|---|---|---|---|---|---|---|---|---|---|---|---|---|---|---|---|---|---|---|---|---|---|---|---|---|---|---|---|---|---|---|---|---|---|---|---|---|---|---|---|---|---|---|---|---|---|---|---|---|---|---|---|---|---|---|---|---|---|---|---|---|---|---|---|---|---|---|---|---|---|---|---|---|---|---|---|---|---|---|---|---|---|---|---|---|---|---|---|---|---|---|---|---|---|---|---|---|---|---|---|---|---|---|---|---|---|---|---|---|---|---|---|---|---|---|---|---|---|---|---|---|---|---|---|---|---|---|---|---|---|---|---|---|---|---|---|---|---|---|---|---|---|---|---|---|---|---|---|---|---|---|---|---|---|---|---|---|---|---|---|---|---|---|---|---|---|---|---|---|---|---|---|---|---|---|---|---|---|---|---|---|---|---|---|---|---|---|---|---|---|---|---|---|---|---|---|---|---|---|---|---|---|---|---|---|---|---|---|---|---|---|---|---|---|---|---|
| ||||||||||||||||||||||||||||||||||||||||||||||||||||||||||||||||||||||||||||||||||||||||||||||||||||||||||||||||||||||||||||||||||||||||||||||||||||||||||||||||||||||||||||||||||||||||||||||||||||||||||||||||||||||||||||||||||||||||||||||||||||||||||||||||||||||||||||||||||||||||||||||||||||||||||||||||||||||||||||||||||||||||||||||||||||||||||||||||||||||||||||||||||||||||||||||||||||||
| Trainers | ||||||||||||||||||||||||||||||||||||||||||||||||||||||||||||||||||||||||||||||||||||||||||||||||||||||||||||||||||||||||||||||||
|---|---|---|---|---|---|---|---|---|---|---|---|---|---|---|---|---|---|---|---|---|---|---|---|---|---|---|---|---|---|---|---|---|---|---|---|---|---|---|---|---|---|---|---|---|---|---|---|---|---|---|---|---|---|---|---|---|---|---|---|---|---|---|---|---|---|---|---|---|---|---|---|---|---|---|---|---|---|---|---|---|---|---|---|---|---|---|---|---|---|---|---|---|---|---|---|---|---|---|---|---|---|---|---|---|---|---|---|---|---|---|---|---|---|---|---|---|---|---|---|---|---|---|---|---|---|---|---|---|
| ||||||||||||||||||||||||||||||||||||||||||||||||||||||||||||||||||||||||||||||||||||||||||||||||||||||||||||||||||||||||||||||||
| Items | ||||||||||||||||||||||||||||||||||||||||||||||||||||||||
|---|---|---|---|---|---|---|---|---|---|---|---|---|---|---|---|---|---|---|---|---|---|---|---|---|---|---|---|---|---|---|---|---|---|---|---|---|---|---|---|---|---|---|---|---|---|---|---|---|---|---|---|---|---|---|---|---|
| ||||||||||||||||||||||||||||||||||||||||||||||||||||||||
Continue east from Route 220. Fight the male Swimmer, and continue east until you reach land. Head east on the northern section Route 221, stopping at the Level House (see below) to pick up the Pure Incense which allows you to produce a Chingling Egg when breeding Chimecho. When you reach the Pal Park (inaccessible until after you defeat the Elite Four), head back along the southern part of the route, collecting all the items you missed when travelling on the northern part. Now that you're finished here, it's time to Fly back to Jubilife City and head northwest via Route 218 to reach Canalave City.
Level House
The only house located on Route 221 belongs to an old man who will each ask for a Pokémon at a certain random level from 1 to 100 each day. The items he'll give you are the Black Belt, Expert Belt, or Focus Sash. Only one item is given to you out of that particular order when you complete his request, and after he gives you the Focus Sash, the cycle will start over.
For days where the requirement is an extremely high-leveled Pokémon, there isn't much you can do. On some days you might get lucky and be able to use Pokémon from your regular team. For days where low-level Pokémon are needed, the quickest solution is to simply head to an earlier area with an Ultra Ball or two, catch a Pokémon of the appropriate level (if you don't have one in storage already), and bring it to him.
Route 218
| Available Pokémon | |||||||||||||||||||||||||||||||||||||||||||||||||||||||||||||||||||||||||||||||||||||||||||||||||||||||||||||||||||||||||||||||||||||||||||||||||||||||||||||||||||||||||||||||||||||||||||||||||||||||||||||||||||||||||||||||||||||||||||||||||||||||||||||||||||||||||||||||||||||||||||||||||||||||
|---|---|---|---|---|---|---|---|---|---|---|---|---|---|---|---|---|---|---|---|---|---|---|---|---|---|---|---|---|---|---|---|---|---|---|---|---|---|---|---|---|---|---|---|---|---|---|---|---|---|---|---|---|---|---|---|---|---|---|---|---|---|---|---|---|---|---|---|---|---|---|---|---|---|---|---|---|---|---|---|---|---|---|---|---|---|---|---|---|---|---|---|---|---|---|---|---|---|---|---|---|---|---|---|---|---|---|---|---|---|---|---|---|---|---|---|---|---|---|---|---|---|---|---|---|---|---|---|---|---|---|---|---|---|---|---|---|---|---|---|---|---|---|---|---|---|---|---|---|---|---|---|---|---|---|---|---|---|---|---|---|---|---|---|---|---|---|---|---|---|---|---|---|---|---|---|---|---|---|---|---|---|---|---|---|---|---|---|---|---|---|---|---|---|---|---|---|---|---|---|---|---|---|---|---|---|---|---|---|---|---|---|---|---|---|---|---|---|---|---|---|---|---|---|---|---|---|---|---|---|---|---|---|---|---|---|---|---|---|---|---|---|---|---|---|---|---|---|---|---|---|---|---|---|---|---|---|---|---|---|---|---|---|---|---|---|---|---|---|---|---|---|---|---|---|---|---|---|---|---|---|---|---|---|---|---|---|---|---|---|---|---|---|---|---|---|
| |||||||||||||||||||||||||||||||||||||||||||||||||||||||||||||||||||||||||||||||||||||||||||||||||||||||||||||||||||||||||||||||||||||||||||||||||||||||||||||||||||||||||||||||||||||||||||||||||||||||||||||||||||||||||||||||||||||||||||||||||||||||||||||||||||||||||||||||||||||||||||||||||||||||
| Trainers | ||||||||||||||||||||||||||||||||||||||||||||||||||||||||||||||||||||||||||||||||||||||||||||||||||||||||
|---|---|---|---|---|---|---|---|---|---|---|---|---|---|---|---|---|---|---|---|---|---|---|---|---|---|---|---|---|---|---|---|---|---|---|---|---|---|---|---|---|---|---|---|---|---|---|---|---|---|---|---|---|---|---|---|---|---|---|---|---|---|---|---|---|---|---|---|---|---|---|---|---|---|---|---|---|---|---|---|---|---|---|---|---|---|---|---|---|---|---|---|---|---|---|---|---|---|---|---|---|---|---|---|---|
| ||||||||||||||||||||||||||||||||||||||||||||||||||||||||||||||||||||||||||||||||||||||||||||||||||||||||
| Items | ||||||||||||||||||||||||||||||||||||
|---|---|---|---|---|---|---|---|---|---|---|---|---|---|---|---|---|---|---|---|---|---|---|---|---|---|---|---|---|---|---|---|---|---|---|---|---|
| ||||||||||||||||||||||||||||||||||||
Now that you have Surf, you're able to navigate the rest of Route 218 and reach Canalave City, your next destination. There isn't much to do on this short route except for fighting the Trainers and catch Mr. Mime (this is the only location in Sinnoh where they can be found).
When you enter the guard post separating Route 218 from Canalave City, Professor Rowan's assistant will approach and give you upgrade to your Pokédex. This will allow you to check the differences in appearance between the same Pokémon in their Pokédex entry, such as gender or form differences.
Canalave City
| Available Pokémon | ||||||||||||||||||||||||||||||||||||||||||||||||||||||||||||||||||||||||||||||||||||||||||||||||||||||||||||||||||||||||||||||||||||||||||||||||||||||||||||||||||||||||||||||||||||||||||||||||||||
|---|---|---|---|---|---|---|---|---|---|---|---|---|---|---|---|---|---|---|---|---|---|---|---|---|---|---|---|---|---|---|---|---|---|---|---|---|---|---|---|---|---|---|---|---|---|---|---|---|---|---|---|---|---|---|---|---|---|---|---|---|---|---|---|---|---|---|---|---|---|---|---|---|---|---|---|---|---|---|---|---|---|---|---|---|---|---|---|---|---|---|---|---|---|---|---|---|---|---|---|---|---|---|---|---|---|---|---|---|---|---|---|---|---|---|---|---|---|---|---|---|---|---|---|---|---|---|---|---|---|---|---|---|---|---|---|---|---|---|---|---|---|---|---|---|---|---|---|---|---|---|---|---|---|---|---|---|---|---|---|---|---|---|---|---|---|---|---|---|---|---|---|---|---|---|---|---|---|---|---|---|---|---|---|---|---|---|---|---|---|---|---|---|---|---|---|---|
| ||||||||||||||||||||||||||||||||||||||||||||||||||||||||||||||||||||||||||||||||||||||||||||||||||||||||||||||||||||||||||||||||||||||||||||||||||||||||||||||||||||||||||||||||||||||||||||||||||||
| Items | ||||||||||||||||||||
|---|---|---|---|---|---|---|---|---|---|---|---|---|---|---|---|---|---|---|---|---|
| ||||||||||||||||||||
When you first enter Canalave City, be sure to visit the Pokémon Center to heal and prepare your team - when you try to cross the bridge your rival Barry will show up and challenge you to test your skills.
Barry now has a Heracross on his team, but a powerful Flying-type move can easily beat it. Unless you have an especially fast one, avoid using Psychic-type-types as Heracross's Dark-type move Night Slash will counter it. Four members of Barry's team have reached their highest evolutionary form, but they shouldn't be too much of a problem as long as your party is at least at Level 35 and has good type coverage. After the battle, Barry will rant a bit (as usual) before heading off towards the library.
The Move Deleter resides in the house just north of the Poké Mart. He will be able to remove any unwanted moves in your Pokémon's present moveset including HM moves. This is the only way for a Pokémon to forget a HM.
The southernmost house on the west side of town belongs to a Sailor named Eldritch, who handles the ferry in town. Nothing important will happen here until the post-game after obtaining the National Pokédex. Eldritch is waiting near his boat at the dock nearby, and he can take you to Iron Island.
You also have the option of challenging the Canalave Gym if you want, but let's go to Iron Island first for some training, as Barry suggests. Before talking to Eldritch, use Surf to travel south from the wharf to find a hidden area where TM89 (U-turn) is located. Now use the ferry to travel to Iron Island.
Iron Island
Outside
| Available Pokémon (Outside) | ||||||||||||||||||||||||||||||||||||||||||||||||||||||||||||||||||||||||||||||||||||||||||||||||||||||||||||||||||||||||||||||||||||||||||||||||||||||||||||||||||||||||||||||||||||||||||||||||||||||||||||||||||||||||
|---|---|---|---|---|---|---|---|---|---|---|---|---|---|---|---|---|---|---|---|---|---|---|---|---|---|---|---|---|---|---|---|---|---|---|---|---|---|---|---|---|---|---|---|---|---|---|---|---|---|---|---|---|---|---|---|---|---|---|---|---|---|---|---|---|---|---|---|---|---|---|---|---|---|---|---|---|---|---|---|---|---|---|---|---|---|---|---|---|---|---|---|---|---|---|---|---|---|---|---|---|---|---|---|---|---|---|---|---|---|---|---|---|---|---|---|---|---|---|---|---|---|---|---|---|---|---|---|---|---|---|---|---|---|---|---|---|---|---|---|---|---|---|---|---|---|---|---|---|---|---|---|---|---|---|---|---|---|---|---|---|---|---|---|---|---|---|---|---|---|---|---|---|---|---|---|---|---|---|---|---|---|---|---|---|---|---|---|---|---|---|---|---|---|---|---|---|---|---|---|---|---|---|---|---|---|---|---|---|---|---|---|---|---|---|---|---|
| ||||||||||||||||||||||||||||||||||||||||||||||||||||||||||||||||||||||||||||||||||||||||||||||||||||||||||||||||||||||||||||||||||||||||||||||||||||||||||||||||||||||||||||||||||||||||||||||||||||||||||||||||||||||||
| Items (Outside) | ||||||||||||||||||||
|---|---|---|---|---|---|---|---|---|---|---|---|---|---|---|---|---|---|---|---|---|
| ||||||||||||||||||||
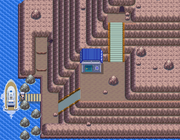
Make sure your that party only contains five Pokémon since you'll receive a Pokémon Egg toward the end of the maze. Make sure your team is well-balanced and has Fire-, Flying-, Ground-, Water-, and Fighting-type moves, since they will be helpful here in the long run. Use the Dowsing Machine on your Pokétch to find a hidden Star Piece that you can exchange at Fuego Ironworks for colored shards. Interior Star Pieces will regenerate each day.
At the entrance to the mine you'll meet a man named Riley, who will give you HM04 (Strength). He mentions he is training inside and proposes you join him. While receiving the HM is the only required part of your mission here, you'll find some good items, get valuable training, and an extremely rare Pokémon if you explore the whole mine.
1F
| Available Pokémon (1F) | ||||||||||||||||||||||||||||||||||||||||||||||||||||||||||||||||||||||||||||||||||||||||||||||||||||||||||
|---|---|---|---|---|---|---|---|---|---|---|---|---|---|---|---|---|---|---|---|---|---|---|---|---|---|---|---|---|---|---|---|---|---|---|---|---|---|---|---|---|---|---|---|---|---|---|---|---|---|---|---|---|---|---|---|---|---|---|---|---|---|---|---|---|---|---|---|---|---|---|---|---|---|---|---|---|---|---|---|---|---|---|---|---|---|---|---|---|---|---|---|---|---|---|---|---|---|---|---|---|---|---|---|---|---|---|
| ||||||||||||||||||||||||||||||||||||||||||||||||||||||||||||||||||||||||||||||||||||||||||||||||||||||||||
Riley will team up with you further on, but you're on your own for the first portion of Iron Island's mine. From the entrance room, first go down the stairs leading left.
B1F
| Available Pokémon (B1F) | |||||||||||||||||||||||||||||||||||||||||||||||||||||||||||||||||||||||||||||||||||||||||||||||||||||||||||||||||||||||||
|---|---|---|---|---|---|---|---|---|---|---|---|---|---|---|---|---|---|---|---|---|---|---|---|---|---|---|---|---|---|---|---|---|---|---|---|---|---|---|---|---|---|---|---|---|---|---|---|---|---|---|---|---|---|---|---|---|---|---|---|---|---|---|---|---|---|---|---|---|---|---|---|---|---|---|---|---|---|---|---|---|---|---|---|---|---|---|---|---|---|---|---|---|---|---|---|---|---|---|---|---|---|---|---|---|---|---|---|---|---|---|---|---|---|---|---|---|---|---|---|---|---|
| |||||||||||||||||||||||||||||||||||||||||||||||||||||||||||||||||||||||||||||||||||||||||||||||||||||||||||||||||||||||||
| Trainers (B1F) | ||||||||||||||||||||||||||||||||||||||
|---|---|---|---|---|---|---|---|---|---|---|---|---|---|---|---|---|---|---|---|---|---|---|---|---|---|---|---|---|---|---|---|---|---|---|---|---|---|---|
| ||||||||||||||||||||||||||||||||||||||
| Items (B1F) | ||||||||||||||||||||||||||||||||
|---|---|---|---|---|---|---|---|---|---|---|---|---|---|---|---|---|---|---|---|---|---|---|---|---|---|---|---|---|---|---|---|---|
| ||||||||||||||||||||||||||||||||
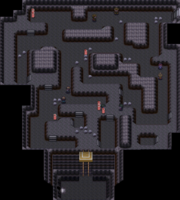
In the west side of B1F there are just two items and a single Trainer. One of these items is the Protector which can evolve Rhydon into Rhyperior if it is held while traded. Afterwards, return to 1F and this time use the right-hand stairs to reach the east side of B1F.
On the right-hand side of B1F, you will again face one Trainer and find some more items, including another hidden Star Piece. Make sure to keep an eye on your bearings here since it is easy to get lost in this maze. You need to stay on the correct path to find the items and get to the small elevator that will take you down to B2F. Once again, there are two pathways. Since Riley can be found by taking the left stairs, let's go right first so afterwards Riley can heal your team.
B2F
| Available Pokémon (B2F) | |||||||||||||||||||||||||||||||||||||||||||||||||||||||||||||||||||||||||||||||||||||||||||||||||||||||||||||||||||||||||||||||||||||||||||||||||||||||||||||||||||||||||||||||||||||||
|---|---|---|---|---|---|---|---|---|---|---|---|---|---|---|---|---|---|---|---|---|---|---|---|---|---|---|---|---|---|---|---|---|---|---|---|---|---|---|---|---|---|---|---|---|---|---|---|---|---|---|---|---|---|---|---|---|---|---|---|---|---|---|---|---|---|---|---|---|---|---|---|---|---|---|---|---|---|---|---|---|---|---|---|---|---|---|---|---|---|---|---|---|---|---|---|---|---|---|---|---|---|---|---|---|---|---|---|---|---|---|---|---|---|---|---|---|---|---|---|---|---|---|---|---|---|---|---|---|---|---|---|---|---|---|---|---|---|---|---|---|---|---|---|---|---|---|---|---|---|---|---|---|---|---|---|---|---|---|---|---|---|---|---|---|---|---|---|---|---|---|---|---|---|---|---|---|---|---|---|---|---|---|---|
| |||||||||||||||||||||||||||||||||||||||||||||||||||||||||||||||||||||||||||||||||||||||||||||||||||||||||||||||||||||||||||||||||||||||||||||||||||||||||||||||||||||||||||||||||||||||
| Trainers (B2F) | ||||||||||||||||||||||||||||||||||||||||||||||||||||||||||||||||||||||||||||||||||||||||||||||||||||||||||||||||||||||||||||||||||||||||||||||||||||||||||||||||||||||||||||||||||||||||||||||||||||||||||||||||||||||
|---|---|---|---|---|---|---|---|---|---|---|---|---|---|---|---|---|---|---|---|---|---|---|---|---|---|---|---|---|---|---|---|---|---|---|---|---|---|---|---|---|---|---|---|---|---|---|---|---|---|---|---|---|---|---|---|---|---|---|---|---|---|---|---|---|---|---|---|---|---|---|---|---|---|---|---|---|---|---|---|---|---|---|---|---|---|---|---|---|---|---|---|---|---|---|---|---|---|---|---|---|---|---|---|---|---|---|---|---|---|---|---|---|---|---|---|---|---|---|---|---|---|---|---|---|---|---|---|---|---|---|---|---|---|---|---|---|---|---|---|---|---|---|---|---|---|---|---|---|---|---|---|---|---|---|---|---|---|---|---|---|---|---|---|---|---|---|---|---|---|---|---|---|---|---|---|---|---|---|---|---|---|---|---|---|---|---|---|---|---|---|---|---|---|---|---|---|---|---|---|---|---|---|---|---|---|---|---|---|---|---|---|---|---|---|
| ||||||||||||||||||||||||||||||||||||||||||||||||||||||||||||||||||||||||||||||||||||||||||||||||||||||||||||||||||||||||||||||||||||||||||||||||||||||||||||||||||||||||||||||||||||||||||||||||||||||||||||||||||||||
| Items (B2F) | ||||||||||||||||||||||||||||||||||||||||||||||||||||||||
|---|---|---|---|---|---|---|---|---|---|---|---|---|---|---|---|---|---|---|---|---|---|---|---|---|---|---|---|---|---|---|---|---|---|---|---|---|---|---|---|---|---|---|---|---|---|---|---|---|---|---|---|---|---|---|---|---|
| ||||||||||||||||||||||||||||||||||||||||||||||||||||||||
In B2F's east side you will face two Trainers, and also find TM23 (Iron Tail). If you follow the path that leads to the other side of where the TM was found and use your Dowsing Machine, you will find yet another hidden Star Piece.
Once you reach the left side of B2F, Riley will team up with you to investigate the mystery of a disturbance here in the mine. Just like Cheryl and Mira, he will heal your team after every battle, and double battles will also occur in the wild. Therefore, you should train as much as possible while he is with you.
| |||||||||||||||||||||||||||||||||||||||||||||||
Remember, like all Multi Battle situations, two wild Pokémon will appear at once and you can't catch a wild Pokémon unless you knock the other out. Since the Trainers in this room are positioned to where you could face them in a Double Battle, do not waste the opportunity to do so, if you wish.
Just like B1F's east room, B2F's west room is also a maze so make sure to get your bearings for collecting items or facing Trainers. Your final target is the pair of Galactic Grunts in the south area of the room - be warned, Riley will leave after you face them. After defeating Workers Brendon and Quentin head southwest and follow the path to reach a ledge above them and then use the Dowsing Machine to find a fourth hidden Star Piece. Also in the southeastern area down some small stairs, the Dowsing Machine will reveal a hidden item, the Iron Plate.
After getting past the somewhat tricky Ace Trainer duo Jonah and Brenda, you'll find the Galactic Grunts - the disturbance in the cave.
| Team Galactic | ||||||||||||||||||||||||||||||||||||||||||||||||||||||
|---|---|---|---|---|---|---|---|---|---|---|---|---|---|---|---|---|---|---|---|---|---|---|---|---|---|---|---|---|---|---|---|---|---|---|---|---|---|---|---|---|---|---|---|---|---|---|---|---|---|---|---|---|---|---|
| ||||||||||||||||||||||||||||||||||||||||||||||||||||||
After you defeat the grunts, Riley will thank you for your help and will give you a Pokémon Egg containing Riolu, Lucario's pre-evolution. As long as you remembered to only bring five Pokémon with you, there should be no problem; if not, you'll have to return to Canalave City first to empty a slot in your team and then backtrack to get the Egg.
All that's left is taking the elevator down and entering the final room.
Final Area
| Available Pokémon (Final Area) | ||||||||||||||||||||||||||||||||||||||||||||||||||||||||||||||||||||||||||||||||||||||||||||||||||||||||||||||||||||||||||||||||||||||||
|---|---|---|---|---|---|---|---|---|---|---|---|---|---|---|---|---|---|---|---|---|---|---|---|---|---|---|---|---|---|---|---|---|---|---|---|---|---|---|---|---|---|---|---|---|---|---|---|---|---|---|---|---|---|---|---|---|---|---|---|---|---|---|---|---|---|---|---|---|---|---|---|---|---|---|---|---|---|---|---|---|---|---|---|---|---|---|---|---|---|---|---|---|---|---|---|---|---|---|---|---|---|---|---|---|---|---|---|---|---|---|---|---|---|---|---|---|---|---|---|---|---|---|---|---|---|---|---|---|---|---|---|---|---|---|---|---|
| ||||||||||||||||||||||||||||||||||||||||||||||||||||||||||||||||||||||||||||||||||||||||||||||||||||||||||||||||||||||||||||||||||||||||
| Items (Final Area) | ||||||||||||||||||||
|---|---|---|---|---|---|---|---|---|---|---|---|---|---|---|---|---|---|---|---|---|
| ||||||||||||||||||||
Use the elevator here to go back up to ground level and you'll find the Shiny Stone, for evolving Togetic into Togekiss or Roselia into Roserade. Since you can only get one of these the regular way, you'll have to raise a Pokémon that has Pickup as far as Level 41 to have a chance of getting another Shiny Stone.
Also, you'll find the entrance to the Iron Ruins, which will become a shrine to Registeel if you have an event Regigigas. If not, it will be an empty room where you can find a Metal Coat. Even if you do have the event Regigigas, you won't be able to face Registeel until you have the National Pokédex.
Leave Iron Island and return to Canalave City so you can have your Gym battle. If you have time, you could hatch the Egg and raise Riolu's happiness factor to evolve it since Lucario will be of great use in the next two Gym battles, especially since it learns Aura Sphere at Level 37. Just remember, Riolu only evolves during the daytime once its happiness factor has been raised high enough.
|
Platinum walkthrough |
|

|
This article is part of Project Walkthroughs, a Bulbapedia project that aims to write comprehensive step-by-step guides on each Pokémon game. |


