Appendix:Omega Ruby and Alpha Sapphire walkthrough/Section 22: Difference between revisions
Jolteon323 (talk | contribs) |
mNo edit summary |
||
| Line 3: | Line 3: | ||
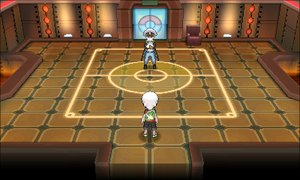
[[File:Ever Grande City Lobby ORAS.png|thumb|Pokémon League Lobby]] | [[File:Ever Grande City Lobby ORAS.png|thumb|Pokémon League Lobby]] | ||
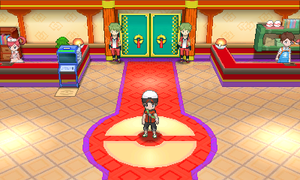
The {{ho|Pokémon League}} building holds the traditional amenities. The Pokémon Center and PC are located to the left, while the Poké Mart is off to the right. It's a good idea to stock up on {{DL|Potion|Hyper Potion}}s, {{DL|Potion|Full Restore}}s, and | The {{ho|Pokémon League}} building holds the traditional amenities. The Pokémon Center and PC are located to the left, while the Poké Mart is off to the right. It's a good idea to stock up on {{DL|Potion|Hyper Potion}}s, {{DL|Potion|Full Restore}}s, and [[Full Heal]]s for the gauntlet ahead. | ||
To increase your chances of victory, you may want to revisit the [[Lilycove Department Store]] and purchase some [[battle item]]s. These items temporarily raise one of a Pokémon's stats during battle. Using a single {{DL|Battle item|X Defense}} or {{DL|Battle item|X Sp. Def}} will boost the respective stat by 50%. Using two is equal to a 100% boost, so the Pokémon sustains half the normal amount of damage. {{DL|Battle item|Dire Hit}}s can be useful as well, as using two or more drastically raises the odds of getting a [[critical hit]]. In addition, using a {{DL|Battle item|Guard Spec.}} protects your Pokémon from stat reduction for five turns. | To increase your chances of victory, you may want to revisit the [[Lilycove Department Store]] and purchase some [[battle item]]s. These items temporarily raise one of a Pokémon's stats during battle. Using a single {{DL|Battle item|X Defense}} or {{DL|Battle item|X Sp. Def}} will boost the respective stat by 50%. Using two is equal to a 100% boost, so the Pokémon sustains half the normal amount of damage. {{DL|Battle item|Dire Hit}}s can be useful as well, as using two or more drastically raises the odds of getting a [[critical hit]]. In addition, using a {{DL|Battle item|Guard Spec.}} protects your Pokémon from stat reduction for five turns. | ||
Revision as of 04:57, 7 May 2017
These pages follow the remade Nintendo 3DS iteration, not Pokémon Ruby and Sapphire. The guide for those games can be found here.
Pokémon League
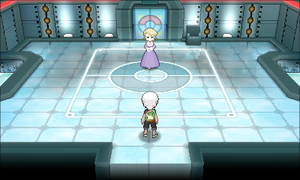
The Pokémon League building holds the traditional amenities. The Pokémon Center and PC are located to the left, while the Poké Mart is off to the right. It's a good idea to stock up on Hyper Potions, Full Restores, and Full Heals for the gauntlet ahead.
To increase your chances of victory, you may want to revisit the Lilycove Department Store and purchase some battle items. These items temporarily raise one of a Pokémon's stats during battle. Using a single X Defense or X Sp. Def will boost the respective stat by 50%. Using two is equal to a 100% boost, so the Pokémon sustains half the normal amount of damage. Dire Hits can be useful as well, as using two or more drastically raises the odds of getting a critical hit. In addition, using a Guard Spec. protects your Pokémon from stat reduction for five turns.
With your preparations complete, talk to the two Ace Trainers guarding the double doors in the room's center. They verify that you've earned all eight Hoenn League Badges before stepping aside, allowing you to enter the depths of the Pokémon League. Challengers must face the Elite Four and Champion in quick succession, with no outside help. Step through the door to reach the first chamber.
Elite Four
Battle 1: Sidney
The first member of the Elite Four is Sidney, a master Dark-type Trainer. His Pokémon are all vulnerable to Bug-, Fighting-, and Fairy-type attacks, and immune to Psychic moves.
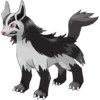
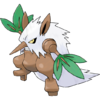
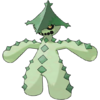
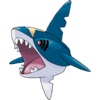
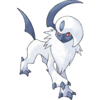
He leads with his Mightyena, which lowers the opponent's Attack with its Intimidate Ability. It may also use Swagger to confuse the target while raising its Attack, in the hopes that it will wear itself down. Use a Persim Berry to cure confusion, or use a special attacker to bypass Intimidate. Shiftry is a Grass/Dark-type, doubly vulnerable to Bug moves. Leaf Blade is its strongest move, but can retaliate against Fighting Pokémon with Extrasensory. Take it out by exploiting one of its many weaknesses. His Sharpedo can be dangerous due to its high Attack and Speed, but its low defenses mean you can make quick work of it. Crunch is its strongest attack, but it can also use Aqua Jet to strike first. Poison Fang also allows it to fight back against Grass and Fairy Pokémon. Cacturne, like Shiftry, has several weaknesses, but may be a bit trickier to take down. Leech Seed lets it slowly sap the target's health to restore its own, and Spiky Shield both protects the user for a turn and inflicts damage if the target attacks with a move that makes contact. Target one of its many weaknesses to knock it out quickly. Last up is his Absol; its high Attack means that any of its moves can pack a punch. Slash, Night Slash, and Psycho Cut each have an increased critical-hit ratio to begin with, but its Super Luck Ability raises the odds even further. Its defenses are mediocre, so use your strongest moves to keep up the pressure and take it down.
| |||||||||||||||||||||||||||||||||||||||||||||||||||||||||||||||||||||||||||||||||||||||||||||||||||||||||||||||||||||||||||||||||||||||||||||||||||||||||||||||||||||||||||||||||||||||
Battle 2: Phoebe
The second member of the Elite Four is Phoebe, a master Ghost-type Trainer. Her Pokémon are generally vulnerable to Ghost- and Dark-type moves, and immune to Normal and Fighting moves.
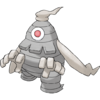
She leads with her Dusclops, a defensive Ghost Pokémon that is more interested in status ailments than direct attacks. Confuse Ray triggers confusion, which may force the target to attack itself. Curse forces it to sacrifice half of its health to lay a curse on the target, which wears away 25% of its maximum health every turn; however, switching your Pokémon out lifts the curse. Use Ghost and Dark attacks to take it down. Sableye has only one weakness: Fairy moves. If your team doesn't have any, then you won't be able to rely on type match-ups right now. Sableye often leads with Fake Out, which causes the target to flinch. Shadow Claw and Power Gem deal damage, but Foul Play can be more dangerous; it calculates damage by using the target's Attack, so don't use a physical fighter against it if you can avoid it. Phoebe has two Banette on her team; one male, one female. The male can wear the target's health away with Toxic. If Grudge is used the turn before being knocked out, it depletes the Power Points of the move that did so. The female can use Will-O-Wisp to burn the target and cut its Attack in half, while Spite gradually wears away the target's Power Points. Both can use Shadow Ball, and can cause minor additional damage with Psychic and Feint Attack, respectively. Lastly, her Dusknoir has better-than-average Attack power, but poor Speed. It has access to Fire Punch, Ice Punch, and Thunder Punch; not only do these allow it to deal super-effective damage against a wide variety of Pokémon, the target may end up Burned, Frozen, or Paralyzed. Its final move, Hex, doubles in power when used against a target with any of these status ailments. Take it down with strong Ghost- or Dark-type attacks to win the battle.
| |||||||||||||||||||||||||||||||||||||||||||||||||||||||||||||||||||||||||||||||||||||||||||||||||||||||||||||||||||||||||||||||||||||||||||||||||||||||||||||||||||||||||||||||||||
Battle 3: Glacia
The third member of the Elite Four is Glacia, a master Ice-type Trainer. Her Pokémon are vulnerable to Rock-, Fire-, and Fighting-type attacks.
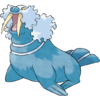
She leads with her first Glalie, which tends to start things off with Hail. With Hail in effect, Blizzard's accuracy rises to 100%, and Pokémon with the Snow Cloak Ability gain a 25% boost to their evasion. In addition, all non-Ice-types take residual damage for five turns. Glalie's Light Screen temporarily reduces the damage taken from Special moves, so moves like Flamethrower are less effective. Its other moves aren't much of a problem, so this may be a good opportunity for set-up moves like Swords Dance. Her second Glalie is much the same; however, it wields Protect in place of Light Screen. It also knows Freeze-Dry, a strong Ice attack that deals super-effective damage to Water Pokémon. As with the first, take it out at your leisure. Glacia also commands two nearly-identical Froslass. The first carries Confuse Ray and Ominous Wind, making it a more defensive fighter. The second has Draining Kiss and Shadow Ball instead, giving it better coverage. Both carry Hail, Blizzard, and the Snow Cloak Ability to abuse the weather conditions. If you brought along the super-ancient Pokémon, its Primal form can completely shut down any hailstorm. Glacia's biggest threat is Walrein, an Ice/Water Pokémon. Its high HP, Defense, and Special Defense means that not even super-effective moves will take it down easily. Decent offensive stats allow it to deal respectable damage with Surf, Blizzard, and Body Slam. Sheer Cold instantly knocks out the target if it hits, but only works on a target of a lower level than the user. Use Grass or Electric moves to take it down quickly.
| |||||||||||||||||||||||||||||||||||||||||||||||||||||||||||||||||||||||||||||||||||||||||||||||||||||||||||||||||||||||||||||||||||||||||||||||||||||||||||||||||||||||||||||||||||||||
Battle 4: Drake
The fourth and final member of the Elite Four is Drake, a master Dragon-type Trainer. His Pokémon are all vulnerable to Dragon- and Fairy-type attacks, while most are also vulnerable to Ice moves.
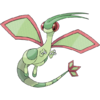
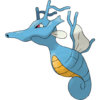
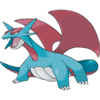
Drake leads with his Altaria, a defensively-oriented Pokémon. Cotton Guard can boost its Defense by a staggering three stages, so special attacks are the better choice. As a Dragon/Flying Pokémon, it takes massive damage from moves like Ice Beam. His Kingdra is a Water/Dragon Pokémon, so you won't be able to exploit a weakness to Ice. It can deal serious damage with Dragon Pulse, Surf, and Ice Beam, so take it down quickly with Dragon or Fairy attacks or the Ice-type move Freeze-Dry which causes 4x damage (as it reverses the Water-type's resistant damage from Ice-type moves into super-effective damage). Drake's team features two Flygon; one male, one female. The male uses strong physical moves, like Earthquake, to deal heavy damage, and may confuse the target with Supersonic. The female uses strong special moves, like Flamethrower, instead. Screech lets it cut the target's Defense in half, though it has no physical moves to use. Both Pokémon are extremely vulnerable to Ice attacks. Drake's final Pokémon is Salamence, a Dragon/Flying type. It has high Attack, better-than-average Speed, and respectable defenses. Its Intimidate Ability weakens physical attackers, so special attackers, especially those with Ice moves, will have the advantage here. Its powerful attacks give it wide coverage, though nothing should pose a threat to any Fairy-type Pokémon.
| |||||||||||||||||||||||||||||||||||||||||||||||||||||||||||||||||||||||||||||||||||||||||||||||||||||||||||||||||||||||||||||||||||||||||||||||||||||||||||||||||||||||||||||||||||||||||||
Defeating the Elite Four has earned you the right to challenge Hoenn's reigning Champion. It is important to note that you will be drawn into battle immediately upon entering the final room, so take a moment to tend to your Pokémon and save your progress before moving on.
Champion
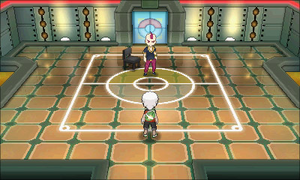
Inside the Champion's hall, you find your mentor Steven waiting for you. It seems that you've been sharing adventures with Hoenn's Champion all along! Steven is curious to know how much you've learned in your travels, and asks that you battle him with all your might. He promises to do the same with his Pokémon, as well. The stage is set for a legendary showdown! As Champion, Steven is well aware of the benefits of a diverse Pokémon team. His Pokémon are of many different types, and don't share nearly as many weaknesses as the Elite Four's teams. However, he still prefers his beloved Steel types, and most of his Pokémon are either part-Rock or part-Ground types—no surprise from this well-known stone collector. With such a varied team, you'll need to switch out your Pokémon as needed to capitalize on the weaknesses of Steven's Pokémon.
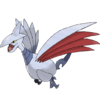
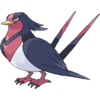
Steven leads with Skarmory, a Steel/Flying Pokémon with very high Defense; this makes physical attacks very ineffective. In addition, its Sturdy Ability allows it to survive at least one strong move that would knock it out with one hit. Skarmory likes to set up with Spikes, which damages any opposing grounded Pokémon switching in. By setting three layers, the opponent loses 25% of their maximum HP on the switch. Toxic can be very disruptive as well, as it badly poisons the target. Its other moves, Aerial Ace and Steel Wing, aren't very threatening. Strike with special-based Fire and Electric attacks to inflict serious damage.
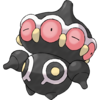
Next up is his Claydol, a Ground/Psychic Pokémon. Claydol plays a defensive role, using Reflect and Light Screen to lessen the amount of damage sustained from physical and special attacks, respectively. This can make any progress very difficult to achieve while these effects are active. TM12 (Taunt) can prevent these status moves for a few turns, while TM31 (Brick Break) lifts their effects before dealing damage. Earth Power and Extrasensory are strong attacks, but it can't make good use of them due to its mediocre offenses. Target it with Water-, Grass-, or Dark-type moves to keep up the pressure.
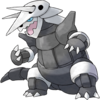
His Aggron, a Steel/Rock Pokémon, has an incredibly high Defense. Like Skarmory, its Sturdy Ability prevents a one-hit knockout. Steven also has three Full Restore at his disposal, and will likely use one to heal a weakened Aggron. Its Attack is very high, and can deal serious damage with any of its moves. Earthquake and Stone Edge provide near-universal coverage, while Iron Tail may lower the target's Defense, allowing it to deal even more damage. It also knows Dragon Claw for good measure, so avoid sending out LatiosOR or LatiasAS against it. Chip away with weaker attacks at first before dealing massive damage with Fighting and Ground moves.
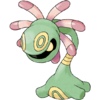
Next is his Cradily, a very defensive Rock/Grass Pokémon. Though it may not deal serious damage, it can still harass the opponent with Confuse Ray and Giga Drain, which steals the target's health for itself. Ancient Power may raise each of its stats by one stage, and Sludge Bomb may poison the target. Be quick to counter its status conditions, and strike back with Bug, Fighting, Ice, or Steel attacks.
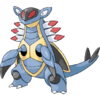
His Armaldo is an unusual Rock/Bug Pokémon. The biggest threats in its arsenal are X-Scissor and Rock Blast, which both receive a same-type attack bonus. Metal Claw has a 10% chance of raising its Attack by one stage, while Crush Claw has a 50% chance of lowering the target's Defense by the same amount. Use items like X Defense or moves like Reflect to boost your Defense and overcome the effects of Crush Claw. Its seldom-seen typing leaves it vulnerable to moves of only a few different types. Use Water-, Rock-, and Steel-type attacks to exploit its weaknesses and knock it out.
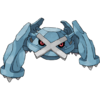
Finally, Steven sends out his heaviest hitter: Metagross, a high-level Steel/Psychic Pokémon. After sending it out, Steven immediately triggers its Mega Evolution. Mega Metagross enjoys a boosted Attack, Special Defense, and Speed, making it far more powerful. As if that weren't intimidating enough, its Tough Claws Ability raises the power of all four of its contact moves by 33%. Bullet Punch strikes first and hard, thanks to Tough Claws and a same-type attack bonus. Should it choose power over speed, Meteor Mash is a strong attack that may raise the user's Attack, allowing it to strike even harder. Zen Headbutt is another STAB-boosted move, while Giga Impact deals heavy damage but forces it to recharge for a turn. It may be a good idea to inflict a Burn, both for its lingering damage and its Attack penalty. Otherwise, hammer away with your strongest special-based Fire, Ground, Ghost, and Dark attacks to claim the knockout and the battle.
With the battle concluded, Steven congratulates you on your impressive victory. He also thanks you for the hard-fought battle, and for demonstrating all you've learned. Just as he is about to crown you the new Hoenn League Champion, May/Brendan rushes in with some advice for challenging the Champion, only to find that you've already done so. Professor Birch arrives not long after, and congratulates you as well.
Hall of Fame
Steven then leads you into the Hall of Fame, where all Champions are honored. He asks that you set your Poké Balls in the machine here, so that your name and those of your Pokémon can be recorded for posterity. During the process, a shot of each fighter appears briefly on-screen. When you leave the Hall of Fame, you are greeted by May/Brendan in the Champion's room. Your friend waited so that she/he could accompany you back to Littleroot Town. The credits begin to roll, and images of several key battles are shown along the way.
Route 103
When the credits end, you find yourself back on Route 103, where you first battled May/Brendan. Your friend then challenges you to one last battle, for old times' sake. Her/His team is the same as the last time you battled in Lilycove City, with the addition of a Raichu and her/his starter Pokémon's item. No experience is won from this battle, and nothing happens if you lose.
Rival Battle 5
 Player chose Treecko
| |||||||||||||||||||||||||||||||||||||||||||||||||||||||||||||||||||||||||||||||||||||||||||||||||||||||||||||||||||||||||||||||||||||||||||||||||||||||||||||||||||||||||||||||||||||||
 Player chose Torchic
| |||||||||||||||||||||||||||||||||||||||||||||||||||||||||||||||||||||||||||||||||||||||||||||||||||||||||||||||||||||||||||||||||||||||||||||||||||||||||||||||||||||||||||||||||||||||||
 Player chose Mudkip
| |||||||||||||||||||||||||||||||||||||||||||||||||||||||||||||||||||||||||||||||||||||||||||||||||||||||||||||||||||||||||||||||||||||||||||||||||||||||||||||||||||||||||||||||||||||
Afterwards, the two of you look up to the sky and see a few shooting stars, and the words, "The End", appear on-screen. The screen fades to black, and the game is saved.
A short cutscene then plays, showing your parents discussing an upcoming meteor shower over Mossdeep City. They had planned to go together, but as Norman has to be at the Gym that day, they wonder what to do with their tickets. The screen darkens, ominous music plays, and a mysterious triangle-shaped symbol appears...
|
Omega Ruby and Alpha Sapphire walkthrough |
|

|
This article is part of Project Walkthroughs, a Bulbapedia project that aims to write comprehensive step-by-step guides on each Pokémon game. |
