Appendix:FireRed and LeafGreen walkthrough/Section 8: Difference between revisions
m (→2F) |
|||
| Line 93: | Line 93: | ||
==== 1F ==== | ==== 1F ==== | ||
[[ | [[File:Silph Co 1F FRLG.png|thumb|thumb|left|Silph Co, 1F]] | ||
The lobby is totally deserted, so take the stairs in the back to 2F. | The lobby is totally deserted, so take the stairs in the back to 2F. | ||
==== 2F ==== | ==== 2F ==== | ||
[[ | [[File:Silph Co 2F FRLG.png|thumb|thumb|right|Silph Co, 2F]] | ||
There's no way to bypass the electronic doors at the moment, so step on either warp to teleport to 8F. | There's no way to bypass the electronic doors at the moment, so step on either warp to teleport to 8F. | ||
| Line 108: | Line 108: | ||
| | | | ||
{{trainerheader}} | {{trainerheader}} | ||
{{trainerentry| | {{trainerentry|FL RocketGruntM.png|Team Rocket|Grunt|800|5|042|Golbat|♂|25||041|Zubat|♂|25||041|Zubat|♂|25||020|Raticate|♂|25||041|Zubat|♂|25||}} | ||
{{trainerdiv}} | {{trainerdiv}} | ||
{{trainerentry| | {{trainerentry|FL Scientist.png|Scientist|Jerry|1344|3|081|Magnemite||28||100|Voltorb||28||082|Magneton||28||}} | ||
{{trainerdiv}} | {{trainerdiv}} | ||
{{trainerentry| | {{trainerentry|FL RocketGruntM.png|Team Rocket|Grunt|928|2|104|Cubone|♂|29||041|Zubat|♂|29||}} | ||
{{trainerfooter}} | {{trainerfooter}} | ||
|} | |} | ||
==== 8F ==== | ==== 8F ==== | ||
[[ | [[File:Silph Co 8F FRLG.png|thumb|thumb|left|Silph Co, 8F]] | ||
Clear out the Rockets here, then take the elevator to 3F. Don't forget to grab the {{DL|Vitamin|Iron}} in the eastern room. | Clear out the Rockets here, then take the elevator to 3F. Don't forget to grab the {{DL|Vitamin|Iron}} in the eastern room. | ||
| Line 127: | Line 127: | ||
| | | | ||
{{trainerheader}} | {{trainerheader}} | ||
{{trainerentry| | {{trainerentry|FL RocketGruntM.png|Team Rocket|Grunt|832|4|020|Raticate|♂|26||042|Golbat|♂|26||024|Arbok|♂|26||109|Koffing|♂|26||}} | ||
{{trainerdiv}} | {{trainerdiv}} | ||
{{trainerentry| | {{trainerentry|FL RocketGruntM.png|Team Rocket|Grunt|896|3|110|Weezing|♂|28||109|Koffing|♂|26||042|Golbat|♂|28||}} | ||
{{trainerdiv}} | {{trainerdiv}} | ||
{{trainerentry| | {{trainerentry|FL Scientist.png|Scientist|Parker|1392|2|088|Grimer|♂|29||101|Electrode||29||}} | ||
{{trainerfooter}} | {{trainerfooter}} | ||
|} | |} | ||
| Line 137: | Line 137: | ||
==== 3F ==== | ==== 3F ==== | ||
[[ | [[File:Silph Co 3F FRLG.png|thumb|thumb|right|Silph Co, 3F]] | ||
Stepping out of the elevator, Trainers can take the warp near the stairs to reach a woman on the second floor. This move tutor will offer to teach {{m|Thunder Wave}} to the player's Pokémon. Warp back to 3F. | Stepping out of the elevator, Trainers can take the warp near the stairs to reach a woman on the second floor. This move tutor will offer to teach {{m|Thunder Wave}} to the player's Pokémon. Warp back to 3F. | ||
| Line 149: | Line 149: | ||
| | | | ||
{{trainerheader}} | {{trainerheader}} | ||
{{trainerentry| | {{trainerentry|FL RocketGruntM.png|Team Rocket|Grunt|896|3|020|Raticate|♂|28||097|Hypno|♂|28||020|Raticate|♂|28||}} | ||
{{trainerfooter}} | {{trainerfooter}} | ||
|} | |} | ||
| Line 155: | Line 155: | ||
==== 4F ==== | ==== 4F ==== | ||
[[ | [[File:Silph Co 4F FRLG.png|thumb|thumb|left|Silph Co, 4F]] | ||
Beat the Rockets here, and climb to the 5th floor. Don't forget the {{TM|41|Torment}} on the table in the eastern room. | Beat the Rockets here, and climb to the 5th floor. Don't forget the {{TM|41|Torment}} on the table in the eastern room. | ||
| Line 165: | Line 165: | ||
| | | | ||
{{trainerheader}} | {{trainerheader}} | ||
{{trainerentry| | {{trainerentry|FL RocketGruntM.png|Team Rocket|Grunt|896|3|023|Ekans|♂|28||041|Zubat|♂|28||104|Cubone|♂|28||}} | ||
{{trainerdiv}} | {{trainerdiv}} | ||
{{trainerentry| | {{trainerentry|FL RocketGruntM.png|Team Rocket|Grunt|928|2|066|Machop|♂|29||096|Drowzee|♂|29||}} | ||
{{trainerfooter}} | {{trainerfooter}} | ||
|} | |} | ||
| Line 173: | Line 173: | ||
==== 5F ==== | ==== 5F ==== | ||
[[ | [[File:Silph Co 5F FRLG.png|thumb|thumb|right|Silph Co, 5F]] | ||
Beat the Rocket and Scientist near the stairs. Follow the hallway to the south to find a Rocket standing next to a warp. Defeat the grunt, take the warp, and warp right back here. Follow the narrow hallway to the right to find the {{DL|List of key items in Generation III|Card Key}}, which opens any of Silph's electronic doors. Go left back towards the Rocket, and open the door to the northwest room for a {{DL|Vitamin|Protein}}. Get upstairs to 6F. | Beat the Rocket and Scientist near the stairs. Follow the hallway to the south to find a Rocket standing next to a warp. Defeat the grunt, take the warp, and warp right back here. Follow the narrow hallway to the right to find the {{DL|List of key items in Generation III|Card Key}}, which opens any of Silph's electronic doors. Go left back towards the Rocket, and open the door to the northwest room for a {{DL|Vitamin|Protein}}. Get upstairs to 6F. | ||
| Line 183: | Line 183: | ||
| | | | ||
{{trainerheader}} | {{trainerheader}} | ||
{{trainerentry| | {{trainerentry|FL RocketGruntM.png|Team Rocket|Grunt|1056|1|097|Hypno|♂|33|None|}} | ||
{{trainerdiv}} | {{trainerdiv}} | ||
{{trainerentry| | {{trainerentry|FL Juggler.png|Juggler|Dalton|1160|2|064|Kadabra|♂|29|None|122|Mr. Mime|♂|29|None|}} | ||
{{trainerdiv}} | {{trainerdiv}} | ||
{{trainerentry| | {{trainerentry|FL Scientist.png|Scientist|Beau|1248|4|082|Magneton||26||081|Magnemite||26||109|Koffing|♂|26||110|Weezing|♂|26||}} | ||
{{trainerdiv}} | {{trainerdiv}} | ||
{{trainerentry| | {{trainerentry|FL RocketGruntM.png|Team Rocket|Grunt|1056|1|024|Arbok|♂|33||}} | ||
{{trainerfooter}} | {{trainerfooter}} | ||
|} | |} | ||
| Line 195: | Line 195: | ||
==== 6F ==== | ==== 6F ==== | ||
[[ | [[File:Silph Co 6F FRLG.png|thumb|thumb|left|Silph Co, 6F]] | ||
Open the door to the southwest room to find an {{DL|Vitamin|HP Up}} and an {{DL|Battle item|X Special}}. Advance to 7F. | Open the door to the southwest room to find an {{DL|Vitamin|HP Up}} and an {{DL|Battle item|X Special}}. Advance to 7F. | ||
| Line 205: | Line 205: | ||
| | | | ||
{{trainerheader}} | {{trainerheader}} | ||
{{trainerentry| | {{trainerentry|FL RocketGruntM.png|Team Rocket|Grunt|928|2|066|Machop|♂|29||067|Machoke|♂|29||}} | ||
{{trainerdiv}} | {{trainerdiv}} | ||
{{trainerentry| | {{trainerentry|FL RocketGruntM.png|Team Rocket|Grunt|896|3|041|Zubat|♂|28||041|Zubat|♂|28||042|Golbat|♂|28||}} | ||
{{trainerdiv}} | {{trainerdiv}} | ||
{{trainerentry| | {{trainerentry|FL Scientist.png|Scientist|Taylor|1200|5|100|Voltorb||25||109|Koffing|♂|25||082|Magneton||25||081|Magnemite||25||109|Koffing|♂|25||}} | ||
{{trainerfooter}} | {{trainerfooter}} | ||
|} | |} | ||
| Line 215: | Line 215: | ||
==== 7F ==== | ==== 7F ==== | ||
[[ | [[File:Silph Co 7F FRLG.png|thumb|thumb|right|Silph Co, 7F]] | ||
Use the {{DL|List of key items in Generation III|Card Key}} to open the eastern door and grab the {{TM|08|Bulk Up}}. After fighting the Rocket along the north wall (next to the counter), walk to the left to see a familiar face in the next room: [[Blue (game)/FireRed and LeafGreen|the rival]], totally unconcerned with the company takeover going on. Follow the hallway south and west, grab the {{DL|Vitamin|Calcium}}, then take the stairs up to 9F (since 8F is already cleared). | Use the {{DL|List of key items in Generation III|Card Key}} to open the eastern door and grab the {{TM|08|Bulk Up}}. After fighting the Rocket along the north wall (next to the counter), walk to the left to see a familiar face in the next room: [[Blue (game)/FireRed and LeafGreen|the rival]], totally unconcerned with the company takeover going on. Follow the hallway south and west, grab the {{DL|Vitamin|Calcium}}, then take the stairs up to 9F (since 8F is already cleared). | ||
| Line 225: | Line 225: | ||
| | | | ||
{{trainerheader}} | {{trainerheader}} | ||
{{trainerentry| | {{trainerentry|FL RocketGruntM.png|Team Rocket|Grunt|928|2|104|Cubone|♂|29||104|Cubone|♂|29||}} | ||
{{trainerdiv}} | {{trainerdiv}} | ||
{{trainerentry| | {{trainerentry|FL RocketGruntM.png|Team Rocket|Grunt|832|4|020|Raticate|♂|26||041|Zubat|♂|26||042|Golbat|♂|26||019|Rattata|♂|26||}} | ||
{{trainerdiv}} | {{trainerdiv}} | ||
{{trainerentry| | {{trainerentry|FL Scientist.png|Scientist|Joshua|1392|2|101|Electrode||29||089|Muk|♂|29||}} | ||
{{trainerdiv}} | {{trainerdiv}} | ||
{{trainerentry| | {{trainerentry|FL RocketGruntM.png|Team Rocket|Grunt|928|2|027|Sandshrew|♂|29||028|Sandslash|♂|29||}} | ||
{{trainerfooter}} | {{trainerfooter}} | ||
|} | |} | ||
| Line 237: | Line 237: | ||
==== 9F ==== | ==== 9F ==== | ||
[[ | [[File:Silph Co 9F FRLG.png|thumb|thumb|left|Silph Co, 9F]] | ||
By now, all of those battles may be taking a toll on the player's team. Walk down the central hallway to the south to fight another Rocket grunt, then open the door nearby and talk to the woman near the beds. To help the player take out the rest of the [[Team Rocket|Rockets]], she restores a Trainer's team to full health. Beat the second Rocket (ignore the warp), and take the stairs to 10F. | By now, all of those battles may be taking a toll on the player's team. Walk down the central hallway to the south to fight another Rocket grunt, then open the door nearby and talk to the woman near the beds. To help the player take out the rest of the [[Team Rocket|Rockets]], she restores a Trainer's team to full health. Beat the second Rocket (ignore the warp), and take the stairs to 10F. | ||
| Line 247: | Line 247: | ||
| | | | ||
{{trainerheader}} | {{trainerheader}} | ||
{{trainerentry| | {{trainerentry|FL RocketGruntM.png|Team Rocket|Grunt|896|3|042|Golbat|♂|28||096|Drowzee|♂|28||097|Hypno|♂|28||}} | ||
{{trainerdiv}} | {{trainerdiv}} | ||
{{trainerentry| | {{trainerentry|FL RocketGruntM.png|Team Rocket|Grunt|896|3|096|Drowzee|♂|28||088|Grimer|♂|28||066|Machop|♂|28|None|}} | ||
{{trainerdiv}} | {{trainerdiv}} | ||
{{trainerentry| | {{trainerentry|FL Scientist.png|Scientist|Ed|1344|3|100|Voltorb||28||082|Magneton||28||109|Koffing|♂|28||}} | ||
{{trainerfooter}} | {{trainerfooter}} | ||
|} | |} | ||
| Line 257: | Line 257: | ||
==== 10F ==== | ==== 10F ==== | ||
[[ | [[File:Silph Co 10F FRLG.png|thumb|thumb|right|Silph Co, 10F]] | ||
Only two battles here, but make sure to grab the {{DL|Vitamin|Carbos}}, {{DL|Vitamin|Rare Candy}}, and {{DL|Poké Ball|Ultra Ball}} from the southwest room. Take the stairs to 11F for a quick grunt battle. | Only two battles here, but make sure to grab the {{DL|Vitamin|Carbos}}, {{DL|Vitamin|Rare Candy}}, and {{DL|Poké Ball|Ultra Ball}} from the southwest room. Take the stairs to 11F for a quick grunt battle. | ||
| Line 267: | Line 267: | ||
| | | | ||
{{trainerheader}} | {{trainerheader}} | ||
{{trainerentry| | {{trainerentry|FL RocketGruntM.png|Team Rocket|Grunt|1056|1|067|Machoke|♂|33||}} | ||
{{trainerdiv}} | {{trainerdiv}} | ||
{{trainerentry| | {{trainerentry|FL Scientist.png|Scientist|Travis|1392|2|081|Magnemite||29||109|Koffing|♂|29||}} | ||
{{trainerfooter}} | {{trainerfooter}} | ||
|} | |} | ||
| Line 284: | Line 284: | ||
| | | | ||
{{trainerheader}} | {{trainerheader}} | ||
{{trainerentry| | {{trainerentry|FL RocketGruntM.png|Team Rocket|Grunt|800|5|019|Rattata|♂|25||041|Zubat|♂|25||023|Ekans|♂|25||019|Rattata|♂|25||019|Rattata|♂|25||}} | ||
{{trainerfooter}} | {{trainerfooter}} | ||
|} | |} | ||
| Line 299: | Line 299: | ||
| | | | ||
{{trainerheader}} | {{trainerheader}} | ||
{{trainerentry| | {{trainerentry|FL Scientist.png|Scientist|Jose|1392|2|101|Electrode||29||110|Weezing|♂|29||}} | ||
{{trainerfooter}} | {{trainerfooter}} | ||
|} | |} | ||
| Line 401: | Line 401: | ||
==== 11F (west) ==== | ==== 11F (west) ==== | ||
[[ | [[File:Silph Co 11F FRLG.png|thumb|right|Silph Co, 11F]] | ||
One last grunt stands before Giovanni. | One last grunt stands before Giovanni. | ||
| Line 411: | Line 411: | ||
| | | | ||
{{trainerheader}} | {{trainerheader}} | ||
{{trainerentry| | {{trainerentry|FL RocketGruntM.png|Team Rocket|Grunt|1024|3|104|Cubone|♂|32||096|Drowzee|♂|32|None|105|Marowak|♂|32||}} | ||
{{trainerfooter}} | {{trainerfooter}} | ||
|} | |} | ||
| Line 485: | Line 485: | ||
<br> | <br> | ||
With the Rockets gone, Trainers are free to collect any leftover items lying around the building. Stop by the 4th floor, and check the west room for a {{DL|Status ailment healing item|Full Heal}}, {{DL|Revive|Max Revive}}, and [[Escape Rope]]. The Rocket grunt outside the Saffron Gym is also gone, meaning that Trainers are free to challenge Sabrina for their next [[badge]]. | With the Rockets gone, Trainers are free to collect any leftover items lying around the building. Stop by the 4th floor, and check the west room for a {{DL|Status ailment healing item|Full Heal}}, {{DL|Revive|Max Revive}}, and [[Escape Rope]]. The Rocket grunt outside the Saffron Gym is also gone, meaning that Trainers are free to challenge Sabrina for their next [[badge]]. | ||
=== Saffron Gym === | === Saffron Gym === | ||
Revision as of 15:12, 15 April 2012
Saffron City
Saffron City is home to Silph Co, which developed the Silph Scope. But why does Giovanni need the prototype? Gather a strong team to track him down.
City under Siege
Team Rocket's operation has led them to Saffron City, and the headquarters of Silph Co. The city's residents are confined to their homes while the criminals hold the Silph employees hostage.
Mr. Psychic
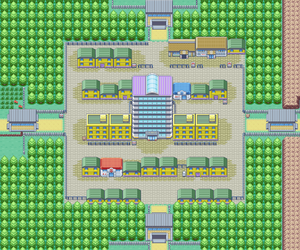
For how large it is, Saffron City is pretty dull. Besides the Poké Center and Poké Mart, there are only two other places to visit before driving the Rockets out of town. Visit Mr Psychic's house in the southeast to get TM29 (Psychic).
Fighting Dojo
One of Saffron's major attractions is that there are two Gyms here, not just one. Located right next to the official Saffron Gym, the Fighting Dojo is an optional challenge, and while the Trainers inside don't offer a badge upon defeat, they offer something just as good: a rare Pokémon. After defeating the Karate Master, he'll offer victorious Trainers a choice of two Template:Type2s - the hard-kicking Hitmonlee, or the piston-punching Hitmonchan. Any decent-leveled Psychic- or Template:Type2 will make short work of these Black Belts, though any bird should be careful to avoid Hitmonchan's ThunderPunch and Ice Punch moves.
| |||||||||||||||||||||||||||||||||||||||||||||||||||||||||||||||||||||||||||||||||||||||||||||||||||||||||||||||||||||||||||||||||||||||||||||||||||||||||||||||||||
After his defeat, the Karate Master allows the player to choose one of his two Template:Type2s.
|
| ||||||||||||||||||||||||||||||||||||||||||||||||||||
Liberate Silph Co!
With Pokémon Tower cleared, the guard outside Silph Co is taking a nap, leaving a perfect opportunity to sneak inside. The company uses warp tiles to allow their employees to quickly move around the huge building, which create a giant maze leading to Giovanni.
The objective is to reach the top floor and rescue the Silph President from Giovanni's clutches. Taking the direct route to the top floor avoids most of the 31 Trainer battles here (and the money and EXP that goes with it) and goes straight for the boss, after which Trainers can collect the items without opposition. When medical attention becomes an issue, either leave for the Poké Center or look for the woman in the southwest corner of the 9th floor.
1F
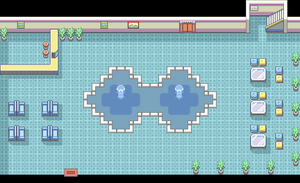
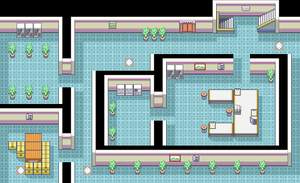
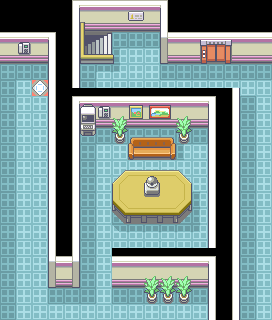
The lobby is totally deserted, so take the stairs in the back to 2F.
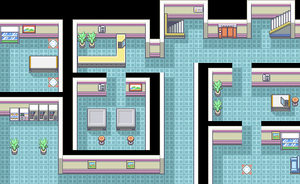
2F
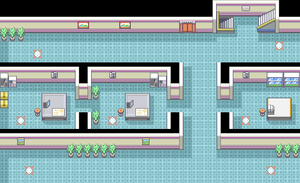
There's no way to bypass the electronic doors at the moment, so step on either warp to teleport to 8F.
| Trainers | |||||||||||||||||||||||||||||||||||||||||||||||||||||||||||||||||||||||||||||||||||||||||
|---|---|---|---|---|---|---|---|---|---|---|---|---|---|---|---|---|---|---|---|---|---|---|---|---|---|---|---|---|---|---|---|---|---|---|---|---|---|---|---|---|---|---|---|---|---|---|---|---|---|---|---|---|---|---|---|---|---|---|---|---|---|---|---|---|---|---|---|---|---|---|---|---|---|---|---|---|---|---|---|---|---|---|---|---|---|---|---|---|---|
| |||||||||||||||||||||||||||||||||||||||||||||||||||||||||||||||||||||||||||||||||||||||||
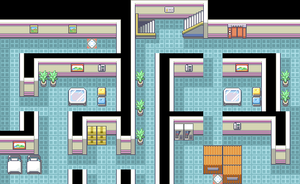
8F
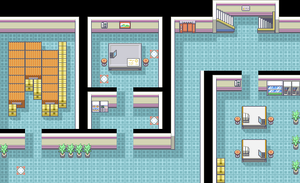
Clear out the Rockets here, then take the elevator to 3F. Don't forget to grab the Iron in the eastern room.
| Trainers | |||||||||||||||||||||||||||||||||||||||||||||||||||||||||||||||||||||||||||||||||||
|---|---|---|---|---|---|---|---|---|---|---|---|---|---|---|---|---|---|---|---|---|---|---|---|---|---|---|---|---|---|---|---|---|---|---|---|---|---|---|---|---|---|---|---|---|---|---|---|---|---|---|---|---|---|---|---|---|---|---|---|---|---|---|---|---|---|---|---|---|---|---|---|---|---|---|---|---|---|---|---|---|---|---|---|
| |||||||||||||||||||||||||||||||||||||||||||||||||||||||||||||||||||||||||||||||||||
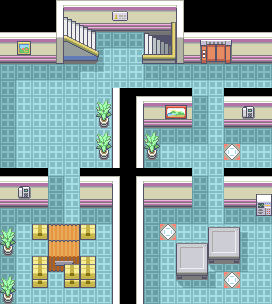
3F
Stepping out of the elevator, Trainers can take the warp near the stairs to reach a woman on the second floor. This move tutor will offer to teach Thunder Wave to the player's Pokémon. Warp back to 3F.
Back on the 3rd floor, fight the lone Rocket and take the warp in the southwest corner to a locked room on the 5th floor. Grab the TM01 (Focus Punch) and warp back. Take the stairs to the fourth floor.
| Trainers | |||||||||||||||||||||||||||||
|---|---|---|---|---|---|---|---|---|---|---|---|---|---|---|---|---|---|---|---|---|---|---|---|---|---|---|---|---|---|
| |||||||||||||||||||||||||||||
4F
Beat the Rockets here, and climb to the 5th floor. Don't forget the TM41 (Torment) on the table in the eastern room.
| Trainers | ||||||||||||||||||||||||||||||||||||||||||||||||||
|---|---|---|---|---|---|---|---|---|---|---|---|---|---|---|---|---|---|---|---|---|---|---|---|---|---|---|---|---|---|---|---|---|---|---|---|---|---|---|---|---|---|---|---|---|---|---|---|---|---|---|
| ||||||||||||||||||||||||||||||||||||||||||||||||||
5F
Beat the Rocket and Scientist near the stairs. Follow the hallway to the south to find a Rocket standing next to a warp. Defeat the grunt, take the warp, and warp right back here. Follow the narrow hallway to the right to find the Card Key, which opens any of Silph's electronic doors. Go left back towards the Rocket, and open the door to the northwest room for a Protein. Get upstairs to 6F.
| Trainers | ||||||||||||||||||||||||||||||||||||||||||||||||||||||||||||||||||||||||||||||||||||||
|---|---|---|---|---|---|---|---|---|---|---|---|---|---|---|---|---|---|---|---|---|---|---|---|---|---|---|---|---|---|---|---|---|---|---|---|---|---|---|---|---|---|---|---|---|---|---|---|---|---|---|---|---|---|---|---|---|---|---|---|---|---|---|---|---|---|---|---|---|---|---|---|---|---|---|---|---|---|---|---|---|---|---|---|---|---|---|
| ||||||||||||||||||||||||||||||||||||||||||||||||||||||||||||||||||||||||||||||||||||||
6F
Open the door to the southwest room to find an HP Up and an X Special. Advance to 7F.
| Trainers | |||||||||||||||||||||||||||||||||||||||||||||||||||||||||||||||||||||||||||||||||||||||||
|---|---|---|---|---|---|---|---|---|---|---|---|---|---|---|---|---|---|---|---|---|---|---|---|---|---|---|---|---|---|---|---|---|---|---|---|---|---|---|---|---|---|---|---|---|---|---|---|---|---|---|---|---|---|---|---|---|---|---|---|---|---|---|---|---|---|---|---|---|---|---|---|---|---|---|---|---|---|---|---|---|---|---|---|---|---|---|---|---|---|
| |||||||||||||||||||||||||||||||||||||||||||||||||||||||||||||||||||||||||||||||||||||||||
7F
Use the Card Key to open the eastern door and grab the TM08 (Bulk Up). After fighting the Rocket along the north wall (next to the counter), walk to the left to see a familiar face in the next room: the rival, totally unconcerned with the company takeover going on. Follow the hallway south and west, grab the Calcium, then take the stairs up to 9F (since 8F is already cleared).
| Trainers | ||||||||||||||||||||||||||||||||||||||||||||||||||||||||||||||||||||||||||||||||||||||||||||||||||
|---|---|---|---|---|---|---|---|---|---|---|---|---|---|---|---|---|---|---|---|---|---|---|---|---|---|---|---|---|---|---|---|---|---|---|---|---|---|---|---|---|---|---|---|---|---|---|---|---|---|---|---|---|---|---|---|---|---|---|---|---|---|---|---|---|---|---|---|---|---|---|---|---|---|---|---|---|---|---|---|---|---|---|---|---|---|---|---|---|---|---|---|---|---|---|---|---|---|---|
| ||||||||||||||||||||||||||||||||||||||||||||||||||||||||||||||||||||||||||||||||||||||||||||||||||
9F
By now, all of those battles may be taking a toll on the player's team. Walk down the central hallway to the south to fight another Rocket grunt, then open the door nearby and talk to the woman near the beds. To help the player take out the rest of the Rockets, she restores a Trainer's team to full health. Beat the second Rocket (ignore the warp), and take the stairs to 10F.
| Trainers | |||||||||||||||||||||||||||||||||||||||||||||||||||||||||||||||||||||||||||||||||||
|---|---|---|---|---|---|---|---|---|---|---|---|---|---|---|---|---|---|---|---|---|---|---|---|---|---|---|---|---|---|---|---|---|---|---|---|---|---|---|---|---|---|---|---|---|---|---|---|---|---|---|---|---|---|---|---|---|---|---|---|---|---|---|---|---|---|---|---|---|---|---|---|---|---|---|---|---|---|---|---|---|---|---|---|
| |||||||||||||||||||||||||||||||||||||||||||||||||||||||||||||||||||||||||||||||||||
10F
Only two battles here, but make sure to grab the Carbos, Rare Candy, and Ultra Ball from the southwest room. Take the stairs to 11F for a quick grunt battle.
| Trainers | ||||||||||||||||||||||||||||||||||||||
|---|---|---|---|---|---|---|---|---|---|---|---|---|---|---|---|---|---|---|---|---|---|---|---|---|---|---|---|---|---|---|---|---|---|---|---|---|---|---|
| ||||||||||||||||||||||||||||||||||||||
11F (east)
Beat the lone grunt here, and pick up the Zinc at the south end of the hallway. Now that the majority of the Rockets have been defeated, it's finally time to track down Giovanni. Take the elevator down to the 3rd floor.
| Trainers | |||||||||||||||||||||||||||||||||||||||||
|---|---|---|---|---|---|---|---|---|---|---|---|---|---|---|---|---|---|---|---|---|---|---|---|---|---|---|---|---|---|---|---|---|---|---|---|---|---|---|---|---|---|
| |||||||||||||||||||||||||||||||||||||||||
3F
Use the Card Key to unlock the door to the center-left room. Fight the scientist and collect the Hyper Potion in the next room, and step on the warp in the first room. This sends Trainers to the 7th floor again.
| Trainers | |||||||||||||||||||||||
|---|---|---|---|---|---|---|---|---|---|---|---|---|---|---|---|---|---|---|---|---|---|---|---|
| |||||||||||||||||||||||
7F
Oh, look - it's the rival again. He's waiting here for the player, itching for another battle with his rival. His Pokémon are very high leveled and are becoming increasingly powerful. However, he is not too much of a threat thanks to a poor moveset.
After the fight, talk to the Silph employee nearby to get a Lapras, and take the lower warp to the 11th floor.
11F (west)
One last grunt stands before Giovanni.
| Trainers | |||||||||||||||||||||||||||||
|---|---|---|---|---|---|---|---|---|---|---|---|---|---|---|---|---|---|---|---|---|---|---|---|---|---|---|---|---|---|
| |||||||||||||||||||||||||||||
Take a trip to either the Poké Center or the woman on 9F to heal up.
Open the door with the Card Key, and confront the boss.
|
|||||||||||||||||||||||||||||||||||||||||||||||||||||||||||||||||||||||||||||||||||||||||||||||||||||||||||||
| |||||||||||||||||||||||||||||||||||||||||||||||||||||||||||||||||||||||||||||||||||||||||||||||||||||||||||||
With Giovanni on the run, Team Rocket's hold on Silph Co is broken. The president is so thankful that his company was saved that he rewards Trainers with the Master Ball prototype, a version of Poké Ball that catches any Pokémon without fail! It's probably best to save this until after the Elite Four is defeated, when Trainers can finally track down the master of Cerulean Cave.
With the Rockets gone, Trainers are free to collect any leftover items lying around the building. Stop by the 4th floor, and check the west room for a Full Heal, Max Revive, and Escape Rope. The Rocket grunt outside the Saffron Gym is also gone, meaning that Trainers are free to challenge Sabrina for their next badge.
Saffron Gym
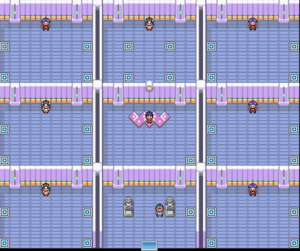
Sabrina is a pain to get to, as the player has to step on the correct teleportation tiles to reach her. The Saffron Gym is a haven for Template:Type2s. Avoid bringing Fighting- or Template:Type2s to the Gym, because they won't last very long. Psychic-types absolutely despise Dark-, Ghost-, and Template:Type2 attacks, so having a ghost or two from Pokémon Tower will certainly help. Any move of these three types will help to make this Gym challenge a quick one. Her team's defenses are weak, so attacking with physical moves (like Earthquake) is also an option.
| ||||||||||||||||||||||||||||||||||||||||||||||||||||||||||||||||||||||||||||||||||||||||||||||||||||||||||||||||||||||||||||||||||||||||||||||||||||||||||||||||||||||||||||||||||||||||||||||||||||||||||||||||||||||||||||||||||||||||||||||||||||||||||||||||||||||||||||||||||||||||||||||
Defeating Sabrina earns Trainers the Marsh Badge, which commands all Pokémon of Lv 70 or less. She also gives out TM04 (Calm Mind) as a prize.
With 5 badges, the next stop is Fuchsia City to the south, where Trainers can finally find HM03 (Surf) and HM04 (Strength). There are two ways to get to Fuchsia - either head southwest from Lavender Town, or southeast from Celadon City. HM02 (Fly) is found on the western path, and the Super Rod is found on the eastern path. For now, go west through Celadon City to Route 16.
|
FireRed and LeafGreen walkthrough |
|

|
This article is part of Project Walkthroughs, a Bulbapedia project that aims to write comprehensive step-by-step guides on each Pokémon game. |
