Appendix:FireRed and LeafGreen walkthrough/Section 3: Difference between revisions
Tyler53841 (talk | contribs) (→Cerulean Gym: Adding some in that will only work for these versions only.) |
m (→Cerulean City) |
||
| (43 intermediate revisions by 22 users not shown) | |||
| Line 1: | Line 1: | ||
{{WalkthroughNotice|FRLG}} | |||
== Cerulean City == | == Cerulean City == | ||
[[ | [[File:Cerulean City FRLG.png|250px|thumbnail|left|Cerulean City]] | ||
[[File:Miracle Cycle FRLG inside.png|250px|thumbnail|The Bike Shop]] | |||
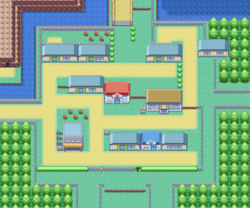
In the house next to the | [[Cerulean City]] is a peaceful seaside city located in the north-central part of [[Kanto]]. Places of interest include the [[Miracle Cycle|Bike Shop]], [[Cerulean Gym]], and [[Cerulean Cave|a mysterious cave]] on the edge of town. In the house next to the Pokémon Center, an old man is willing to trade his {{2t|Ice|Psychic}}-type {{p|Jynx}} to get a {{p|Poliwhirl}}. Poliwhirl can only be found by using a {{key|III|Super Rod|high-end fishing rod}}, so return later to complete the trade. | ||
= | {| align="center" | ||
|{{shop|Poké Mart}} | |||
{{shoprow|{{shopitem|Poké Ball|200}}|{{shopitem|Super Potion|700}}}} | |||
{{shoprow|{{shopitem|Potion|300}}|{{shopitem|Antidote|100}}}} | |||
{{shoprow|{{shopitem|Parlyz Heal|200}}|{{shopitem|Awakening|250}}}} | |||
{{shoprow|{{shopitem|Burn Heal|250}}|{{shopitem|Escape Rope|550}}}} | |||
{{shoprow|{{shopitem|Repel|350}}}} | |||
{{shopfooter}} | |||
|} | |||
In the | {| class="expandable" align="center" style="background: #{{leafgreen color light}}; {{roundy}}; border: 5px solid #{{firered color light}};" | ||
|- align="center" | |||
! Items | |||
|- | |||
| | |||
{{Itlisth|road}} | |||
{{Itemlist|Fab Mail|Held by ZYNX, a {{p|Jynx}} the {{player}} can obtain in a {{DL|In-game trade|Generation III|trade}}|FR=yes|LG=yes|display={{DL|Mail|Fab Mail}}}} | |||
{{Itemlist|Fame Checker|Received from {{ga|Blue}} after defeating him|FR=yes|LG=yes}} | |||
{{Itemlist|Powder Jar|Received from an old man in the house second to the right of [[Cerulean Cave]]|FR=yes|LG=yes}} | |||
{{Itemlist|Bicycle|Received from Bike Shop Owner in return for a {{key|III|Bike Voucher}}|FR=yes|LG=yes}} | |||
{{Itemlist|Rare Candy|In the backyard of the Gym Badge man's house ''(hidden)''|FR=yes|LG=yes|display={{DL|Vitamin|Rare Candy}}}} | |||
{{Itemlist|TM Water|Reward for defeating Misty|FR=yes|LG=yes|display={{TM|03|Water Pulse}}}} | |||
{{Itlistfoot|road}} | |||
|} | |||
{| class="expandable" align="center" style="background: #{{leafgreen color light}}; {{roundy}}; border: 5px solid #{{firered color light}};" | |||
{| class="expandable" align="center" style="background: #{{leafgreen color light}}; | |||
|- align="center" | |- align="center" | ||
! | ! Available Pokémon | ||
|- | |- | ||
| | | | ||
{{ | {{Catch/header|road|no}} | ||
{{Catch/div|road|Special}} | |||
{{Catch/entryfl|124|Jynx|yes|yes|Trade|tradenum=061|tradename=Poliwhirl|The same as the Traded Pokémon|One|type1=Ice|type2=Psychic}} | |||
{{ | {{catch/footer|road}} | ||
{{ | |||
{{ | |||
|} | |} | ||
=== Bike Shop === | === Bike Shop === | ||
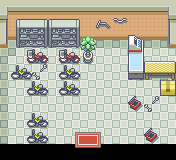
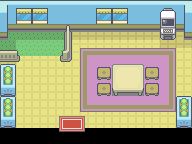
The [[Miracle Cycle|Bike Shop]] has bicycles for sale, but the price is a whopping {{pdollar}}1,000,000! The player can't carry that much cash, so it seems that he/she is out of luck for now. | |||
=== Berry Powder man === | |||
Visit the Gym Badge man's neighbor to receive the {{key|III|Powder Jar}} from the old man. This jar is used to collect the [[Berry Powder]] that is obtained from the [[Berry Crush]] minigame. Collecting lots of powder allows him to prepare many different medicines in exchange. | |||
{| align="center" | |||
|{{shop|Berry Powder}} | |||
{{shoprow|{{shopitem|EnergyPowder|50|Units}}|{{shopitem|Energy Root|80|Units}}}} | |||
{{shoprow|{{shopitem|Heal Powder|50|Units}}|{{shopitem|Revival Herb|300|Units}}}} | |||
{{shoprow|{{shopitem|Protein|1,000|Units}}|{{shopitem|Iron|1,000|Units}}}} | |||
{{shoprow|{{shopitem|Carbos|1,000|Units}}|{{shopitem|Calcium|1,000|Units}}}} | |||
{{shoprow|{{shopitem|Zinc|1,000|Units}}|{{shopitem|HP Up|1,000|Units}}}} | |||
{{shoprow|{{shopitem|PP Up|3,000|Units}}}} | |||
{{shopfooter}} | |||
|} | |||
=== Gym Badge man === | |||
In the northwest house is a man who will explain the effects of the eight {{DL|Badge|Indigo League|Gym Badges}}. The first seven Badges enable the use of [[HM]] moves in the field. Four Badges increase a certain stat during battle, raising each respective skill to 112.5% of the normal value. The four other Badges ensure a Pokémon's obedience during battle. | |||
=== | {| style="background: #3F9BBC; {{roundy}}; border: 2px solid #007BA7;" colspan="3" cellspacing="2" cellpadding="4" | ||
|- | |||
! colspan="2" style="background: #7FBCD2; {{roundytl|5px}};" | Badge | |||
! style="background: #7FBCD2;" | Effect | |||
! colspan="2" style="background: #7FBCD2;" | Badge | |||
! style="background: #7FBCD2; {{roundytr|5px}};" | Effect | |||
|- style="background: #FFFFFF;" | |||
| align="center" | [[File:Boulder Badge.png|20px|Boulder Badge]] | |||
| align="center" | {{badge|Boulder}} | |||
| align="center" | Increases {{stat|Attack}};<br />Allows {{m|Flash}} in the field | |||
| align="center" | [[File:Cascade Badge.png|20px|Cascade Badge]] | |||
| align="center" | {{badge|Cascade}} | |||
| align="center" | Ensures obedience up to level 30;<br />Allows {{m|Cut}} in the field | |||
|- style="background: #FFFFFF;" | |||
| align="center" | [[File:Thunder Badge.png|20px|Thunder Badge]] | |||
| align="center" | {{badge|Thunder}} | |||
| align="center" | Increases {{stat|Speed}};<br />Allows {{m|Fly}} in the field | |||
| align="center" | [[File:Rainbow Badge.png|20px|Rainbow Badge]] | |||
| align="center" | {{badge|Rainbow}} | |||
| align="center" | Ensures obedience up to level 50;<br />Allows {{m|Strength}} in the field | |||
|- style="background: #FFFFFF;" | |||
| align="center" | [[File:Soul Badge.png|20px|Soul Badge]] | |||
| align="center" | {{badge|Soul}} | |||
| align="center" | Increases {{stat|Defense}};<br />Allows {{m|Surf}} in the field | |||
| align="center" | [[File:Marsh Badge.png|20px|Marsh Badge]] | |||
| align="center" | {{badge|Marsh}} | |||
| align="center" | Ensures obedience up to level 70;<br />Allows {{m|Rock Smash}} in the field | |||
|- style="background: #FFFFFF;" | |||
| align="center" | [[File:Volcano Badge.png|20px|Volcano Badge]] | |||
| align="center" | {{badge|Volcano}} | |||
| align="center" | Increases {{stat|Special Attack}} and {{stat|Special Defense}};<br />Allows {{m|Waterfall}} in the field | |||
| align="center" | [[File:Earth Badge.png|20px|Earth Badge]] | |||
| align="center" | {{badge|Earth}} | |||
| align="center" | Ensures obedience up to level 100 | |||
|- style="background: #7FBCD2;" | |||
| colspan="6" style="background: #7FBCD2; {{roundybottom}};" | | |||
|} | |||
The | === Burgled house === | ||
The house behind the Gym is blocked off by a police officer. It seems that [[Team Rocket]] has stolen [[TM28|a valuable item]] from the people living here. Nothing can be done about this now, so instead head for the Gym. | |||
=== Cerulean Gym === | === Cerulean Gym === | ||
[[File:Cerulean Gym FRLG.png|250px|thumbnail|Cerulean Gym]] | |||
{{sign|FRLG|header}} | {{sign|FRLG|header}} | ||
{{sign|FRLG|title| | {{sign|FRLG|title|CERULEAN CITY POKéMON GYM<br />LEADER: MISTY}} | ||
{{sign|FRLG|The Tomboyish Mermaid!}} | {{sign|FRLG|The Tomboyish Mermaid!}} | ||
{{sign|FRLG|footer}} | {{sign|FRLG|footer}} | ||
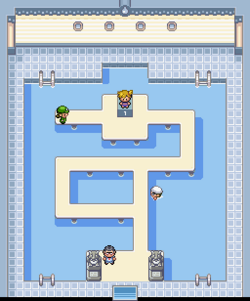
The [[Cerulean Gym]] specializes in {{ | The [[Cerulean Gym]] specializes in {{type|Water}} Pokémon, so {{t|Grass}}- and {{type|Electric}} attacks will work wonders. Trainers who chose {{p|Charmander}} may have a rough time here, so it may be necessary to venture off to {{rt|24|Kanto}} or {{rt|25|Kanto}} to catch an {{p|Oddish}}{{sup/3|FR}} or a {{p|Bellsprout}}{{sup/3|LG}} to help out. Take out [[Misty]]'s {{p|Staryu}} as quickly as possible in order to move on to her {{p|Starmie}}. Her purple starfish is both {{stat|Special Attack|stronger}} and {{stat|Speed|faster}} than Staryu, making its {{m|Water Pulse}} especially painful. Trainers who chose {{p|Squirtle}} would do well to raise it to level 18, as its {{m|Bite}} move will inflict serious damage on the part-{{t|Psychic}} Starmie. | ||
{| align="center" | {| align="center" | ||
|- align="center" valign="top" | |- align="center" valign="top" | ||
| | | | ||
{| align="center" style="background: #{{water color}}; | {| align="center" style="background: #{{water color}}; {{roundy}}; border: 5px solid #{{water color light}};" | ||
|- align="center" | |- align="center" | ||
! Cerulean Gym <br> [[ | ! Cerulean Gym <br /> [[File:Cascade Badge.png|35px|The Cascade Badge]] <br /><br /> | ||
|- | |- | ||
| | | | ||
{| align="center" class="expandable" style="background: #{{water color}}; | {| align="center" class="expandable" style="background: #{{water color}}; {{roundy}}; border: 5px solid #{{water color light}};" | ||
|- align="center" | |- align="center" | ||
! Trainers | ! Trainers | ||
| Line 64: | Line 128: | ||
| | | | ||
{{Trainerheader|Water}} | {{Trainerheader|Water}} | ||
{{Trainerentry| | {{Trainerentry|Spr FRLG Swimmer M.png|Swimmer|Luis|64|2|116|Horsea|♂|16|None|090|Shellder|♂|16|None|36=ヨウヘイ|37=Yōhei}} | ||
{{Trainerdiv|Water}} | {{Trainerdiv|Water}} | ||
{{Trainerentry| | {{Trainerentry|Spr FRLG Picnicker.png|Picnicker|Diana|380|1|118|Goldeen|♀|19|None|36=コズエ|37=Kozue}} | ||
{{Trainerfooter|Water|1}} | {{Trainerfooter|Water|1}} | ||
|} | |} | ||
{{Party/Single | |||
|color={{water color}} | |||
{{Party|color={{water color}}|bordercolor={{water color dark}}|headcolor={{water color light}}|sprite= | |bordercolor={{water color dark}} | ||
|headcolor={{water color light}} | |||
move1=Tackle|move1type=Normal|move2=Harden|move2type=Normal|move3=Recover|move3type=Normal|move4=Water Pulse|move4type=Water}}| | |sprite=Spr FRLG Misty.png | ||
|prize={{pdollar}}2100 | |||
move1=Rapid Spin|move1type=Normal|move2=Swift|move2type=Normal|move3=Recover|move3type=Normal|move4=Water Pulse|move4type=Water}} | |class=Leader | ||
}} | |classlink=Gym Leader | ||
|name={{color2|000000|Misty}} | |||
|game=FRLG | |||
|location=Cerulean Gym | |||
|pokemon=2}} | |||
|{{Pokémon/3 | |||
|ndex=120 | |||
|pokemon=Staryu | |||
|game=FireRed | |||
|type1=Water | |||
|level=18 | |||
|ability=Natural Cure | |||
|move1=Tackle|move1type=Normal | |||
|move2=Harden|move2type=Normal | |||
|move3=Recover|move3type=Normal | |||
|move4=Water Pulse|move4type=Water}} | |||
|{{Pokémon/3 | |||
|ndex=121 | |||
|pokemon=Starmie | |||
|game=FireRed | |||
|type1=Water | |||
|type2=Psychic | |||
|level=21 | |||
|ability=Natural Cure | |||
|move1=Rapid Spin|move1type=Normal | |||
|move2=Swift|move2type=Normal | |||
|move3=Recover|move3type=Normal | |||
|move4=Water Pulse|move4type=Water}} | |||
{{Party/Footer}} | |||
|} | |} | ||
|} | |} | ||
Defeated, [[Misty]] awards the player the {{badge|Cascade}}, which ensures a Pokémon's obedience up to level 30. It also enables the use of {{m|Cut}} in the field. Misty also hands over {{TM|03|Water Pulse}} as a prize. | |||
Rest up and head north to {{rt|24|Kanto}}. As soon as the player heads for Route 24, Blue appears. He taunts his rival like usual before challenging the player to another battle. His {{p|Pidgeotto}} is more a nuisance than a threat, though {{p|Bulbasaur}} is vulnerable to its {{m|Gust}} attack. {{p|Abra}}, with {{m|Teleport}}—which fails during Trainer battles—as its only move, is nothing more than a punching bag for the player's weaker Pokémon. His starter Pokémon has learned a damaging elemental attack, so the player should avoid pitting his/her own starter against it. | |||
{| align="center" | {| align="center" | ||
!{{MS|001|Bulbasaur (Pokémon)}} If the {{player}} chose {{p|Bulbasaur}}: | ! {{MS|001|Bulbasaur (Pokémon)}} If the {{player}} chose {{p|Bulbasaur}}: | ||
!{{MS|004|Charmander (Pokémon)}} If the {{player}} chose {{p|Charmander}}: | ! {{MS|004|Charmander (Pokémon)}} If the {{player}} chose {{p|Charmander}}: | ||
!{{MS|007|Squirtle (Pokémon)}} If the {{player}} chose {{p|Squirtle}}: | ! {{MS|007|Squirtle (Pokémon)}} If the {{player}} chose {{p|Squirtle}}: | ||
|- | |- | ||
|{{Party|color={{ | |{{Party/Single | ||
|sprite= | |color={{blue color}} | ||
|prize={{ | |headcolor={{blue color light}} | ||
|class= | |bordercolor={{blue color dark}} | ||
| | |sprite=Spr FRLG Blue 1.png | ||
| | |prize={{PDollar}}288 | ||
|location= | |class=Rival | ||
|pokemon=4 | |classlink=Rival | ||
| | |name={{color2|000000|Blue (game)|Blue}} | ||
| | |game=FRLG | ||
|location=Cerulean City | |||
|move1=Tackle|move1type=Normal|move2=Gust|move2type=Flying|move3=Sand-Attack|move3type=Ground|move4=Quick Attack|move4type=Normal}} | |pokemon=4}} | ||
| | |{{Pokémon/3 | ||
|move1=Tackle|move1type=Normal|move2=Tail Whip|move2type=Normal|move3=Quick Attack|move3type=Normal}} | |game=FireRed | ||
| | |ndex=017 | ||
|move1=Teleport|move1type=Psychic}}}} | |pokemon=Pidgeotto | ||
|gender=male | |||
|level=17 | |||
|type1=Normal | |||
|type2=Flying | |||
|ability=Keen Eye | |||
|move1=Tackle | |||
|move1type=Normal | |||
|move2=Gust | |||
|move2type=Flying | |||
|move3=Sand-Attack | |||
|move3type=Ground | |||
|move4=Quick Attack | |||
|move4type=Normal}} | |||
|{{Pokémon/3 | |||
|game=FireRed | |||
|ndex=019 | |||
|pokemon=Rattata | |||
|gender=male | |||
|level=15 | |||
|type1=Normal | |||
|ability=Guts | |||
|move1=Tackle | |||
|move1type=Normal | |||
|move2=Tail Whip | |||
|move2type=Normal | |||
|move3=Quick Attack | |||
|move3type=Normal}} | |||
{{Party/Div|color={{blue color}}}} | |||
|{{Pokémon/3 | |||
|game=FireRed | |||
|ndex=063 | |||
|pokemon=Abra | |||
|gender=male | |||
|level=16 | |||
|type1=Psychic | |||
|ability=Synchronize | |||
|move1=Teleport | |||
|move1type=Psychic}} | |||
|{{Pokémon/3 | |||
|game=FireRed | |||
|ndex=004 | |||
|pokemon=Charmander | |||
|gender=male | |||
|level=18 | |||
|type1=Fire | |||
|ability=Blaze | |||
|move1=Scratch | |||
|move1type=Normal | |||
|move2=Growl | |||
|move2type=Normal | |||
|move3=Ember | |||
|move3type=Fire | |||
|move4=Metal Claw | |||
|move4type=Steel}} | |||
{{Party/Footer}} | |||
|{{Party|color={{ | |{{Party/Single | ||
|sprite= | |color={{blue color}} | ||
|prize={{ | |headcolor={{blue color light}} | ||
|class= | |bordercolor={{blue color dark}} | ||
| | |sprite=Spr FRLG Blue 1.png | ||
| | |prize={{PDollar}}288 | ||
|location= | |class=Rival | ||
|pokemon=4 | |classlink=Rival | ||
| | |name={{color2|000000|Blue (game)|Blue}} | ||
|move1=Tackle|move1type=Normal|move2= | |game=FRLG | ||
| | |location=Cerulean City | ||
|move1= | |pokemon=4}} | ||
| | |{{Pokémon/3 | ||
|move1=Tackle|move1type=Normal|move2=Tail Whip|move2type=Normal|move3=Quick Attack|move3type=Normal|move4=Hyper Fang|move4type=Normal}} | |game=FireRed | ||
| | |ndex=017 | ||
|move1= | |pokemon=Pidgeotto | ||
|gender=male | |||
|level=17 | |||
|type1=Normal | |||
|type2=Flying | |||
|ability=Keen Eye | |||
|move1=Tackle | |||
|move1type=Normal | |||
|move2=Gust | |||
|move2type=Flying | |||
|move3=Sand-Attack | |||
|move3type=Ground | |||
|move4=Quick Attack | |||
|move4type=Normal}} | |||
|{{Pokémon/3 | |||
|game=FireRed | |||
|ndex=063 | |||
|pokemon=Abra | |||
|gender=male | |||
|level=16 | |||
|type1=Psychic | |||
|ability=Synchronize | |||
|move1=Teleport | |||
|move1type=Psychic}} | |||
{{Party/Div|color={{blue color}}}} | |||
|{{Pokémon/3 | |||
|game=FireRed | |||
|ndex=019 | |||
|pokemon=Rattata | |||
|gender=male | |||
|level=15 | |||
|type1=Normal | |||
|ability=Guts | |||
|move1=Tackle | |||
|move1type=Normal | |||
|move2=Tail Whip | |||
|move2type=Normal | |||
|move3=Quick Attack | |||
|move3type=Normal | |||
|move4=Hyper Fang | |||
|move4type=Normal}} | |||
|{{Pokémon/3 | |||
|game=FireRed | |||
|ndex=007 | |||
|pokemon=Squirtle | |||
|gender=male | |||
|level=18 | |||
|type1=Water | |||
|ability=Torrent | |||
|move1=Tackle | |||
|move1type=Normal | |||
|move2=Tail Whip | |||
|move2type=Normal | |||
|move3=Bubble | |||
|move3type=Water | |||
|move4=Water Gun | |||
|move4type=Water}} | |||
{{Party/Footer}} | |||
|{{Party|color={{ | |{{Party/Single | ||
|sprite= | |color={{blue color}} | ||
|prize={{ | |headcolor={{blue color light}} | ||
|class= | |bordercolor={{blue color dark}} | ||
| | |sprite=Spr FRLG Blue 1.png | ||
| | |prize={{PDollar}}288 | ||
|location= | |class=Rival | ||
|pokemon=4 | |classlink=Rival | ||
| | |name={{color2|000000|Blue (game)|Blue}} | ||
| | |game=FRLG | ||
|location=Cerulean City | |||
|move1=Tackle|move1type=Normal|move2=Gust|move2type=Flying|move3=Sand-Attack|move3type=Ground|move4=Quick Attack|move4type=Normal}} | |pokemon=4}} | ||
| | |{{Pokémon/3 | ||
|move1=Tackle|move1type=Normal|move2=Tail Whip|move2type=Normal|move3=Quick Attack|move3type=Normal|move4=Hyper Fang|move4type=Normal}} | |game=FireRed | ||
| | |ndex=017 | ||
|move1=Teleport|move1type=Psychic}}}} | |pokemon=Pidgeotto | ||
|gender=male | |||
|level=17 | |||
|type1=Normal | |||
|type2=Flying | |||
|ability=Keen Eye | |||
|move1=Tackle | |||
|move1type=Normal | |||
|move2=Gust | |||
|move2type=Flying | |||
|move3=Sand-Attack | |||
|move3type=Ground | |||
|move4=Quick Attack | |||
|move4type=Normal}} | |||
|{{Pokémon/3 | |||
|game=FireRed | |||
|ndex=019 | |||
|pokemon=Rattata | |||
|gender=male | |||
|level=15 | |||
|type1=Normal | |||
|ability=Guts | |||
|move1=Tackle | |||
|move1type=Normal | |||
|move2=Tail Whip | |||
|move2type=Normal | |||
|move3=Quick Attack | |||
|move3type=Normal | |||
|move4=Hyper Fang | |||
|move4type=Normal}} | |||
{{Party/Div|color={{blue color}}}} | |||
|{{Pokémon/3 | |||
|game=FireRed | |||
|ndex=063 | |||
|pokemon=Abra | |||
|gender=male | |||
|level=16 | |||
|type1=Psychic | |||
|ability=Synchronize | |||
|move1=Teleport | |||
|move1type=Psychic}} | |||
|{{Pokémon/3 | |||
|game=FireRed | |||
|ndex=001 | |||
|pokemon=Bulbasaur | |||
|gender=male | |||
|level=18 | |||
|type1=Grass | |||
|type2=Poison | |||
|ability=Overgrow | |||
|move1=Tackle | |||
|move1type=Normal | |||
|move2=Growl | |||
|move2type=Normal | |||
|move3=Leech Seed | |||
|move3type=Grass | |||
|move4=Vine Whip | |||
|move4type=Grass}} | |||
{{Party/Footer}} | |||
|} | |} | ||
After the battle, Blue hands over the {{key|III|Fame Checker}}. This item records miscellaneous information about notable figures, including [[Professor Oak]], the eight {{DL|Gym Leader|Indigo League|Gym Leaders}}, and the {{ka|Elite Four}}. This info is primarily found in the {{DL|Magazines in the Pokémon world|Pokémon Journal}}s located in most Pokémon Centers. | |||
== Route 24 == | |||
[[File:Kanto Route 24 FRLG.png|250px|thumbnail|Route 24]] | |||
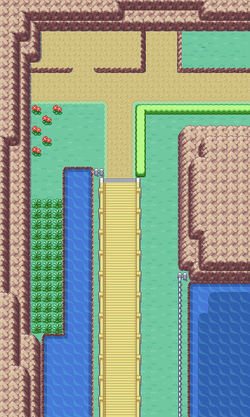
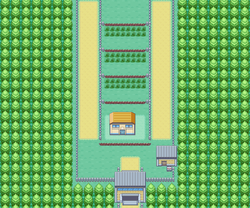
{{rt|24|Kanto}} is a narrow route that connects [[Cerulean City]] to {{rt|25|Kanto}}. Nugget Bridge is located here, and is always packed with Trainers. There are sixteen Trainers between [[Cerulean City]] and the [[Sea Cottage]]; luckily it is possible to return to the Pokémon Center and heal up as necessary. Upon defeating the five Trainers on the bridge, a disguised {{tc|Team Rocket Grunt}} tries to get the player to join the organization. He attacks when his offer is declined, but gives up a valuable {{DL|Valuable item|Nugget}} when defeated. | |||
A patch of tall grass is located near the north end of the bridge. In addition to Camper Shane, wild {{p|Abra}} can also be found here. Collect {{TM|45|Attract}} on the hill to the north, then head east to {{rt|25|Kanto}}. | |||
{| class="expandable" align="center" style="background: #{{leafgreen color light}}; {{roundy}}; border: 5px solid #{{firered color light}};" | |||
|- align="center" | |||
! Items | |||
|- | |||
| | |||
{{Itlisth}} | |||
{{Itemlist|Nugget|Reward for defeating the Trainers on Nugget Bridge|FR=yes|LG=yes|display={{DL|Valuable item|Nugget}}}} | |||
{{Itemlist|TM Normal|On the plateau at northern end|FR=yes|LG=yes|display={{TM|45|Attract}}}} | |||
{{Itemlist|Pecha Berry|West of the first Hiker of {{rt|25|Kanto}} ''(hidden)''|FR=yes|LG=yes}} | |||
{{Itlistfoot}} | |||
|} | |||
{| class="expandable" align="center" style="background: #{{leafgreen color light}}; {{roundy}}; border: 5px solid #{{firered color light}};" | |||
|- align="center" | |||
! Available Pokémon | |||
|- | |||
| | |||
{{Catch/header|land|no}} | |||
{{Catch/entryfl|043|Oddish|yes|no|Grass|12-14|25%|type1=Grass|type2=Poison}} | |||
{{Catch/entryfl|069|Bellsprout|no|yes|Grass|12-14|25%|type1=Grass|type2=Poison}} | |||
{{Catch/entryfl|010|Caterpie|yes|yes|Grass|7|20%|type1=Bug}} | |||
{{Catch/entryfl|013|Weedle|yes|yes|Grass|7|20%|type1=Bug|type2=Poison}} | |||
{{Catch/entryfl|016|Pidgey|yes|yes|Grass|11, 13|15%|type1=Normal|type2=Flying}} | |||
{{Catch/entryfl|063|Abra|yes|yes|Grass|8, 10, 12|15%|type1=Psychic}} | |||
{{Catch/entryfl|011|Metapod|no|yes|Grass|8|4%|type1=Bug}} | |||
{{Catch/entryfl|014|Kakuna|yes|no|Grass|8|4%|type1=Bug|type2=Poison}} | |||
{{Catch/entryfl|011|Metapod|yes|no|Grass|8|1%|type1=Bug}} | |||
{{Catch/entryfl|014|Kakuna|no|yes|Grass|8|1%|type1=Bug|type2=Poison}} | |||
{{Catch/footer|land}} | |||
|} | |||
{| | {| class="expandable" align="center" style="background: #{{leafgreen color light}}; {{roundy}}; border: 5px solid #{{firered color light}};" | ||
|- align="center" | |- align="center" | ||
! Trainers | ! Trainers | ||
|- | |- | ||
| | | | ||
{{trainerheader}} | {{trainerheader}} | ||
{{Trainerentry| | {{Trainerdiv|land|Nugget Bridge}} | ||
{{Trainerentry|Spr FRLG Bug Catcher.png|Bug Catcher|Cale|120|4|010|Caterpie|♂|10|None|013|Weedle|♂|10|None|011|Metapod|♂|10|None|014|Kakuna|♂|10|None|36=ケンスケ|37=Kensuke|38=}} | |||
{{Trainerdiv}} | {{Trainerdiv}} | ||
{{Trainerentry| | {{Trainerentry|Spr FRLG Lass.png|Lass|Ali|192|3|016|Pidgey|♀|12|None|043|Oddish|♀|12|None|069|Bellsprout|♀|12|None|36=サヤ|37=Saya|38=}} | ||
{{Trainerdiv}} | {{Trainerdiv}} | ||
{{Trainerentry| | {{Trainerentry|Spr FRLG Youngster.png|Youngster|Timmy|224|2|027|Sandshrew|♂|14|None|023|Ekans|♂|14|None|36=シンゴ|37=Shingo|38=Vs. Seeker}} | ||
{{Trainerdiv}} | {{Trainerdiv}} | ||
{{Trainerentry| | {{Trainerentry|Spr FRLG Lass.png|Lass|Reli|256|2|032|Nidoran♂||16|None|029|Nidoran♀||16|None|36=アミ|37=Ami|38=Vs. Seeker}} | ||
{{Trainerdiv}} | {{Trainerdiv}} | ||
{{Trainerentry| | {{Trainerentry|Spr FRLG Camper.png|Camper|Ethan|360|1|056|Mankey|♂|18|None|36=ヨシハル|37=Yoshiharu|38=}} | ||
{{Trainerdiv}} | {{Trainerdiv}} | ||
{{Trainerentry| | {{Trainerentry|Spr FRLG Team Rocket Grunt M.png|Team Rocket Grunt||480|2|023|Ekans|♂|15|None|041|Zubat|♂|15|None}} | ||
{{Trainerdiv}} | {{Trainerdiv|land|Grassy area}} | ||
{{Trainerentry| | {{Trainerentry|Spr FRLG Camper.png|Camper|Shane|280|2|019|Rattata|♂|14|None|023|Ekans|♂|14|None|36=トモヒロ|37=Tomohiro|38=}} | ||
{{trainerfooter}} | {{trainerfooter}} | ||
|} | |} | ||
== Route 25 == | == Route 25 == | ||
[[ | [[File:Kanto Route 25 FRLG.png|500px|thumbnail|left|Route 25]] | ||
[[File:SeaBill.png|250px|thumbnail|Inside the Sea Cottage]] | |||
{{rt|25|Kanto}} is a dead-end route on the ocean's edge. There are nine more Trainers to fight on the way to the cape. One of them, Camper Flint, is standing in a line of trees, and the player will need to lure him out with a battle to reach {{TM|43|Secret Power}} lying behind him. Secret Power is a damage-dealing move with a 30% chance of causing {{DL|Secret Power (move)|Generation III|a secondary effect}}, which is determined by the surrounding environment. | |||
{| class="expandable" align="center" style="background: #{{leafgreen color light}}; | {| class="expandable" align="center" style="background: #{{leafgreen color light}}; {{roundy}}; border: 5px solid #{{firered color light}};" | ||
|- align="center" | |- align="center" | ||
! | ! Items | ||
|- | |- | ||
| | | | ||
{{ | {{Itlisth|land}} | ||
{{ | {{Itemlist|Elixir|In northwest corner of the tree maze, near the first Hiker ''(hidden)''|FR=yes|LG=yes|display={{DL|Ether|Elixir}}}} | ||
{{ | {{Itemlist|TM Normal|Behind cuttable tree (requires defeating Camper Flint or {{m|Cut}})|FR=yes|LG=yes|display={{TM|43|Secret Power}}}} | ||
{{ | {{Itemlist|Bluk Berry|Northeast of running Trainer ''(hidden)''|FR=yes|LG=yes}} | ||
{{ | {{Itemlist|Oran Berry|Southwest of running Trainer ''(hidden)''|FR=yes|LG=yes}} | ||
{{ | {{Itemlist|Ether|Two steps east from the end of the path near Bill's house ''(hidden)''|FR=yes|LG=yes|display={{DL|Ether|Ether}}}} | ||
{{ | {{Itemlist|S.S. Ticket|Reward for helping Bill turn back to normal|FR=yes|LG=yes|display={{key|III|S.S. Ticket|S.S. Ticket}}}} | ||
{{ | {{Itlistfoot|land}} | ||
{{ | |||
{{ | |||
{{ | |||
|} | |} | ||
{| class="expandable" align="center" style="background: #{{leafgreen color light}}; | |||
{| class="expandable" align="center" style="background: #{{leafgreen color light}}; {{roundy}}; border: 5px solid #{{firered color light}};" | |||
|- align="center" | |- align="center" | ||
! Available Pokémon | ! Available Pokémon | ||
|- | |- | ||
| | | | ||
{{ | {{catch/header|land|no}} | ||
{{ | {{Catch/entryfl|043|Oddish|yes|no|Grass|12-14|25%|type1=Grass|type2=Poison}} | ||
{{ | {{Catch/entryfl|069|Bellsprout|no|yes|Grass|12-14|25%|type1=Grass|type2=Poison}} | ||
{{ | {{catch/entryfl|010|Caterpie|yes|yes|Grass|8|20%|type1=Bug}} | ||
{{ | {{catch/entryfl|013|Weedle|yes|yes|Grass|8|20%|type1=Bug|type2=Poison}} | ||
{{ | {{catch/entryfl|016|Pidgey|yes|yes|Grass|11, 13|15%|type1=Normal|type2=Flying}} | ||
{{ | {{Catch/entryfl|063|Abra|yes|yes|Grass|9, 11, 13|15%|type1=Psychic}} | ||
{{ | {{catch/entryfl|011|Metapod|no|yes|Grass|9|4%|type1=Bug}} | ||
{{ | {{catch/entryfl|014|Kakuna|yes|no|Grass|9|4%|type1=Bug|type2=Poison}} | ||
{{ | {{catch/entryfl|011|Metapod|yes|no|Grass|9|1%|type1=Bug}} | ||
{{ | {{catch/entryfl|014|Kakuna|no|yes|Grass|9|1%|type1=Bug|type2=Poison}} | ||
{{ | {{catch/footer|land}} | ||
|} | |} | ||
{| class="expandable" align="center" style="background: #{{leafgreen color light}}; {{roundy}}; border: 5px solid #{{firered color light}};" | |||
|- align="center" | |||
! Trainers | |||
|- | |||
| | |||
{{trainerheader}} | |||
{{Trainerentry|Spr FRLG Hiker.png|Hiker|Franklin|540|2|066|Machop|♂|15|None|074|Geodude|♂|15|None|36=シゲオ|37=Shigeo|38=Vs. Seeker}} | |||
{{trainerdiv}} | |||
{{Trainerentry|Spr FRLG Hiker.png|Hiker|Wayne|612|1|095|Onix|♂|17|None|36=コウサク|37=Kōsaku}} | |||
{{trainerdiv}} | |||
{{Trainerentry|Spr FRLG Youngster.png|Youngster|Joey|240|2|019|Rattata|♂|15|None|021|Spearow|♂|15|None|36=タケオ|37=Takeo}} | |||
{{trainerdiv}} | |||
{{Trainerentry|Spr FRLG Youngster.png|Youngster|Dan|272|1|079|Slowpoke|♂|17|None|36=アツシ|37=Atsushi}} | |||
{{trainerdiv}} | |||
{{Trainerentry|Spr FRLG Picnicker.png|Picnicker|Kelsey|300|2|032|Nidoran♂||15|None|029|Nidoran♀||15|None|36=ミサ|37=Misa|38=Vs. Seeker}} | |||
{{trainerdiv}} | |||
{{Trainerentry|Spr FRLG Hiker.png|Hiker|Nob|468|4|074|Geodude|♂|13|None|074|Geodude|♂|13|None|066|Machop|♂|13|None|074|Geodude|♂|13|None|36=ゴロウ|37=Gorō}} | |||
{{trainerdiv}} | |||
{{Trainerentry|Spr FRLG Camper.png|Camper|Flint|280|2|019|Rattata|♂|14|None|023|Ekans|♂|14|None|36=テルオ|37=Teruo}} | |||
{{trainerdiv}} | |||
{{Trainerentry|Spr FRLG Youngster.png|Youngster|Chad|224|2|023|Ekans|♂|14|None|027|Sandshrew|♂|14|None|36=カツユキ|37=Katsuyuki|38=Vs. Seeker}} | |||
{{trainerdiv}} | |||
{{Trainerentry|Spr FRLG Lass.png|Lass|Haley|208|3|043|Oddish|♀|13|None|016|Pidgey|♀|13|None|043|Oddish|♀|13|None|36=マキ|37=Maki}} | |||
{{Trainerfooter}} | |||
|} | |||
=== Sea Cottage === | === Sea Cottage === | ||
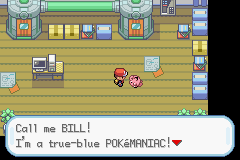
The Sea Cottage on [[Kanto Route 25|Cerulean Cape]] belongs to [[Bill]], a famous Pokémon researcher. His latest experiment has gone wrong, and his DNA was combined with that of a {{p|Clefairy}}! He asks for the player's help, so when he steps into the Teleporter, activate the Cell Separation System on his PC to return him to normal. As thanks, he hands over an {{key|III|S.S. Ticket}}, a boarding pass for the [[S.S. Anne|luxury cruise liner]] that is docked in [[Vermilion City]], which also happens to be the location of the third Gym. Before leaving the cape, re-enter the cottage and check out Bill's PC to view his favorite Pokémon, the [[Eeveelutions|Eevee family]]. This adds {{p|Eevee|fou}}{{p|Vaporeon|r ne}}{{p|Jolteon|w pa}}{{p|Flareon|ges}} to the Pokédex. | |||
Bill | |||
== Cerulean City == | == Cerulean City == | ||
Back in {{ci|Cerulean}}, the officer blocking the burgled house has moved out of the way. Inside lie obvious signs of a break-in, including muddy footprints, overturned plants, and a gaping hole in the wall that was used as an escape route. Step through the hole to confront the thief. | |||
{| class="expandable" align="center" style="background: #{{leafgreen color light}}; {{roundy}}; border: 5px solid #{{firered color light}};" | |||
|- align="center" | |||
! Items | |||
|- | |||
| | |||
{{Itlisth|road}} | |||
{{Itemlist|TM Ground|Received from {{tc|Team Rocket Grunt}} after defeating him|FR=yes|LG=yes|display={{TM|28|Dig}}}} | |||
{{Itlistfoot|road}} | |||
|} | |||
{| class="expandable" align="center" style="background: #{{leafgreen color light}}; | {| class="expandable" align="center" style="background: #{{leafgreen color light}}; {{roundy}}; border: 5px solid #{{firered color light}};" | ||
|- align="center" | |- align="center" | ||
! Trainers | ! Trainers | ||
|- | |- | ||
| | | | ||
{{trainerheader| | {{trainerheader|road}} | ||
{{Trainerentry| | {{Trainerentry|Spr FRLG Team Rocket Grunt M.png|Team Rocket Grunt||544|2|066|Machop|♂|17|None|096|Drowzee|♂|17|None}} | ||
{{Trainerfooter| | {{Trainerfooter|road|Inside}} | ||
|} | |} | ||
When he loses, the Rocket hands over the stolen [[TM28]] before running off. {{m|Dig}} is useful when in a cave, as it instantly returns the user to the entrance. | |||
== Route 5 == | |||
[[File:Kanto Route 5 FRLG.png|250px|thumbnail|left|Route 5]] | |||
[[File:Day Care 1 FRLG.png|250px|thumbnail|Pokémon Day Care]] | |||
{{rt|5|Kanto}} is a tiny path that connects [[Cerulean City]] to [[Saffron City]]. | |||
{| class="expandable" align="center" style="background: #{{leafgreen color light}}; {{roundy}}; border: 5px solid #{{firered color light}};" | |||
{| class="expandable" align="center" style="background: #{{leafgreen color light}}; | |||
|- align="center" | |- align="center" | ||
! Available Pokémon | ! Available Pokémon | ||
|- | |- | ||
| | | | ||
{{ | {{Catch/header|land|no}} | ||
{{ | {{Catch/entryfl|016|Pidgey|yes|yes|Grass|13, 15-16|40%|type1=Normal|type2=Flying}} | ||
{{ | {{Catch/entryfl|052|Meowth|yes|yes|Grass|10, 12, 14, 16|35%|type1=Normal}} | ||
{{ | {{Catch/entryfl|043|Oddish|yes|no|Grass|13, 15-16|25%|type1=Grass|type2=Poison}} | ||
{{ | {{Catch/entryfl|069|Bellsprout|no|yes|Grass|13, 15-16|25%|type1=Grass|type2=Poison}} | ||
{{Catch/footer|land}} | |||
{{ | |||
|} | |} | ||
=== Pokémon Day Care === | |||
The house on the hill is the [[Pokémon Day Care]]. The old man inside will raise one Pokémon at a time while the player is away. A Pokémon left here will gain one [[Experience|experience point]] for every step taken. This is a good way to raise the {{p|Magikarp}} from the [[Mt. Moon]] Pokémon Center. The downside is that he will make every decision; he may delete a desirable move, or ignore a new move altogether. He charges {{pdollar}}100, plus another {{pdollar}}100 for every new level, to return a Pokémon. | |||
=== | === Underground Path === | ||
It is impossible to reach Saffron just yet, so instead enter the [[Underground Path (Kanto Routes 5-6)|Underground Path]]. The tunnel leads to {{rt|6|Kanto}}. Inside the Underground Path entrance, a girl offers to trade Pokémon. She will offer either a {{p|Nidoran♀}}{{sup/3|FR}} or a {{p|Nidoran♂}}{{sup/3|LG}}, in exchange for its opposite-gender counterpart. | |||
{| class="expandable" align="center" style="background: #{{leafgreen color light}}; {{roundy}}; border: 5px solid #{{firered color light}};" | |||
|- align="center" | |||
! Items | |||
|- | |||
| | |||
{{Itlisth|road}} | |||
{{Itemlist|TinyMushroom|Held by a {{p|Nidoran♀}}{{sup/3|FR}}/{{p|Nidoran♂}}{{sup/3|LG}} that is received in trade with a girl|FR=yes|LG=yes|display={{DL|TinyMushroom|TinyMushroom}}}} | |||
{{Itemlist|Antidote|Near the northern stairs ''(hidden)''|FR=yes|LG=yes|display={{DL|Status ailment healing item|Antidote}}}} | |||
{{Itemlist|Awakening|Left side in the middle of the blue tiles ''(hidden)''|FR=yes|LG=yes|display={{DL|Status ailment healing item|Awakening}}}} | |||
{{Itemlist|Burn Heal|Two tiles up from the lower stairs, two tiles right from the left wall ''(hidden)''|FR=yes|LG=yes|display={{DL|Status ailment healing item|Burn Heal}}}} | |||
{{Itemlist|Ether|Middle of the red tiles, in the center of the path ''(hidden)''|FR=yes|LG=yes|display={{DL|Ether|Ether}}}} | |||
{{Itemlist|Ice Heal|Southern brown tiles near the Burn Heal ''(hidden)''|FR=yes|LG=yes|display={{DL|Status ailment healing item|Ice Heal}}}} | |||
{{Itemlist|Parlyz Heal|North side were the blue tiles go into the brown tiles ''(hidden)''|FR=yes|LG=yes|display={{DL|Status ailment healing item|Paralyze Heal|Parlyz Heal}}}} | |||
{{Itemlist|Potion|Where the blue tiles go into the red tiles ''(hidden)''|FR=yes|LG=yes|display={{DL|Potion|Potion}}}} | |||
{{Itlistfoot|road}} | |||
|} | |||
{| class="expandable" align="center" style="background: #{{leafgreen color light}}; {{roundy}}; border: 5px solid #{{firered color light}};" | |||
|- align="center" | |||
! Available Pokémon | |||
|- | |||
| | |||
{{Catch/header|road|no}} | |||
{{Catch/div|road|Gift Pokémon}} | |||
{{Catch/entryfl|029|Nidoran♀|yes|no|Trade|tradenum=032|tradename=Nidoran♂|The same as the Traded Pokémon|One|type1=Poison}} | |||
{{Catch/entryfl|032|Nidoran♂|no|yes|Trade|tradenum=029|tradename=Nidoran♀|The same as the traded Pokémon|One|type1=Poison}} | |||
{{Catch/footer|road}} | |||
|} | |||
{{WalkthroughPrevNext | | {{WalkthroughPrevNext | ||
game=FireRed | | |game=FireRed | ||
game2=LeafGreen | | |game2=LeafGreen | ||
gamename=FireRed and LeafGreen| | |gamename=FireRed and LeafGreen | ||
prev=yes | |prev=yes | ||
|prevsection=2 | |||
prevsection=2 | |prevname=Pewter City, Pewter Gym, Route 3, Mt. Moon, Route 4 | ||
|next=yes | |||
prevname=Pewter City | |nextsection=4 | ||
nextname=Route 6 | |nextname=Route 6, Vermilion City, S.S. Anne, Vermilion Gym | ||
}} | }} | ||
<br> | <br /> | ||
{{Project Walkthroughs notice}} | {{Project Walkthroughs notice}} | ||
[[Category:FireRed and LeafGreen walkthrough]] | [[Category:FireRed and LeafGreen walkthrough|F03]] | ||
Revision as of 00:56, 20 January 2016
These pages follow the remade Game Boy Advance iteration, not Pokémon Red and Blue. The guide for those games can be found here.
Cerulean City
Cerulean City is a peaceful seaside city located in the north-central part of Kanto. Places of interest include the Bike Shop, Cerulean Gym, and a mysterious cave on the edge of town. In the house next to the Pokémon Center, an old man is willing to trade his Ice/Psychic-type Jynx to get a Poliwhirl. Poliwhirl can only be found by using a high-end fishing rod, so return later to complete the trade.
| |||||||||||||||||||||||||||||||||||||||
| Items | ||||||||||||||||||||||||||||||||
|---|---|---|---|---|---|---|---|---|---|---|---|---|---|---|---|---|---|---|---|---|---|---|---|---|---|---|---|---|---|---|---|---|
| ||||||||||||||||||||||||||||||||
| Available Pokémon | |||||||||||||||||||||||||||||||||||||||||||||||||||||||||
|---|---|---|---|---|---|---|---|---|---|---|---|---|---|---|---|---|---|---|---|---|---|---|---|---|---|---|---|---|---|---|---|---|---|---|---|---|---|---|---|---|---|---|---|---|---|---|---|---|---|---|---|---|---|---|---|---|---|
| |||||||||||||||||||||||||||||||||||||||||||||||||||||||||
Bike Shop
The Bike Shop has bicycles for sale, but the price is a whopping $1,000,000! The player can't carry that much cash, so it seems that he/she is out of luck for now.
Berry Powder man
Visit the Gym Badge man's neighbor to receive the Powder Jar from the old man. This jar is used to collect the Berry Powder that is obtained from the Berry Crush minigame. Collecting lots of powder allows him to prepare many different medicines in exchange.
| |||||||||||||||||||||||||||||||||||||||||||||||
Gym Badge man
In the northwest house is a man who will explain the effects of the eight Gym Badges. The first seven Badges enable the use of HM moves in the field. Four Badges increase a certain stat during battle, raising each respective skill to 112.5% of the normal value. The four other Badges ensure a Pokémon's obedience during battle.
| Badge | Effect | Badge | Effect | ||
|---|---|---|---|---|---|
| Boulder Badge | Increases Attack; Allows Flash in the field |
Cascade Badge | Ensures obedience up to level 30; Allows Cut in the field | ||
| Thunder Badge | Increases Speed; Allows Fly in the field |
Rainbow Badge | Ensures obedience up to level 50; Allows Strength in the field | ||
| Soul Badge | Increases Defense; Allows Surf in the field |
Marsh Badge | Ensures obedience up to level 70; Allows Rock Smash in the field | ||
| Volcano Badge | Increases Special Attack and Special Defense; Allows Waterfall in the field |
Earth Badge | Ensures obedience up to level 100 | ||
Burgled house
The house behind the Gym is blocked off by a police officer. It seems that Team Rocket has stolen a valuable item from the people living here. Nothing can be done about this now, so instead head for the Gym.
Cerulean Gym
The Cerulean Gym specializes in Water-type Pokémon, so Grass- and Electric-type attacks will work wonders. Trainers who chose Charmander may have a rough time here, so it may be necessary to venture off to Route 24 or Route 25 to catch an OddishFR or a BellsproutLG to help out. Take out Misty's Staryu as quickly as possible in order to move on to her Starmie. Her purple starfish is both stronger and faster than Staryu, making its Water Pulse especially painful. Trainers who chose Squirtle would do well to raise it to level 18, as its Bite move will inflict serious damage on the part-Psychic Starmie.
| ||||||||||||||||||||||||||||||||||||||||||||||||||||||||||||||||||||||||||||||||||||||||||||||||||||||||||
Defeated, Misty awards the player the Cascade Badge, which ensures a Pokémon's obedience up to level 30. It also enables the use of Cut in the field. Misty also hands over TM03 (Water Pulse) as a prize.
Rest up and head north to Route 24. As soon as the player heads for Route 24, Blue appears. He taunts his rival like usual before challenging the player to another battle. His Pidgeotto is more a nuisance than a threat, though Bulbasaur is vulnerable to its Gust attack. Abra, with Teleport—which fails during Trainer battles—as its only move, is nothing more than a punching bag for the player's weaker Pokémon. His starter Pokémon has learned a damaging elemental attack, so the player should avoid pitting his/her own starter against it.
After the battle, Blue hands over the Fame Checker. This item records miscellaneous information about notable figures, including Professor Oak, the eight Gym Leaders, and the Elite Four. This info is primarily found in the Pokémon Journals located in most Pokémon Centers.
Route 24
Route 24 is a narrow route that connects Cerulean City to Route 25. Nugget Bridge is located here, and is always packed with Trainers. There are sixteen Trainers between Cerulean City and the Sea Cottage; luckily it is possible to return to the Pokémon Center and heal up as necessary. Upon defeating the five Trainers on the bridge, a disguised Team Rocket Grunt tries to get the player to join the organization. He attacks when his offer is declined, but gives up a valuable Nugget when defeated.
A patch of tall grass is located near the north end of the bridge. In addition to Camper Shane, wild Abra can also be found here. Collect TM45 (Attract) on the hill to the north, then head east to Route 25.
| Items | ||||||||||||||||||||
|---|---|---|---|---|---|---|---|---|---|---|---|---|---|---|---|---|---|---|---|---|
| ||||||||||||||||||||
| Available Pokémon | ||||||||||||||||||||||||||||||||||||||||||||||||||||||||||||||||||||||||||||||||||||||||||||||||||||||||||||||||||||||||||||||||||||||||||||||||||||||||||||||||||||||||||||||||||||||||||
|---|---|---|---|---|---|---|---|---|---|---|---|---|---|---|---|---|---|---|---|---|---|---|---|---|---|---|---|---|---|---|---|---|---|---|---|---|---|---|---|---|---|---|---|---|---|---|---|---|---|---|---|---|---|---|---|---|---|---|---|---|---|---|---|---|---|---|---|---|---|---|---|---|---|---|---|---|---|---|---|---|---|---|---|---|---|---|---|---|---|---|---|---|---|---|---|---|---|---|---|---|---|---|---|---|---|---|---|---|---|---|---|---|---|---|---|---|---|---|---|---|---|---|---|---|---|---|---|---|---|---|---|---|---|---|---|---|---|---|---|---|---|---|---|---|---|---|---|---|---|---|---|---|---|---|---|---|---|---|---|---|---|---|---|---|---|---|---|---|---|---|---|---|---|---|---|---|---|---|---|---|---|---|---|---|---|---|
| ||||||||||||||||||||||||||||||||||||||||||||||||||||||||||||||||||||||||||||||||||||||||||||||||||||||||||||||||||||||||||||||||||||||||||||||||||||||||||||||||||||||||||||||||||||||||||
| Trainers | |||||||||||||||||||||||||||||||||||||||||||||||||||||||||||||||||||||||||||||||||||||||||||||||||||||||||||||||||||||||||||||||||||||||||||||||||||||||||||||||||||
|---|---|---|---|---|---|---|---|---|---|---|---|---|---|---|---|---|---|---|---|---|---|---|---|---|---|---|---|---|---|---|---|---|---|---|---|---|---|---|---|---|---|---|---|---|---|---|---|---|---|---|---|---|---|---|---|---|---|---|---|---|---|---|---|---|---|---|---|---|---|---|---|---|---|---|---|---|---|---|---|---|---|---|---|---|---|---|---|---|---|---|---|---|---|---|---|---|---|---|---|---|---|---|---|---|---|---|---|---|---|---|---|---|---|---|---|---|---|---|---|---|---|---|---|---|---|---|---|---|---|---|---|---|---|---|---|---|---|---|---|---|---|---|---|---|---|---|---|---|---|---|---|---|---|---|---|---|---|---|---|---|---|---|---|
| |||||||||||||||||||||||||||||||||||||||||||||||||||||||||||||||||||||||||||||||||||||||||||||||||||||||||||||||||||||||||||||||||||||||||||||||||||||||||||||||||||
Route 25
Route 25 is a dead-end route on the ocean's edge. There are nine more Trainers to fight on the way to the cape. One of them, Camper Flint, is standing in a line of trees, and the player will need to lure him out with a battle to reach TM43 (Secret Power) lying behind him. Secret Power is a damage-dealing move with a 30% chance of causing a secondary effect, which is determined by the surrounding environment.
| Items | ||||||||||||||||||||||||||||||||
|---|---|---|---|---|---|---|---|---|---|---|---|---|---|---|---|---|---|---|---|---|---|---|---|---|---|---|---|---|---|---|---|---|
| ||||||||||||||||||||||||||||||||
| Available Pokémon | ||||||||||||||||||||||||||||||||||||||||||||||||||||||||||||||||||||||||||||||||||||||||||||||||||||||||||||||||||||||||||||||||||||||||||||||||||||||||||||||||||||||||||||||||||||||||||
|---|---|---|---|---|---|---|---|---|---|---|---|---|---|---|---|---|---|---|---|---|---|---|---|---|---|---|---|---|---|---|---|---|---|---|---|---|---|---|---|---|---|---|---|---|---|---|---|---|---|---|---|---|---|---|---|---|---|---|---|---|---|---|---|---|---|---|---|---|---|---|---|---|---|---|---|---|---|---|---|---|---|---|---|---|---|---|---|---|---|---|---|---|---|---|---|---|---|---|---|---|---|---|---|---|---|---|---|---|---|---|---|---|---|---|---|---|---|---|---|---|---|---|---|---|---|---|---|---|---|---|---|---|---|---|---|---|---|---|---|---|---|---|---|---|---|---|---|---|---|---|---|---|---|---|---|---|---|---|---|---|---|---|---|---|---|---|---|---|---|---|---|---|---|---|---|---|---|---|---|---|---|---|---|---|---|---|
| ||||||||||||||||||||||||||||||||||||||||||||||||||||||||||||||||||||||||||||||||||||||||||||||||||||||||||||||||||||||||||||||||||||||||||||||||||||||||||||||||||||||||||||||||||||||||||
| Trainers | |||||||||||||||||||||||||||||||||||||||||||||||||||||||||||||||||||||||||||||||||||||||||||||||||||||||||||||||||||||||||||||||||||||||||||||||||||||||||||||||||||||||||||||||||||||||||||||||||||||
|---|---|---|---|---|---|---|---|---|---|---|---|---|---|---|---|---|---|---|---|---|---|---|---|---|---|---|---|---|---|---|---|---|---|---|---|---|---|---|---|---|---|---|---|---|---|---|---|---|---|---|---|---|---|---|---|---|---|---|---|---|---|---|---|---|---|---|---|---|---|---|---|---|---|---|---|---|---|---|---|---|---|---|---|---|---|---|---|---|---|---|---|---|---|---|---|---|---|---|---|---|---|---|---|---|---|---|---|---|---|---|---|---|---|---|---|---|---|---|---|---|---|---|---|---|---|---|---|---|---|---|---|---|---|---|---|---|---|---|---|---|---|---|---|---|---|---|---|---|---|---|---|---|---|---|---|---|---|---|---|---|---|---|---|---|---|---|---|---|---|---|---|---|---|---|---|---|---|---|---|---|---|---|---|---|---|---|---|---|---|---|---|---|---|---|---|---|---|
| |||||||||||||||||||||||||||||||||||||||||||||||||||||||||||||||||||||||||||||||||||||||||||||||||||||||||||||||||||||||||||||||||||||||||||||||||||||||||||||||||||||||||||||||||||||||||||||||||||||
Sea Cottage
The Sea Cottage on Cerulean Cape belongs to Bill, a famous Pokémon researcher. His latest experiment has gone wrong, and his DNA was combined with that of a Clefairy! He asks for the player's help, so when he steps into the Teleporter, activate the Cell Separation System on his PC to return him to normal. As thanks, he hands over an S.S. Ticket, a boarding pass for the luxury cruise liner that is docked in Vermilion City, which also happens to be the location of the third Gym. Before leaving the cape, re-enter the cottage and check out Bill's PC to view his favorite Pokémon, the Eevee family. This adds four new pages to the Pokédex.
Cerulean City
Back in Cerulean, the officer blocking the burgled house has moved out of the way. Inside lie obvious signs of a break-in, including muddy footprints, overturned plants, and a gaping hole in the wall that was used as an escape route. Step through the hole to confront the thief.
| Items | ||||||||||||
|---|---|---|---|---|---|---|---|---|---|---|---|---|
| ||||||||||||
| Trainers | |||||||||||||||||||||||
|---|---|---|---|---|---|---|---|---|---|---|---|---|---|---|---|---|---|---|---|---|---|---|---|
| |||||||||||||||||||||||
When he loses, the Rocket hands over the stolen TM28 before running off. Dig is useful when in a cave, as it instantly returns the user to the entrance.
Route 5
Route 5 is a tiny path that connects Cerulean City to Saffron City.
| Available Pokémon | ||||||||||||||||||||||||||||||||||||||||||||||||||||||||||||||||||||||||||||||||||||||||||
|---|---|---|---|---|---|---|---|---|---|---|---|---|---|---|---|---|---|---|---|---|---|---|---|---|---|---|---|---|---|---|---|---|---|---|---|---|---|---|---|---|---|---|---|---|---|---|---|---|---|---|---|---|---|---|---|---|---|---|---|---|---|---|---|---|---|---|---|---|---|---|---|---|---|---|---|---|---|---|---|---|---|---|---|---|---|---|---|---|---|---|
| ||||||||||||||||||||||||||||||||||||||||||||||||||||||||||||||||||||||||||||||||||||||||||
Pokémon Day Care
The house on the hill is the Pokémon Day Care. The old man inside will raise one Pokémon at a time while the player is away. A Pokémon left here will gain one experience point for every step taken. This is a good way to raise the Magikarp from the Mt. Moon Pokémon Center. The downside is that he will make every decision; he may delete a desirable move, or ignore a new move altogether. He charges $100, plus another $100 for every new level, to return a Pokémon.
Underground Path
It is impossible to reach Saffron just yet, so instead enter the Underground Path. The tunnel leads to Route 6. Inside the Underground Path entrance, a girl offers to trade Pokémon. She will offer either a Nidoran♀FR or a Nidoran♂LG, in exchange for its opposite-gender counterpart.
| Items | ||||||||||||||||||||||||||||||||||||||||
|---|---|---|---|---|---|---|---|---|---|---|---|---|---|---|---|---|---|---|---|---|---|---|---|---|---|---|---|---|---|---|---|---|---|---|---|---|---|---|---|---|
| ||||||||||||||||||||||||||||||||||||||||
| Available Pokémon | |||||||||||||||||||||||||||||||||||||||||||||||||||||||||||||||||||||||||
|---|---|---|---|---|---|---|---|---|---|---|---|---|---|---|---|---|---|---|---|---|---|---|---|---|---|---|---|---|---|---|---|---|---|---|---|---|---|---|---|---|---|---|---|---|---|---|---|---|---|---|---|---|---|---|---|---|---|---|---|---|---|---|---|---|---|---|---|---|---|---|---|---|---|
| |||||||||||||||||||||||||||||||||||||||||||||||||||||||||||||||||||||||||
|
FireRed and LeafGreen walkthrough |
|

|
This article is part of Project Walkthroughs, a Bulbapedia project that aims to write comprehensive step-by-step guides on each Pokémon game. |
