Appendix:Emerald walkthrough/Section 13: Difference between revisions
m (→Sky Pillar) |
mNo edit summary Tag: bad formatting |
||
| (16 intermediate revisions by 5 users not shown) | |||
| Line 1: | Line 1: | ||
==Mossdeep City== | |||
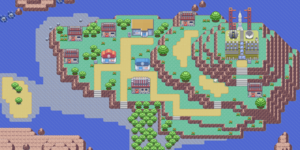
== | [[File:Mossdeep City E.png|thumb|Mossdeep City]] | ||
[[File: | |||
{| class="expandable | [[Mossdeep City]] stands perched on an island near [[Hoenn]]'s eastern edge, where the winds are mild and the weather conditions are stable. This makes it the perfect place for launching rockets, and a perfect home for the [[Mossdeep Space Center]]. The [[Mossdeep Gym|seventh Gym]] in the [[Hoenn League]], run by twin Gym Leaders, is located on the north side of the island, and {{steven}}'s house can be found on the island's northwest corner. | ||
{| class="expandable" style="margin: auto; background: #F0A7B6; {{roundy}}; border: 5px solid #FAAFBE;" | |||
|- align="center" | |- align="center" | ||
! Available Pokémon | ! Available Pokémon | ||
|- | |||
| | |||
{{Catch/header|city|no}} | |||
{{Catch/div|water|Surfing}} | |||
{{Catch/entry3|072|Tentacool|no|no|yes|Surf|5-35|60%|type1=Water|type2=Poison}} | |||
{{Catch/entry3|278|Wingull|no|no|yes|Surf|10-30|35%|type1=Water|type2=Flying}} | |||
{{Catch/entry3|279|Pelipper|no|no|yes|Surf|25-30|5%|type1=Water|type2=Flying}} | |||
{{Catch/div|water|Fishing}} | |||
{{Catch/entry3|129|Magikarp|no|no|yes|Fish Old|5-10|70%|type1=Water}} | |||
{{Catch/entry3|072|Tentacool|no|no|yes|Fish Old|5-10|30%|type1=Water|type2=Poison}} | |||
{{Catch/entry3|129|Magikarp|no|no|yes|Fish Good|10-30|60%|type1=Water}} | |||
{{Catch/entry3|072|Tentacool|no|no|yes|Fish Good|10-30|20%|type1=Water|type2=Poison}} | |||
{{Catch/entry3|320|Wailmer|no|no|yes|Fish Good|10-30|20%|type1=Water}} | |||
{{Catch/entry3|320|Wailmer|no|no|yes|Fish Super|25-45|60%|type1=Water}} | |||
{{Catch/entry3|319|Sharpedo|no|no|yes|Fish Super|30-35|40%|type1=Water|type2=Dark}} | |||
{{Catch/div|city|Gift Pokémon}} | |||
{{Catch/entry3|374|Beldum|no|no|yes|Gift|5|One|type1=Steel|type2=Psychic}} | |||
{{Catch/footer|city}} | |||
|} | |||
{| class="expandable" style="margin: auto; background: #F0A7B6; {{roundy}}; border: 5px solid #FAAFBE;" | |||
|- align="center" | |||
! Items | |||
|- | |||
| | |||
{{itlisth|sand}} | |||
{{itemlist|Net Ball|Southeast corner of the island|E=yes|display={{ball|Net}}}} | |||
{{itemlist|King's Rock|From the boy in front of Steven's house|E=yes|display={{DL|Evolution-inducing held item|King's Rock}}}} | |||
{{itemlist|Super Rod|From the Fisherman in the house overlooking the Gym|E=yes|display={{key|VI|Super Rod}}}} | |||
{{itemlist|Sun Stone|From a Sailor inside the Space Center|E=yes|display={{evostone|Sun Stone}}}} | |||
{{catch/div|sand|After defeating Team Magma at the Space Center}} | |||
{{itemlist|HM Water|From Steven in his house|E=yes|display={{HM|08|Dive}}}} | |||
{{catch/div|sand|After defeating the Mossdeep Gym}} | |||
{{itemlist|TM Psychic|From Liza and Tate upon their defeat|E=yes|display={{TM|04|Calm Mind}}}} | |||
{{itlistfoot|sand}} | |||
|} | |||
===Move Tutor=== | |||
The first person you meet upon arriving in Mossdeep is a Black Belt in the shallow water on the island's southwest side. As a {{type|Fighting}} Trainer, he's had a difficult time at the local Gym and has resorted to punching the ground to relieve his frustration. Speak to him, and he offers to teach the move {{m|DynamicPunch}} to a Pokémon, one time only. | |||
===Steven's House=== | |||
The house on the island's northwest edge belongs to {{Steven}}, and contains part of his rock collection. | |||
===Game Corner=== | |||
A Game Corner is located to the south of the Poké Mart. Inside, Trainers can compete with others from [[Hoenn]]{{sup/3|E}} and [[Kanto]]{{sup/3|FRLG}} in two mini-games, [[Pokémon Jump]] and [[Dodrio Berry Picking]]. Communications are made using the [[Game Boy Advance Wireless Adapter]]. | |||
===Running Errands=== | |||
Visit the house nearest the stairway to the Space Center to meet a young woman who uses a {{p|Wingull}} to send letters to a friend in [[Fortree City]]. Talk to the Wingull and it will take flight, off to deliver another note. If you return to Fortree and visit the Pokémon Breeder in the northeast house there, he will give you a {{DL|In-battle effect item|Mental Herb}} that his Wingull found in its travels. | |||
===Score the Super Rod=== | |||
The house overlooking the Gym belongs to a lone Fisherman. Speak to him to receive the {{key|III|Super Rod}}, a high-end fishing rod that can reel in all kinds of sea life. | |||
===Mossdeep Space Center=== | |||
The [[Mossdeep Space Center]] stands on a hill in the northeast. {{steven}} is inside, standing near a table with a letter emblazoned with the [[Team Magma]] logo. It seems that the group has announced its intention of stealing all the rocket fuel on the island. He plans to keep an eye on things for now, and suggests checking out the rest of the city. A Sailor near the viewing area will give you a {{evostone|Sun Stone}} he found on the beach. | |||
===Mossdeep Gym=== | |||
[[File:Mossdeep Gym E.png|thumb|Mossdeep Gym]] | |||
{{sign|E|header}} | |||
{{sign|E|title|Mossdeep City Pokémon Gym<br>Leaders: Liza & Tate}} | |||
{{sign|E|The mystic combination!}} | |||
{{sign|E|footer}} | |||
The [[Mossdeep Gym]] specializes in {{type|Psychic}} Pokémon, which are vulnerable to {{t|Bug}}-, {{t|Dark}}-, and {{type|Ghost}} moves. Dark Pokémon are both immune to Psychic moves and able to inflict super-effective damage. Avoid using {{t|Fighting}}- and {{type|Poison}} Pokémon. The Gym features several rooms linked only by [[warp tile]]s. Each room contains Trainers and obstacles on [[spin tile]]s that rotate when certain tiles are stepped on, changing the path and often bringing challengers within view of opposing Gym Trainers. | |||
Step on the yellow tile in the first room to start a [[Double Battle]] with Psychics Preston and Maura, then go north to the warp tile. The second room is located a short distance northward; step on the yellow tile here to begin a Double Battle with Psychics Samantha and Drake. There are two warp tiles beyond them; take the right warp to the southeast room first. Step on the first purple tile to begin a battle with Hex Maniac Kathleen and Psychic Nicholas. Go south and step on the second purple tile twice to battle Gentleman Clifford and Psychic Macey. Continue south and step on the green tile twice; this spins the obstacles in the south-central room. Take the north warp back to the west-central room, then the left warp there to the northwest room. Step on the first blue tile twice, the orange tile three times, the second blue tile three times, and the first blue tile once to reach the warp tile. Cross the south-central room to the last warp and the Gym Leaders' room. | |||
Twins [[Tate and Liza]] send out two Pokémon at once, drawing challengers into a Double Battle. {{p|Claydol}} can boost its already-high {{stat|Special Defense}} with {{m|Light Screen}}, and retaliate against {{t|Bug}} Pokémon with {{m|AncientPower}}. {{p|Xatu}}'s {{m|Calm Mind}} raises both its Special stats, and {{m|Confuse Ray}} allows it to harass the foe. {{p|Lunatone}} can lull its opponent to sleep with {{m|Hypnosis}}, while {{p|Solrock}} can scorch {{t|Grass}} Pokémon looking to target their {{t|Rock}} typing. Three of their Pokémon are weakened by {{t|Water}} moves; by using {{m|Surf}}, you can attack both at once and bring the battle to a quick end. Otherwise, you may want to target one Pokémon at a time in what would essentially become a two-on-one battle. | |||
{| align="center" | |||
|- align="center" valign="top" | |||
| | |||
{| align="center" style="background: #{{psychic color}}; {{roundy}}; border: 5px solid #{{psychic color light}};" | |||
|- align="center" | |||
! Mossdeep Gym<br>[[File:Mind Badge.png|35px|The Mind Badge]]<br><br> | |||
|- | |||
| | |||
{| align="center" class="expandable" style="background: #{{psychic color}}; {{roundy}}; border: 5px solid #{{psychic color light}};" | |||
|- align="center" | |||
! Trainers | |||
|- | |- | ||
| | |||
{{Trainerheader|Psychic}} | |||
{{catch/div|Psychic|Southwest room}} | |||
{{Trainerentry|Spr RS_Psychic M.png|Psychic|Preston|864<br><small>Potential [[Double Battle]] with Maura</small>|1|281|Kirlia|♂|36|}} | |||
{{trainerdiv|Psychic}} | |||
{{Trainerentry|Spr RS Psychic F.png|Psychic|Maura|864<br><small>Potential [[Double Battle]] with Preston</small>|1|064|Kadabra|♂|36|}} | |||
{{catch/div|Psychic|West-central room}} | |||
{{Trainerentry|Spr RS Psychic F.png|Psychic|Samantha|864<br><small>Potential [[Double Battle]] with Blake</small>|1|178|Xatu|♀|36|}} | |||
{{trainerdiv|Psychic}} | |||
{{Trainerentry|Spr RS Psychic M.png|Psychic|Blake|864<br><small>Potential [[Double Battle]] with Samantha</small>|1|203|Girafarig|♂|36|}} | |||
{{catch/div|Psychic|Southeast room}} | |||
{{Trainerentry|Spr RS Psychic F.png|Psychic|Macey|864<br><small>Potential [[Double Battle]] with Clifford</small>|1|177|Natu|♀|36|}} | |||
{{trainerdiv|Psychic}} | |||
{{Trainerentry|Spr RS Gentleman.png|Gentleman|Clifford|2880<br><small>Potential [[Double Battle]] with Macey or Kathleen</small>|1|203|Girafarig|♂|36|}} | |||
{{trainerdiv|Psychic}} | |||
{{Trainerentry|Spr RS Hex Maniac.png|Hex Maniac|Kathleen|864<br><small>Potential [[Double Battle]] with Clifford or Nicholas</small>|1|064|Kadabra|♂|36|}} | |||
{{trainerdiv|Psychic}} | |||
{{Trainerentry|Spr RS Psychic M.png|Psychic|Nicholas|864<br><small>Potential [[Double Battle]] with Kathleen</small>|1|202|Wobbuffet|♂|36|}} | |||
{{catch/div|Psychic|Northwest room}} | |||
{{Trainerentry|Spr RS Gentleman.png|Gentleman|Nate|2880<br><small>Potential [[Double Battle]] with Virgil</small>|1|325|Spoink|♂|36|}} | |||
{{trainerdiv|Psychic}} | |||
{{Trainerentry|Spr RS Psychic M.png|Psychic|Virgil|864<br><small>Potential [[Double Battle]] with Nate or Slyvia</small>|1|280|Ralts|♂|36|}} | |||
{{trainerdiv|Psychic}} | |||
{{Trainerentry|Spr RS Hex Maniac.png|Hex Maniac|Sylvia|864<br><small>Potential [[Double Battle]] with Hannah or Virgil</small>|1|307|Meditite|♀|36|}} | |||
{{trainerdiv|Psychic}} | |||
{{Trainerentry|Spr RS Psychic F.png|Psychic|Hannah|864<br><small>Potential [[Double Battle]] with Sylvia</small>|1|281|Kirlia|♀|36|}} | |||
{{Trainerfooter|Psychic|3|Inside}} | |||
|} | |||
{| style="margin: auto;" | |||
| | | | ||
{{ | {{Party/Single | ||
{{ | |color={{psychic color}}|headcolor={{psychic color light}}|bordercolor={{psychic color dark}} | ||
|sprite=Spr RS Tate and Liza.png | |||
|prize={{PDollar}}8400 | |||
{{ | |class=Leader|classlink=Gym Leader|name={{color2|000|Tate and Liza|Tate & Liza}} | ||
|game=E|location=Mossdeep Gym | |||
{{ | |pokemon=4}} | ||
{{ | |{{Pokémon/3|game=Emerald | ||
{{ | |ndex=344|pokemon=Claydol | ||
|type1=Ground|type2=Psychic | |||
{{ | |level=41 | ||
|ability=Levitate | |||
{{ | |move1=Earthquake|move1type=Ground | ||
|move2=AncientPower|move2type=Rock | |||
|move3=Psychic|move3type=Psychic | |||
|move4=Light Screen|move4type=Psychic}} | |||
|{{Pokémon/3|game=Emerald | |||
|ndex=178|pokemon=Xatu | |||
|type1=Psychic|type2=Flying | |||
|level=41|gender=male | |||
|ability=Synchronize | |||
|move1=Psychic|move1type=Psychic | |||
|move2=Sunny Day|move2type=Fire | |||
|move3=Confuse Ray|move3type=Ghost | |||
|move4=Calm Mind|move4type=Psychic}} | |||
{{Party/Div|color={{psychic color}}}} | |||
|{{Pokémon/3|game=Emerald | |||
|ndex=337|pokemon=Lunatone | |||
|type1=Rock|type2=Psychic | |||
|level=42 | |||
|ability=Levitate | |||
|held=Sitrus Berry | |||
|move1=Light Screen|move1type=Psychic | |||
|move2=Psychic|move2type=Psychic | |||
|move3=Hypnosis|move3type=Psychic | |||
|move4=Calm Mind|move4type=Psychic}} | |||
|{{Pokémon/3|game=Emerald | |||
|ndex=338|pokemon=Solrock | |||
|type1=Rock|type2=Psychic | |||
|level=42 | |||
|ability=Levitate | |||
|held=Sitrus Berry | |||
|move1=Sunny Day|move1type=Fire | |||
|move2=SolarBeam|move2type=Grass | |||
|move3=Psychic|move3type=Psychic | |||
|move4=Flamethrower|move4type=Fire}} | |||
{{Party/Footer}} | |||
|} | |||
|} | |||
|} | |} | ||
{| class="expandable | |||
After the battle, [[Tate and Liza]] award you the {{badge|Mind}}, which boosts your Pokémon's {{stat|Special Attack}} and {{stat|Special Defense}} by 10% and enables the use of {{m|Dive}} in the field. The twins also give you {{TM|04|Calm Mind}} as a prize, and register themselves in your PokéNav. | |||
===Space Center=== | |||
{| class="expandable" style="margin: auto; background: #{{locationcolor/med|building}}; {{roundy}}; border: 5px solid #{{locationcolor/light|building}};" | |||
|- align="center" | |- align="center" | ||
! Trainers | ! Trainers | ||
|- | |- | ||
| | |||
{{trainerheader|building}} | |||
{{catch/div|building|1F}} | |||
{{trainerentry|Spr RS Team Magma Grunt F.png|Team Magma Grunt||620|2|041|Zubat|♀|31||261|Poochyena|♀|31|}} | |||
{{trainerdiv|building}} | |||
{{trainerentry|Spr RS Team Magma Grunt M.png|Team Magma Grunt||640|1|322|Numel|♂|32|}} | |||
{{trainerdiv|building}} | |||
{{trainerentry|Spr RS Team Magma Grunt M.png|Team Magma Grunt||640|1|343|Baltoy||32|}} | |||
{{trainerdiv|building}} | |||
{{trainerentry|Spr RS Team Magma Grunt M.png|Team Magma Grunt||600|3|262|Mightyena|♂|26||262|Mightyena|♂|28||322|Numel|♂|30|}} | |||
{{catch/div|building|2F}} | |||
{{trainerentry|Spr RS Team Magma Grunt M.png|Team Magma Grunt||640|1|041|Zubat|♂|32|}} | |||
{{trainerdiv|building}} | |||
{{trainerentry|Spr RS Team Magma Grunt M.png|Team Magma Grunt||640|1|262|Mightyena|♂|32|}} | |||
{{trainerdiv|building}} | |||
{{trainerentry|Spr RS Team Magma Grunt M.png|Team Magma Grunt||640|1|343|Baltoy||32|}} | |||
{{trainerfooter|building|I}} | |||
|} | |||
After beating the Gym, you find [[Maxie]] and several Grunts on their way to the Space Center. Follow them inside and defeat the four Grunts on the first floor. Upstairs, you are ambushed by three more; you fight them one at a time, but with no break between. Farther on, you find Steven confronting Maxie, who reveals his intentions for the rocket fuel. With {{p|Groudon}} gone, he has no need for their base. They're going to cause [[Mt. Chimney]] to erupt by dumping the entire supply into the volcano! Steven is shocked, and asks you to join him in battle against Maxie and [[Tabitha]]. {{DL|Steven Stone|Multi Battle with player|Steven's team}} consists of {{p|Metang}}, {{p|Skarmory}}, and {{p|Aggron}}. | |||
====VS Maxie, Tabitha==== | |||
{| style="margin: auto;" | |||
| | |||
{{Party/Tag | |||
|color={{ruby color light}}|bordercolor={{ruby color}}|headcolor={{ground color}} | |||
|color1={{ruby color light}}|bordercolor1={{ruby color}}|headcolor1={{ground color}} | |||
|color2={{ruby color light}}|bordercolor2={{ruby color}}|headcolor2={{ground color}} | |||
|class=Magma Leader|classlink=Maxie|name={{color2|000|Maxie}}|sprite=Spr RS Maxie.png | |||
|class2=Magma Admin|name2={{color2|000|Tabitha}}|sprite2=Spr RS Tabitha.png | |||
|game=E|location=Mossdeep Space Center | |||
|prize={{pdollar}}5120 | |||
|pokemon1=3 | |||
|pokemon2=3}} | |||
|{{Pokémon/3|game=Emerald | |||
|ndex=262|pokemon=Mightyena | |||
|type1=Dark | |||
|level=42|gender=male | |||
|ability=Intimidate | |||
|move1=Swagger|move1type=Normal | |||
|move2=Scary Face|move2type=Normal | |||
|move3=Take Down|move3type=Normal | |||
|move4=Taunt|move4type=Dark}} | |||
|{{Pokémon/3|game=Emerald | |||
|ndex=169|pokemon=Crobat | |||
|type1=Poison|type2=Flying | |||
|level=43|gender=male | |||
|ability=Inner Focus | |||
|move1=Wing Attack|move1type=Flying | |||
|move2=Confuse Ray|move2type=Ghost | |||
|move3=Air Cutter|move3type=Flying | |||
|move4=Mean Look|move4type=Normal}} | |||
|{{Pokémon/3|game=Emerald | |||
|ndex=323|pokemon=Camerupt | |||
|type1=Fire|type2=Ground | |||
|level=44|gender=male | |||
|ability=Magma Armor | |||
|move1=Take Down|move1type=Normal | |||
|move2=Amnesia|move2type=Psychic | |||
|move3=Rock Slide|move3type=Rock | |||
|move4=Earthquake|move4type=Ground}} | |||
{{Party/Div|color={{ruby color light}}}} | |||
|{{Pokémon/3|game=Emerald | |||
|ndex=323|pokemon=Camerupt | |||
|type1=Fire|type2=Ground | |||
|level=36|gender=male | |||
|ability=Oblivious | |||
|move1=Focus Energy|move1type=Normal | |||
|move2=Take Down|move2type=Normal | |||
|move3=Amnesia|move3type=Psychic | |||
|move4=Rock Slide|move4type=Rock}} | |||
|{{Pokémon/3|game=Emerald | |||
|ndex=262|pokemon=Mightyena | |||
|type1=Dark | |||
|level=38|gender=male | |||
|ability=Intimidate | |||
|move1=Roar|move1type=Normal | |||
|move2=Swagger|move2type=Normal | |||
|move3=Scary Face|move3type=Normal | |||
|move4=Take Down|move4type=Normal}} | |||
|{{Pokémon/3|game=Emerald | |||
|ndex=042|pokemon=Golbat | |||
|type1=Poison|type2=Flying | |||
|level=40|gender=male | |||
|ability=Inner Focus | |||
|move1=Bite|move1type=Dark | |||
|move2=Wing Attack|move2type=Flying | |||
|move3=Confuse Ray|move3type=Ghost | |||
|move4=Air Cutter|move4type=Flying}} | |||
{{Party/Footer}} | |||
|} | |||
Having failed at both controlling Groudon and activating the volcano, Maxie begins to questions his goals and wonders if [[Team Aqua]]'s plans are equally misguided. Maxie and his subordinates flee, and Steven invites you to his home. He greets you when you step inside, and hands you {{HM|08|Dive}}. In certain bodies of water, there are dark spots where the water runs unusually deep; using Dive at one of these spots lets you descend to the ocean floor far below. Swim to a point where the sunlight filters down from above and use Dive again to surface. With this move, you will be able to pursue [[Archie]] to the [[Seafloor Cavern]]. | |||
==Route 125== | |||
[[File:Hoenn Route 125 E.png|thumb|Route 125]] | |||
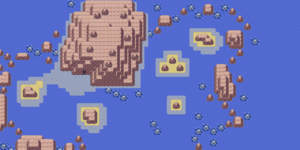
Located north of [[Mossdeep City]], {{rt|125|Hoenn}} is an optional area with several potential Secret Base locations. The waterlogged [[Shoal Cave]] stands in the route's center. | |||
{| class="expandable" style="margin: auto; background: #{{locationcolor/med|ocean}}; {{roundy}}; border: 5px solid #{{locationcolor/light|ocean}};" | |||
|- align="center" | |||
! Trainers | |||
|- | |||
| | | | ||
{{trainerheader|ocean}} | {{trainerheader|ocean}} | ||
{{trainerentry|Spr RS | {{trainerentry|Spr RS Sailor.png|Sailor|Ernest|1056|2|278|Wingull|♂|33||067|Machoke|♂|33||38=Nav}} | ||
{{trainerdiv|ocean}} | |||
{{trainerentry|Spr RS Swimmer M.png|Swimmer|Nolen|272|1|073|Tentacruel|♂|34|}} | |||
{{trainerdiv|ocean}} | {{trainerdiv|ocean}} | ||
{{trainerentry|Spr RS | {{trainerentry|Spr RS Swimmer F.png|Swimmer|Sharon|272|1|119|Seaking|♀|34|}} | ||
{{trainerdiv|ocean}} | {{trainerdiv|ocean}} | ||
{{trainerentry|Spr RS Swimmer | {{trainerentry|Spr RS Swimmer F.png|Swimmer|Tanya|272|1|370|Luvdisc|♀|34|}} | ||
{{trainerdiv|ocean}} | {{trainerdiv|ocean}} | ||
{{trainerentry|Spr RS | {{trainerentry|Spr RS Bird Keeper.png|Bird Keeper|Presley|1056<br><small>Potential [[Double Battle]] with Auron</small>|2|357|Tropius|♂|33||178|Xatu|♂|33|}} | ||
{{trainerdiv|ocean}} | {{trainerdiv|ocean}} | ||
{{trainerentry|Spr RS Swimmer M.png|Swimmer| | {{trainerentry|Spr RS Expert M.png|Expert|Auron|1320<br><small>Potential [[Double Battle]] with Presley</small>|2|310|Manectric|♂|33||068|Machamp|♂|33|}} | ||
{{trainerdiv|ocean}} | |||
{{trainerentry|Spr RS Swimmer M.png|Swimmer|Stan|272|1|116|Horsea|♂|34|}} | |||
{{trainerdiv|ocean}} | |||
{{trainerentry|Spr RS Sr and Jr.png|Sr. and Jr.|Kim & Iris|1120|2|333|Swablu|♂|32||322|Numel|♂|35|}} | |||
{{catch/div|ocean|Rematch}} | |||
{{trainerentry|Spr RS Sailor.png|Sailor|Ernest{{tt|*|First rematch}}|1152|3|278|Wingull|♂|36||072|Tentacool|♂|36||067|Machoke|♂|36||38=Nav}} | |||
{{trainerentry|Spr RS Sailor.png|Sailor|Ernest{{tt|*|Second and third rematch}}|{{tt|1248|Second rematch}}/{{tt|1344|Third rematch}}|3|279|Pelipper|♂|{{tt|39|Second rematch}}/{{tt|42|Third rematch}}||072|Tentacool|♂|{{tt|39|Second rematch}}/{{tt|42|Third rematch}}||067|Machoke|♂|{{tt|39|Second rematch}}/{{tt|42|Third rematch}}||38=Nav}} | |||
{{trainerentry|Spr RS Sailor.png|Sailor|Ernest{{tt|*|Fourth rematch onwards}}|1440|3|279|Pelipper|♂|45||067|Machoke|♂|45||073|Tentacruel|♂|45||38=Nav}} | |||
{{trainerfooter|ocean|3}} | {{trainerfooter|ocean|3}} | ||
|} | |} | ||
{| class="expandable" style="margin: auto; background: #{{locationcolor/med|ocean}}; {{roundy}}; border: 5px solid #{{locationcolor/light|ocean}};" | |||
{| class="expandable | |||
|- align="center" | |- align="center" | ||
! Available Pokémon | ! Available Pokémon | ||
|- | |- | ||
| | | | ||
{{ | {{Catch/header|ocean|no}} | ||
{{ | {{Catch/div|ocean|Surfing}} | ||
{{catch/entry3|072|Tentacool| | {{catch/entry3|072|Tentacool|no|no|yes|Surf|5-35|60%|type1=Water|type2=Poison}} | ||
{{catch/entry3|278|Wingull| | {{catch/entry3|278|Wingull|no|no|yes|Surf|10-30|35%|type1=Water|type2=Flying}} | ||
{{catch/entry3|279|Pelipper| | {{catch/entry3|279|Pelipper|no|no|yes|Surf|25-30|5%|type1=Water|type2=Flying}} | ||
{{catch/entry3|129|Magikarp| | {{Catch/div|ocean|Fishing}} | ||
{{catch/entry3|072|Tentacool| | {{catch/entry3|129|Magikarp|no|no|yes|Fish Old|5-10|70%|type1=Water}} | ||
{{catch/entry3|129|Magikarp| | {{catch/entry3|072|Tentacool|no|no|yes|Fish Old|5-10|30%|type1=Water|type2=Poison}} | ||
{{catch/entry3|072|Tentacool| | {{catch/entry3|129|Magikarp|no|no|yes|Fish Good|10-30|60%|type1=Water}} | ||
{{catch/entry3|320|Wailmer| | {{catch/entry3|072|Tentacool|no|no|yes|Fish Good|10-30|20%|type1=Water|type2=Poison}} | ||
{{catch/entry3|320|Wailmer| | {{catch/entry3|320|Wailmer|no|no|yes|Fish Good|10-30|20%|type1=Water}} | ||
{{catch/entry3|319|Sharpedo| | {{catch/entry3|320|Wailmer|no|no|yes|Fish Super|25-45|60%|type1=Water}} | ||
{{ | {{catch/entry3|319|Sharpedo|no|no|yes|Fish Super|30-35|40%|type1=Water|type2=Dark}} | ||
{{Catch/footer|ocean}} | |||
|} | |} | ||
{| class="expandable | {| class="expandable" style="margin: auto; background: #{{locationcolor/med|ocean}}; {{roundy}}; border: 5px solid #{{locationcolor/light|ocean}};" | ||
|- align="center" | |- align="center" | ||
! | ! Items | ||
|- | |- | ||
| | | | ||
{{ | {{itlisth|ocean}} | ||
{{ | {{itemlist|Big Pearl|Middle island on the east side|E=yes|display={{DL|Valuable item|Big Pearl}}}} | ||
{{ | {{itlistfoot|ocean}} | ||
{{ | |||
|} | |} | ||
[[File: | [[File:Shoal Cave entrance high tide E.png|thumb|left|Shoal Cave, Entrance (high tide)]] | ||
[[File:Shoal Cave entrance low tide E.png|thumb|Shoal Cave, Entrance (low tide)]] | |||
[[File:Shoal Cave inner room high tide E.png|left|thumb|Shoal Cave, Second Cavern (high tide)]] | |||
[[File:Shoal Cave inner room low tide E.png|thumb|Shoal Cave, Second Cavern (low tide)]] | |||
[[File:Shoal Cave ice room E.png|thumb|left|Shoal Cave, Ice Cavern (low tide)]] | |||
[[File:Shoal Cave lower room E.png|thumb|Shoal Cave, Third Cavern (low tide)]] | |||
[[File:Shoal Cave stairs room E.png|thumb|Shoal Cave, Fourth Cavern (low tide)]] | |||
===Shoal Cave=== | |||
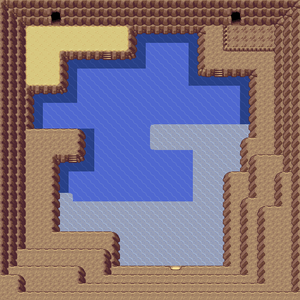
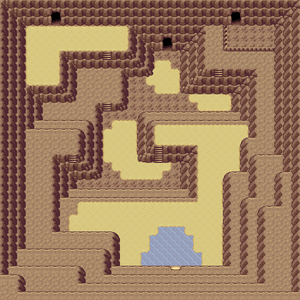
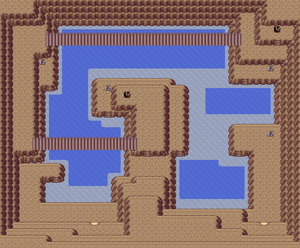
Connected to the ocean, the appearance of [[Shoal Cave]] changes with the {{DL|Shoal Cave|tides}}. Seawater floods the cave during high tide, closing off some areas and opening others. It then drains away during low tide, revealing new areas for exploration. The tides change every six hours, at 3:00 and 9:00. | |||
{| class="expandable" style="margin: auto; background: #{{locationcolor/med|cave}}; {{roundy}}; border: 5px solid #{{locationcolor/light|cave}};" | |||
{| class="expandable | |||
|- align="center" | |- align="center" | ||
! Available Pokémon | ! Available Pokémon | ||
|- | |- | ||
| | |||
{| class="expandable" style="margin: auto; background: #{{locationcolor/med|{{#switch: {{#time: g}}|9|10|11|12|1|2=water|cave}}}}; {{roundy}}; border: 5px solid #{{locationcolor/light|{{#switch: {{#time: g}}|9|10|11|12|1|2=water|cave}}}};" | |||
|- align="center" | |||
! Main Cave | |||
|- | |||
| | |||
{{Catch/header|{{#switch: {{#time: g}}|9|10|11|12|1|2=water|cave}}|no}} | |||
{{Catch/entry3|363|Spheal|no|no|yes|Cave|26, 28, 30, 32|50%|type1=Ice|type2=Water}} | |||
{{Catch/entry3|041|Zubat|no|no|yes|Cave|26, 28, 30, 32|45%|type1=Poison|type2=Flying}} | |||
{{Catch/entry3|042|Golbat|no|no|yes|Cave|32|5%|type1=Poison|type2=Flying}} | |||
{{Catch/div|water|Surfing}} | |||
{{Catch/entry3|072|Tentacool|no|no|yes|Surf|5-35|60%|type1=Water|type2=Poison}} | |||
{{Catch/entry3|041|Zubat|no|no|yes|Surf|5-35|30%|type1=Poison|type2=Flying}} | |||
{{Catch/entry3|363|Spheal|no|no|yes|Surf|25-35|10%|type1=Ice|type2=Water}} | |||
{{Catch/div|water|Fishing}} | |||
{{Catch/entry3|129|Magikarp|no|no|yes|Fish Old|5-10|70%|type1=Water}} | |||
{{Catch/entry3|072|Tentacool|no|no|yes|Fish Old|5-10|30%|type1=Water|type2=Poison}} | |||
{{Catch/entry3|129|Magikarp|no|no|yes|Fish Good|10-30|60%|type1=Water}} | |||
{{Catch/entry3|072|Tentacool|no|no|yes|Fish Good|10-30|20%|type1=Water|type2=Poison}} | |||
{{Catch/entry3|320|Wailmer|no|no|yes|Fish Good|10-30|20%|type1=Water}} | |||
{{Catch/entry3|320|Wailmer|no|no|yes|Fish Super|20-45|100%|type1=Water}} | |||
{{Catch/footer|{{#switch: {{#time: g}}|9|10|11|12|1|2=water|cave}}}} | |||
|} | |||
{| class="expandable" style="margin: auto; background: #{{locationcolor/med|ice}}; {{roundy}}; border: 5px solid #{{locationcolor/light|ice}};" | |||
|- align="center" | |||
! Icy Cavern | |||
|- | |||
| | |||
{{Catch/header|snow|no}} | |||
{{Catch/entry3|363|Spheal|no|no|yes|Cave|26, 28, 30, 32|45%|type1=Ice|type2=Water}} | |||
{{Catch/entry3|041|Zubat|no|no|yes|Cave|26, 28, 30|40%|type1=Poison|type2=Flying}} | |||
{{Catch/entry3|361|Snorunt|no|no|yes|Cave|26, 28, 30|10%|type1=Ice}} | |||
{{Catch/entry3|042|Golbat|no|no|yes|Cave|30, 32|5%|type1=Poison|type2=Flying}} | |||
{{Catch/footer|snow}} | |||
|} | |||
|} | |||
{| class="expandable" style="margin: auto; background: #{{locationcolor/med|cave}}; {{roundy}}; border: 5px solid #{{locationcolor/light|cave}};" | |||
|- align="center" | |||
! Items | |||
|- | |||
| | | | ||
{{ | {{itlisth|cave}} | ||
{{catch/div| | {{catch/div|cave|All times}} | ||
{{ | {{itemlist|Shell Bell|Entrance, from the old man after handing over four {{DL|Exchangeable item|Shoal Shell}}s and four {{DL|Exchangeable item|Shoal Salt}}s|E=yes|display={{DL|In-battle effect item|Shell Bell}}}} | ||
{{ | {{catch/div|water|High tide}} | ||
{{catch/ | {{itemlist|Rare Candy|Second Cavern, east of the central ladder|E=yes|display={{DL|Vitamin|Rare Candy}}}} | ||
{{ | {{itemlist|Big Pearl|Entrance; northeast ledge, accessible from second cavern|E=yes|display={{DL|Valuable item|Big Pearl}}}} | ||
{{ | {{itemlist|Shoal Shell| | ||
{{catch/ | * Second Cavern, near the southern bridge | ||
{{ | * Second Cavern, northwest corner | ||
{{ | * Second Cavern, northeast corner | ||
{{ | * Second Cavern, southeast corner|E=yes|display={{DL|Exchangeable item|Shoal Shell}} ×4}} | ||
{{ | {{catch/div|sand|Low tide}} | ||
{{ | {{itemlist|Shoal Salt| | ||
* Fourth Cavern, southeast corner | |||
* Third Cavern, north-central area | |||
* Second Cavern, southwest area | |||
* Second Cavern, under the north bridge|E=yes|display={{DL|Exchangeable item|Shoal Salt}} ×4}} | |||
{{itemlist|Ice Heal|Fourth Cavern, southeast corner|E=yes|display={{DL|Status ailment healing item|Ice Heal}}}} | |||
{{itemlist|Focus Band|Third Cavern, from the Black Belt|E=yes|display={{DL|In-battle effect item|Focus Band}}}} | |||
{{itemlist|Never-Melt Ice|Ice Cavern, south end of the central plateau|E=yes|display={{DL|Type-enhancing item|Never-Melt Ice}}}} | |||
{{itemlist|TM Ice|Ice Cavern, atop the ledge|E=yes|display={{TM|07|Hail}}}} | |||
{{itlistfoot|cave}} | |||
|} | |} | ||
{| class="expandable | |||
====High tide==== | |||
=====Entrance===== | |||
An old man in the entry chamber offers to make a {{DL|In-battle effect item|Shell Bell}} for your Pokémon. But first, he needs you to collect some of the cave's natural resources: {{DL|Exchangeable item|Shoal Shell}}s and {{DL|Exchangeable item|Shoal Salt}}s. These items are replenished each day, so there's no limit to the number you can collect. Once you hand over four of each item, he crafts the health-restoring item for you. Surf northwest and take the doorway there to reach the next chamber. | |||
=====Second Cavern===== | |||
Surf along the water in a clockwise direction, collecting the four Shoal Shells and a {{DL|Vitamin|Rare Candy}} on the way. Take the southeast doorway back to the entrance, where you can collect a {{DL|Valuable item|Big Pearl}} on the nearby ledge. | |||
====Low tide==== | |||
=====Entrance===== | |||
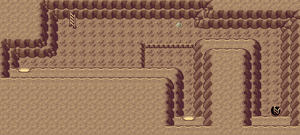
An old man in the entry chamber offers to make a {{DL|In-battle effect item|Shell Bell}} for your Pokémon. But first, he needs you to collect some of the cave's natural resources: {{DL|Exchangeable item|Shoal Shell}}s and {{DL|Exchangeable item|Shoal Salt}}s. These items are replenished each day, so there's no limit to the number you can collect. Once you hand over four of each item, he crafts the health-restoring item for you. Head through the north doorway to reach the next chamber. | |||
=====Second Cavern===== | |||
Head up the stairway, go north and climb down the east-central ladder. | |||
=====Fourth Cavern===== | |||
Grab the Shoal Salt and {{DL|Status ailment healing item|Ice Heal}}, then climb the hill to the ladder in the northwest. | |||
=====Second Cavern===== | |||
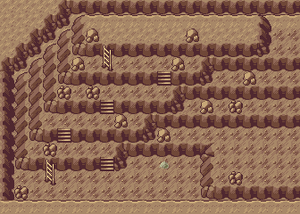
Go west then south along the two bridges, then climb down the ladder in the center. | |||
=====Third Cavern===== | |||
Head east to meet a Black Belt and receive a {{DL|In-battle effect item|Focus Band}} from him. Continue east to find another Shoal Salt, then use {{m|Strength}} to move the boulder eastward and descend the ladder to the south. | |||
=====Ice Cavern===== | |||
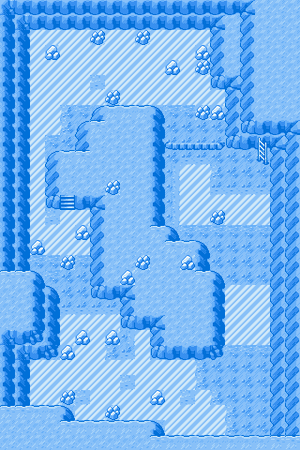
The final cavern is permanently encased in ice, and the slick floors hinder travel. Go south from the ladder, across two ice patches. At the third ice patch, slide west to the second snow patch within it. Slide north, then west and south to the third small snow patch. Slide south, east, then north to continue on. Slide north to the snow patch near the narrow stairway. Move west then south to a rock, then east and north to the central plateau and the {{DL|Type-enhancing item|Never-Melt Ice}} on its south end. Slide south from the narrow stairway, then west and north to reach the northwest corner. Go east then south to a snow patch, then north to a rock near the room's northwest corner. Head east, south, and west, then move north, west, south, and west to the small snow patch. Slide north, east, then south to reach {{TM|07|Hail}} and jump the ledge to return to the ladder. | |||
{{-}} | |||
==Route 127== | |||
[[File:Hoenn Route 127 underwater E.png|thumb|left|Route 127, Underwater]] | |||
[[File:Hoenn Route 127 E.png|thumb|Route 127, Surface]] | |||
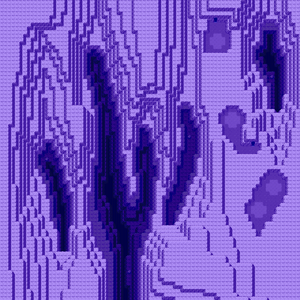
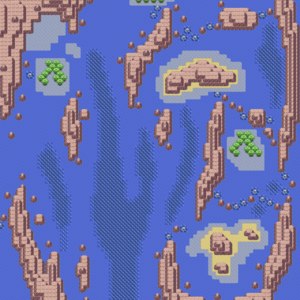
{{rt|127|Hoenn}} links [[Mossdeep City]] with {{rt|126|Hoenn}} to the west and {{rt|128|Hoenn}} to the south. Explore the area quickly on your way southward in pursuit of Team Aqua! | |||
{| class="expandable" style="margin: auto; background: #{{locationcolor/med|ocean}}; {{roundy}}; border: 5px solid #{{locationcolor/light|ocean}};" | |||
|- align="center" | |- align="center" | ||
! Trainers | ! Trainers | ||
|- | |- | ||
| | | | ||
{{trainerheader|ocean}} | {{trainerheader|ocean}} | ||
{{trainerentry|Spr RS | {{trainerentry|Spr RS Bird Keeper.png|Bird Keeper|Aidan|1024<br><small>Potential [[Double Battle]] with Athena</small>|2|277|Swellow|♂|32||227|Skarmory|♂|32|}} | ||
{{trainerdiv|ocean}} | {{trainerdiv|ocean}} | ||
{{trainerentry|Spr RS | {{trainerentry|Spr RS Cooltrainer F.png|Cooltrainer|Athena|1536<br><small>Potential [[Double Battle]] with Aidan</small>|2|310|Manectric|♀|32||264|Linoone|♀|32|}} | ||
{{trainerdiv|ocean}} | |||
{{trainerentry|Spr RS Fisherman.png|Fisherman|Jonah|1280|3|320|Wailmer|♂|30||072|Tentacool|♂|31||319|Sharpedo|♂|32|}} | |||
{{trainerdiv|ocean}} | {{trainerdiv|ocean}} | ||
{{trainerentry|Spr RS | {{trainerentry|Spr RS Fisherman.png|Fisherman|Roger|1400|3|129|Magikarp|♂|15||129|Magikarp|♂|25||130|Gyarados|♂|35|}} | ||
{{trainerdiv|ocean}} | {{trainerdiv|ocean}} | ||
{{trainerentry|Spr RS | {{trainerentry|Spr RS Fisherman.png|Fisherman|Henry|1360|2|318|Carvanha|♂|31||073|Tentacruel|♂|34|}} | ||
{{trainerdiv|ocean}} | {{trainerdiv|ocean}} | ||
{{trainerentry|Spr RS | {{trainerentry|Spr RS Triathlete Swimmer M.png|Triathlete|Camden|1320|2|120|Staryu||33||120|Staryu||33|}} | ||
{{trainerdiv|ocean}} | {{trainerdiv|ocean}} | ||
{{trainerentry|Spr RS | {{trainerentry|Spr RS Black Belt.png|Black Belt|Koji|1088|1|067|Machoke|♂|34||38=Nav}} | ||
{{trainerdiv|ocean}} | {{trainerdiv|ocean}} | ||
{{trainerentry|Spr RS Triathlete | {{trainerentry|Spr RS Triathlete Swimmer F.png|Triathlete|Donny|1360|2|278|Wingull|♀|26||120|Staryu||34|}} | ||
{{catch/div|ocean|Rematch}} | |||
{{trainerentry|Spr RS Black Belt.png|Black Belt|Koji{{tt|*|First rematch}}|1184|2|067|Machoke|♂|37||067|Machoke|♂|37||38=Nav}} | |||
{{trainerentry|Spr RS Black Belt.png|Black Belt|Koji{{tt|*|Second rematch}}|1248|3|296|Makuhita|♂|39||067|Machoke|♂|39||067|Machoke|♂|39||38=Nav}} | |||
{{trainerentry|Spr RS Black Belt.png|Black Belt|Koji{{tt|*|Third rematch}}|1312|3|297|Hariyama|♂|41||067|Machoke|♂|41||067|Machoke|♂|41||38=Nav}} | |||
{{trainerentry|Spr RS Black Belt.png|Black Belt|Koji{{tt|*|Fourth rematch onwards}}|1376|3|297|Hariyama|♂|43||068|Machamp|♂|43||068|Machamp|♂|43||38=Nav}} | |||
{{trainerfooter|ocean|3}} | {{trainerfooter|ocean|3}} | ||
|} | |} | ||
{| class="expandable" style="margin: auto; background: #{{locationcolor/med|ocean}}; {{roundy}}; border: 5px solid #{{locationcolor/light|ocean}};" | |||
{| class="expandable | |||
|- align="center" | |- align="center" | ||
! Available Pokémon | ! Available Pokémon | ||
|- | |- | ||
| | |||
{{catch/header|ocean|no}} | |||
{{catch/div|ocean|Surfing}} | |||
{{catch/entry3|072|Tentacool|no|no|yes|Surf|5-35|60%|type1=Water|type2=Poison}} | |||
{{catch/entry3|278|Wingull|no|no|yes|Surf|10-30|35%|type1=Water|type2=Flying}} | |||
{{catch/entry3|279|Pelipper|no|no|yes|Surf|25-30|5%|type1=Water|type2=Flying}} | |||
{{catch/div|ocean|Fishing}} | |||
{{catch/entry3|129|Magikarp|no|no|yes|Fish Old|5-10|70%|type1=Water}} | |||
{{catch/entry3|072|Tentacool|no|no|yes|Fish Old|5-10|30%|type1=Water|type2=Poison}} | |||
{{catch/entry3|129|Magikarp|no|no|yes|Fish Good|10-30|60%|type1=Water}} | |||
{{catch/entry3|072|Tentacool|no|no|yes|Fish Good|10-30|20%|type1=Water|type2=Poison}} | |||
{{catch/entry3|320|Wailmer|no|no|yes|Fish Good|10-30|20%|type1=Water}} | |||
{{catch/entry3|320|Wailmer|no|no|yes|Fish Super|25-45|60%|type1=Water}} | |||
{{catch/entry3|319|Sharpedo|no|no|yes|Fish Super|30-35|40%|type1=Water|type2=Dark}} | |||
{{catch/footer|ocean}} | |||
|} | |||
{| class="expandable" style="margin: auto; background: #{{locationcolor/med|ocean}}; {{roundy}}; border: 5px solid #{{locationcolor/light|ocean}};" | |||
|- align="center" | |||
! Items | |||
|- | |||
| | | | ||
{{ | {{itlisth|ocean}} | ||
{{ | {{itemlist|Zinc|In the northwestern-most patch of shallow water|E=yes|display={{DL|Vitamin|Zinc}}}} | ||
{{ | {{itemlist|Rare Candy|South side of the tree-covered northwest island|E=yes|display={{DL|Vitamin|Rare Candy}}}} | ||
{{ | {{itemlist|Carbos|South end of the isolated grove, accessed via Dive spot near the southeast island|E=yes|display={{DL|Vitamin|Carbos}}}} | ||
{{ | {{catch/div|underwater|Underwater}} | ||
{{ | {{itemlist|Star Piece|Main area's center-west branch, on a small rock (hidden)|E=yes|display={{DL|Valuable item|Star Piece}}}} | ||
{{ | {{itemlist|Heart Scale|Main area's center trench, on small rock to the south (hidden)|E=yes|display={{DL|Exchangeable item|Heart Scale}}}} | ||
{{ | {{itemlist|HP Up|Main area's center-east branch, on a small rock (hidden)|E=yes|display={{DL|Vitamin|HP Up}}}} | ||
{{ | {{itemlist|Red Shard|Isolated eastern trench, on a small rock (hidden)|E=yes|display={{DL|Shard|Red Shard}}}} | ||
{{ | {{itlistfoot|ocean}} | ||
|} | |} | ||
{{WalkthroughPrevNext | | {{WalkthroughPrevNext | ||
game=Emerald | |game=Emerald | ||
|gamename=Emerald | |||
gamename=Emerald | |prevsection=12 | ||
|prevname=Team Aqua Hideout, Route 124 | |||
|nextsection=14 | |||
prevsection=12 | | |nextname=Route 128, Seafloor Cavern, Route 126, Sootopolis City, Cave of Origin | ||
nextsection=14 | | }} | ||
<br> | |||
{{Project Walkthroughs notice}} | {{Project Walkthroughs notice}} | ||
[[Category:Emerald walkthrough]] | [[Category:Emerald walkthrough]] | ||
Revision as of 16:37, 22 August 2016
Mossdeep City
Mossdeep City stands perched on an island near Hoenn's eastern edge, where the winds are mild and the weather conditions are stable. This makes it the perfect place for launching rockets, and a perfect home for the Mossdeep Space Center. The seventh Gym in the Hoenn League, run by twin Gym Leaders, is located on the north side of the island, and Steven's house can be found on the island's northwest corner.
| Available Pokémon | |||||||||||||||||||||||||||||||||||||||||||||||||||||||||||||||||||||||||||||||||||||||||||||||||||||||||||||||||||||||||||||||||||||||||||||||||||||||||||||||||||||||||||||||||||||||||||||||||||||||||||||||||||||
|---|---|---|---|---|---|---|---|---|---|---|---|---|---|---|---|---|---|---|---|---|---|---|---|---|---|---|---|---|---|---|---|---|---|---|---|---|---|---|---|---|---|---|---|---|---|---|---|---|---|---|---|---|---|---|---|---|---|---|---|---|---|---|---|---|---|---|---|---|---|---|---|---|---|---|---|---|---|---|---|---|---|---|---|---|---|---|---|---|---|---|---|---|---|---|---|---|---|---|---|---|---|---|---|---|---|---|---|---|---|---|---|---|---|---|---|---|---|---|---|---|---|---|---|---|---|---|---|---|---|---|---|---|---|---|---|---|---|---|---|---|---|---|---|---|---|---|---|---|---|---|---|---|---|---|---|---|---|---|---|---|---|---|---|---|---|---|---|---|---|---|---|---|---|---|---|---|---|---|---|---|---|---|---|---|---|---|---|---|---|---|---|---|---|---|---|---|---|---|---|---|---|---|---|---|---|---|---|---|---|---|---|---|---|
| |||||||||||||||||||||||||||||||||||||||||||||||||||||||||||||||||||||||||||||||||||||||||||||||||||||||||||||||||||||||||||||||||||||||||||||||||||||||||||||||||||||||||||||||||||||||||||||||||||||||||||||||||||||
| Items | ||||||||||||||||||||||||||||||||||||||||||||||||||||||||||||||
|---|---|---|---|---|---|---|---|---|---|---|---|---|---|---|---|---|---|---|---|---|---|---|---|---|---|---|---|---|---|---|---|---|---|---|---|---|---|---|---|---|---|---|---|---|---|---|---|---|---|---|---|---|---|---|---|---|---|---|---|---|---|---|
| ||||||||||||||||||||||||||||||||||||||||||||||||||||||||||||||
Move Tutor
The first person you meet upon arriving in Mossdeep is a Black Belt in the shallow water on the island's southwest side. As a Fighting-type Trainer, he's had a difficult time at the local Gym and has resorted to punching the ground to relieve his frustration. Speak to him, and he offers to teach the move DynamicPunch to a Pokémon, one time only.
Steven's House
The house on the island's northwest edge belongs to Steven, and contains part of his rock collection.
Game Corner
A Game Corner is located to the south of the Poké Mart. Inside, Trainers can compete with others from HoennE and KantoFRLG in two mini-games, Pokémon Jump and Dodrio Berry Picking. Communications are made using the Game Boy Advance Wireless Adapter.
Running Errands
Visit the house nearest the stairway to the Space Center to meet a young woman who uses a Wingull to send letters to a friend in Fortree City. Talk to the Wingull and it will take flight, off to deliver another note. If you return to Fortree and visit the Pokémon Breeder in the northeast house there, he will give you a Mental Herb that his Wingull found in its travels.
Score the Super Rod
The house overlooking the Gym belongs to a lone Fisherman. Speak to him to receive the Super Rod, a high-end fishing rod that can reel in all kinds of sea life.
Mossdeep Space Center
The Mossdeep Space Center stands on a hill in the northeast. Steven is inside, standing near a table with a letter emblazoned with the Team Magma logo. It seems that the group has announced its intention of stealing all the rocket fuel on the island. He plans to keep an eye on things for now, and suggests checking out the rest of the city. A Sailor near the viewing area will give you a Sun Stone he found on the beach.
Mossdeep Gym
The Mossdeep Gym specializes in Psychic-type Pokémon, which are vulnerable to Bug-, Dark-, and Ghost-type moves. Dark Pokémon are both immune to Psychic moves and able to inflict super-effective damage. Avoid using Fighting- and Poison-type Pokémon. The Gym features several rooms linked only by warp tiles. Each room contains Trainers and obstacles on spin tiles that rotate when certain tiles are stepped on, changing the path and often bringing challengers within view of opposing Gym Trainers.
Step on the yellow tile in the first room to start a Double Battle with Psychics Preston and Maura, then go north to the warp tile. The second room is located a short distance northward; step on the yellow tile here to begin a Double Battle with Psychics Samantha and Drake. There are two warp tiles beyond them; take the right warp to the southeast room first. Step on the first purple tile to begin a battle with Hex Maniac Kathleen and Psychic Nicholas. Go south and step on the second purple tile twice to battle Gentleman Clifford and Psychic Macey. Continue south and step on the green tile twice; this spins the obstacles in the south-central room. Take the north warp back to the west-central room, then the left warp there to the northwest room. Step on the first blue tile twice, the orange tile three times, the second blue tile three times, and the first blue tile once to reach the warp tile. Cross the south-central room to the last warp and the Gym Leaders' room.
Twins Tate and Liza send out two Pokémon at once, drawing challengers into a Double Battle. Claydol can boost its already-high Special Defense with Light Screen, and retaliate against Bug Pokémon with AncientPower. Xatu's Calm Mind raises both its Special stats, and Confuse Ray allows it to harass the foe. Lunatone can lull its opponent to sleep with Hypnosis, while Solrock can scorch Grass Pokémon looking to target their Rock typing. Three of their Pokémon are weakened by Water moves; by using Surf, you can attack both at once and bring the battle to a quick end. Otherwise, you may want to target one Pokémon at a time in what would essentially become a two-on-one battle.
| |||||||||||||||||||||||||||||||||||||||||||||||||||||||||||||||||||||||||||||||||||||||||||||||||||||||||||||||||||||||||||||||||||||||||||||||||||||||||||||||||||||||||||||||||||||||||||||||||||||||||||||||||||||||||||||||||||||||||||||||||||||||||||||||||||||||||||||||||||||||||||||||||||||||||||||||||||||||||||||||||||||||||||||||||||||||||||||||||||||||||
After the battle, Tate and Liza award you the Mind Badge, which boosts your Pokémon's Special Attack and Special Defense by 10% and enables the use of Dive in the field. The twins also give you TM04 (Calm Mind) as a prize, and register themselves in your PokéNav.
Space Center
| Trainers | |||||||||||||||||||||||||||||||||||||||||||||||||||||||||||||||||||||||||||||||||||||||||||||||||||||||||||||||||||||||||||||||||||||||||||||||||||||||||
|---|---|---|---|---|---|---|---|---|---|---|---|---|---|---|---|---|---|---|---|---|---|---|---|---|---|---|---|---|---|---|---|---|---|---|---|---|---|---|---|---|---|---|---|---|---|---|---|---|---|---|---|---|---|---|---|---|---|---|---|---|---|---|---|---|---|---|---|---|---|---|---|---|---|---|---|---|---|---|---|---|---|---|---|---|---|---|---|---|---|---|---|---|---|---|---|---|---|---|---|---|---|---|---|---|---|---|---|---|---|---|---|---|---|---|---|---|---|---|---|---|---|---|---|---|---|---|---|---|---|---|---|---|---|---|---|---|---|---|---|---|---|---|---|---|---|---|---|---|---|---|---|---|---|
| |||||||||||||||||||||||||||||||||||||||||||||||||||||||||||||||||||||||||||||||||||||||||||||||||||||||||||||||||||||||||||||||||||||||||||||||||||||||||
After beating the Gym, you find Maxie and several Grunts on their way to the Space Center. Follow them inside and defeat the four Grunts on the first floor. Upstairs, you are ambushed by three more; you fight them one at a time, but with no break between. Farther on, you find Steven confronting Maxie, who reveals his intentions for the rocket fuel. With Groudon gone, he has no need for their base. They're going to cause Mt. Chimney to erupt by dumping the entire supply into the volcano! Steven is shocked, and asks you to join him in battle against Maxie and Tabitha. Steven's team consists of Metang, Skarmory, and Aggron.
VS Maxie, Tabitha
| |||||||||||||||||||||||||||||||||||||||||||||||||||||||||||||||||||||||||||||||||||||||||||||||||||||||||||||||||||||||||||||||||||||||||||||||||||||||||||||||||||||||||||||||||
Having failed at both controlling Groudon and activating the volcano, Maxie begins to questions his goals and wonders if Team Aqua's plans are equally misguided. Maxie and his subordinates flee, and Steven invites you to his home. He greets you when you step inside, and hands you HM08 (Dive). In certain bodies of water, there are dark spots where the water runs unusually deep; using Dive at one of these spots lets you descend to the ocean floor far below. Swim to a point where the sunlight filters down from above and use Dive again to surface. With this move, you will be able to pursue Archie to the Seafloor Cavern.
Route 125
Located north of Mossdeep City, Route 125 is an optional area with several potential Secret Base locations. The waterlogged Shoal Cave stands in the route's center.
| Trainers | ||||||||||||||||||||||||||||||||||||||||||||||||||||||||||||||||||||||||||||||||||||||||||||||||||||||||||||||||||||||||||||||||||||||||||||||||||||||||||||||||||||||||||||||||||||||||||||||||||||||||||||||||||||||||||||||||||||||||||||
|---|---|---|---|---|---|---|---|---|---|---|---|---|---|---|---|---|---|---|---|---|---|---|---|---|---|---|---|---|---|---|---|---|---|---|---|---|---|---|---|---|---|---|---|---|---|---|---|---|---|---|---|---|---|---|---|---|---|---|---|---|---|---|---|---|---|---|---|---|---|---|---|---|---|---|---|---|---|---|---|---|---|---|---|---|---|---|---|---|---|---|---|---|---|---|---|---|---|---|---|---|---|---|---|---|---|---|---|---|---|---|---|---|---|---|---|---|---|---|---|---|---|---|---|---|---|---|---|---|---|---|---|---|---|---|---|---|---|---|---|---|---|---|---|---|---|---|---|---|---|---|---|---|---|---|---|---|---|---|---|---|---|---|---|---|---|---|---|---|---|---|---|---|---|---|---|---|---|---|---|---|---|---|---|---|---|---|---|---|---|---|---|---|---|---|---|---|---|---|---|---|---|---|---|---|---|---|---|---|---|---|---|---|---|---|---|---|---|---|---|---|---|---|---|---|---|---|---|---|---|---|---|---|---|---|---|---|
| ||||||||||||||||||||||||||||||||||||||||||||||||||||||||||||||||||||||||||||||||||||||||||||||||||||||||||||||||||||||||||||||||||||||||||||||||||||||||||||||||||||||||||||||||||||||||||||||||||||||||||||||||||||||||||||||||||||||||||||
| Available Pokémon | ||||||||||||||||||||||||||||||||||||||||||||||||||||||||||||||||||||||||||||||||||||||||||||||||||||||||||||||||||||||||||||||||||||||||||||||||||||||||||||||||||||||||||||||||||||||||||||||||||||||||||||||||||||||||
|---|---|---|---|---|---|---|---|---|---|---|---|---|---|---|---|---|---|---|---|---|---|---|---|---|---|---|---|---|---|---|---|---|---|---|---|---|---|---|---|---|---|---|---|---|---|---|---|---|---|---|---|---|---|---|---|---|---|---|---|---|---|---|---|---|---|---|---|---|---|---|---|---|---|---|---|---|---|---|---|---|---|---|---|---|---|---|---|---|---|---|---|---|---|---|---|---|---|---|---|---|---|---|---|---|---|---|---|---|---|---|---|---|---|---|---|---|---|---|---|---|---|---|---|---|---|---|---|---|---|---|---|---|---|---|---|---|---|---|---|---|---|---|---|---|---|---|---|---|---|---|---|---|---|---|---|---|---|---|---|---|---|---|---|---|---|---|---|---|---|---|---|---|---|---|---|---|---|---|---|---|---|---|---|---|---|---|---|---|---|---|---|---|---|---|---|---|---|---|---|---|---|---|---|---|---|---|---|---|---|---|---|---|---|---|---|---|
| ||||||||||||||||||||||||||||||||||||||||||||||||||||||||||||||||||||||||||||||||||||||||||||||||||||||||||||||||||||||||||||||||||||||||||||||||||||||||||||||||||||||||||||||||||||||||||||||||||||||||||||||||||||||||
| Items | ||||||||||||
|---|---|---|---|---|---|---|---|---|---|---|---|---|
| ||||||||||||
Shoal Cave
Connected to the ocean, the appearance of Shoal Cave changes with the tides. Seawater floods the cave during high tide, closing off some areas and opening others. It then drains away during low tide, revealing new areas for exploration. The tides change every six hours, at 3:00 and 9:00.
| Available Pokémon | ||||||||||||||||||||||||||||||||||||||||||||||||||||||||||||||||||||||||||||||||||||||||||||||||||||||||||||||||||||||||||||||||||||||||||||||||||||||||||||||||||||||||||||||||||||||||||||||||||||||||||||||||||||||||||||||||||||||||||||||||||||||||||||||||||||||||||||||||||||||||||||||||||||||||||||||||||||||||||||||||||||||||||||||||||||||
|---|---|---|---|---|---|---|---|---|---|---|---|---|---|---|---|---|---|---|---|---|---|---|---|---|---|---|---|---|---|---|---|---|---|---|---|---|---|---|---|---|---|---|---|---|---|---|---|---|---|---|---|---|---|---|---|---|---|---|---|---|---|---|---|---|---|---|---|---|---|---|---|---|---|---|---|---|---|---|---|---|---|---|---|---|---|---|---|---|---|---|---|---|---|---|---|---|---|---|---|---|---|---|---|---|---|---|---|---|---|---|---|---|---|---|---|---|---|---|---|---|---|---|---|---|---|---|---|---|---|---|---|---|---|---|---|---|---|---|---|---|---|---|---|---|---|---|---|---|---|---|---|---|---|---|---|---|---|---|---|---|---|---|---|---|---|---|---|---|---|---|---|---|---|---|---|---|---|---|---|---|---|---|---|---|---|---|---|---|---|---|---|---|---|---|---|---|---|---|---|---|---|---|---|---|---|---|---|---|---|---|---|---|---|---|---|---|---|---|---|---|---|---|---|---|---|---|---|---|---|---|---|---|---|---|---|---|---|---|---|---|---|---|---|---|---|---|---|---|---|---|---|---|---|---|---|---|---|---|---|---|---|---|---|---|---|---|---|---|---|---|---|---|---|---|---|---|---|---|---|---|---|---|---|---|---|---|---|---|---|---|---|---|---|---|---|---|---|---|---|---|---|---|---|---|---|---|---|---|---|---|---|---|---|---|---|---|---|---|---|---|---|---|---|---|---|---|---|---|---|---|---|---|---|---|---|---|---|---|---|---|---|---|
| ||||||||||||||||||||||||||||||||||||||||||||||||||||||||||||||||||||||||||||||||||||||||||||||||||||||||||||||||||||||||||||||||||||||||||||||||||||||||||||||||||||||||||||||||||||||||||||||||||||||||||||||||||||||||||||||||||||||||||||||||||||||||||||||||||||||||||||||||||||||||||||||||||||||||||||||||||||||||||||||||||||||||||||||||||||||
| Items | |||||||||||||||||||||||||||||||||||||||||||||||||||||||||||||||||||||||||||||||||||||||||
|---|---|---|---|---|---|---|---|---|---|---|---|---|---|---|---|---|---|---|---|---|---|---|---|---|---|---|---|---|---|---|---|---|---|---|---|---|---|---|---|---|---|---|---|---|---|---|---|---|---|---|---|---|---|---|---|---|---|---|---|---|---|---|---|---|---|---|---|---|---|---|---|---|---|---|---|---|---|---|---|---|---|---|---|---|---|---|---|---|---|
| |||||||||||||||||||||||||||||||||||||||||||||||||||||||||||||||||||||||||||||||||||||||||
High tide
Entrance
An old man in the entry chamber offers to make a Shell Bell for your Pokémon. But first, he needs you to collect some of the cave's natural resources: Shoal Shells and Shoal Salts. These items are replenished each day, so there's no limit to the number you can collect. Once you hand over four of each item, he crafts the health-restoring item for you. Surf northwest and take the doorway there to reach the next chamber.
Second Cavern
Surf along the water in a clockwise direction, collecting the four Shoal Shells and a Rare Candy on the way. Take the southeast doorway back to the entrance, where you can collect a Big Pearl on the nearby ledge.
Low tide
Entrance
An old man in the entry chamber offers to make a Shell Bell for your Pokémon. But first, he needs you to collect some of the cave's natural resources: Shoal Shells and Shoal Salts. These items are replenished each day, so there's no limit to the number you can collect. Once you hand over four of each item, he crafts the health-restoring item for you. Head through the north doorway to reach the next chamber.
Second Cavern
Head up the stairway, go north and climb down the east-central ladder.
Fourth Cavern
Grab the Shoal Salt and Ice Heal, then climb the hill to the ladder in the northwest.
Second Cavern
Go west then south along the two bridges, then climb down the ladder in the center.
Third Cavern
Head east to meet a Black Belt and receive a Focus Band from him. Continue east to find another Shoal Salt, then use Strength to move the boulder eastward and descend the ladder to the south.
Ice Cavern
The final cavern is permanently encased in ice, and the slick floors hinder travel. Go south from the ladder, across two ice patches. At the third ice patch, slide west to the second snow patch within it. Slide north, then west and south to the third small snow patch. Slide south, east, then north to continue on. Slide north to the snow patch near the narrow stairway. Move west then south to a rock, then east and north to the central plateau and the Never-Melt Ice on its south end. Slide south from the narrow stairway, then west and north to reach the northwest corner. Go east then south to a snow patch, then north to a rock near the room's northwest corner. Head east, south, and west, then move north, west, south, and west to the small snow patch. Slide north, east, then south to reach TM07 (Hail) and jump the ledge to return to the ladder.
Route 127
Route 127 links Mossdeep City with Route 126 to the west and Route 128 to the south. Explore the area quickly on your way southward in pursuit of Team Aqua!
| Trainers | |||||||||||||||||||||||||||||||||||||||||||||||||||||||||||||||||||||||||||||||||||||||||||||||||||||||||||||||||||||||||||||||||||||||||||||||||||||||||||||||||||||||||||||||||||||||||||||||||||||||||||||||||||||||||||||||||||||||||||||||||||||||||||||||||||||||||||||||||||||||||||||
|---|---|---|---|---|---|---|---|---|---|---|---|---|---|---|---|---|---|---|---|---|---|---|---|---|---|---|---|---|---|---|---|---|---|---|---|---|---|---|---|---|---|---|---|---|---|---|---|---|---|---|---|---|---|---|---|---|---|---|---|---|---|---|---|---|---|---|---|---|---|---|---|---|---|---|---|---|---|---|---|---|---|---|---|---|---|---|---|---|---|---|---|---|---|---|---|---|---|---|---|---|---|---|---|---|---|---|---|---|---|---|---|---|---|---|---|---|---|---|---|---|---|---|---|---|---|---|---|---|---|---|---|---|---|---|---|---|---|---|---|---|---|---|---|---|---|---|---|---|---|---|---|---|---|---|---|---|---|---|---|---|---|---|---|---|---|---|---|---|---|---|---|---|---|---|---|---|---|---|---|---|---|---|---|---|---|---|---|---|---|---|---|---|---|---|---|---|---|---|---|---|---|---|---|---|---|---|---|---|---|---|---|---|---|---|---|---|---|---|---|---|---|---|---|---|---|---|---|---|---|---|---|---|---|---|---|---|---|---|---|---|---|---|---|---|---|---|---|---|---|---|---|---|---|---|---|---|---|---|---|---|---|---|---|---|---|---|---|---|---|---|---|---|---|---|---|---|---|---|---|---|---|---|---|---|---|
| |||||||||||||||||||||||||||||||||||||||||||||||||||||||||||||||||||||||||||||||||||||||||||||||||||||||||||||||||||||||||||||||||||||||||||||||||||||||||||||||||||||||||||||||||||||||||||||||||||||||||||||||||||||||||||||||||||||||||||||||||||||||||||||||||||||||||||||||||||||||||||||
| Available Pokémon | ||||||||||||||||||||||||||||||||||||||||||||||||||||||||||||||||||||||||||||||||||||||||||||||||||||||||||||||||||||||||||||||||||||||||||||||||||||||||||||||||||||||||||||||||||||||||||||||||||||||||||||||||||||||||
|---|---|---|---|---|---|---|---|---|---|---|---|---|---|---|---|---|---|---|---|---|---|---|---|---|---|---|---|---|---|---|---|---|---|---|---|---|---|---|---|---|---|---|---|---|---|---|---|---|---|---|---|---|---|---|---|---|---|---|---|---|---|---|---|---|---|---|---|---|---|---|---|---|---|---|---|---|---|---|---|---|---|---|---|---|---|---|---|---|---|---|---|---|---|---|---|---|---|---|---|---|---|---|---|---|---|---|---|---|---|---|---|---|---|---|---|---|---|---|---|---|---|---|---|---|---|---|---|---|---|---|---|---|---|---|---|---|---|---|---|---|---|---|---|---|---|---|---|---|---|---|---|---|---|---|---|---|---|---|---|---|---|---|---|---|---|---|---|---|---|---|---|---|---|---|---|---|---|---|---|---|---|---|---|---|---|---|---|---|---|---|---|---|---|---|---|---|---|---|---|---|---|---|---|---|---|---|---|---|---|---|---|---|---|---|---|---|
| ||||||||||||||||||||||||||||||||||||||||||||||||||||||||||||||||||||||||||||||||||||||||||||||||||||||||||||||||||||||||||||||||||||||||||||||||||||||||||||||||||||||||||||||||||||||||||||||||||||||||||||||||||||||||
| Items | |||||||||||||||||||||||||||||||||||||||||||||||||||
|---|---|---|---|---|---|---|---|---|---|---|---|---|---|---|---|---|---|---|---|---|---|---|---|---|---|---|---|---|---|---|---|---|---|---|---|---|---|---|---|---|---|---|---|---|---|---|---|---|---|---|---|
| |||||||||||||||||||||||||||||||||||||||||||||||||||
|
Emerald walkthrough |
|

|
This article is part of Project Walkthroughs, a Bulbapedia project that aims to write comprehensive step-by-step guides on each Pokémon game. |
