Appendix:Black 2 and White 2 walkthrough/Section 7: Difference between revisions
m (→Driftveil City) |
mNo edit summary |
||
| (14 intermediate revisions by 9 users not shown) | |||
| Line 1: | Line 1: | ||
== Route 5 == | ==Route 5== | ||
[[File:Unova Route 5.png|thumb|Route 5]] | [[File:Unova Route 5 Winter BW.png|thumb|Route 5]] | ||
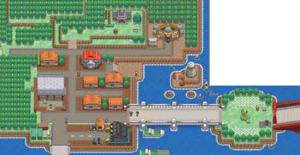
{{rt|5|Unova}} is a short path that leads from [[Nimbasa City]] to the [[Driftveil Drawbridge]] in the west. | {{rt|5|Unova}} is a short path that leads from [[Nimbasa City]] to the [[Driftveil Drawbridge]] in the west. It is usually a lively place because many Pokémon Trainers like to gather here. | ||
{| class="expandable" align="center" style="background: #{{locationcolor/med|forest}}; {{roundy}}; border: 5px solid #{{locationcolor/light|forest}};" | {| class="expandable" align="center" style="background: #{{locationcolor/med|forest}}; {{roundy}}; border: 5px solid #{{locationcolor/light|forest}};" | ||
| Line 10: | Line 10: | ||
| | | | ||
{{trainerheader|forest}} | {{trainerheader|forest}} | ||
{{trainerentry|Spr B2W2 Baker.png|Baker|Jenn|960|2|191|Sunkern|♀|24|None|415|Combee|♂|24|None}} | {{trainerentry|Spr B2W2 Baker.png|Baker|Jenn|{{tt|960|880 in Easy Mode, 1040 in Challenge Mode}}|2|191|Sunkern|♀|{{tt|24|22 in Easy Mode, 26 in Challenge Mode}}|None|415|Combee|♂|{{tt|24|22 in Easy Mode, 26 in Challenge Mode}}|None}} | ||
{{trainerdiv|forest}} | {{trainerdiv|forest}} | ||
{{trainerentry|Spr B2W2 Artist.png|Artist|Horton|1200|1|561|Sigilyph|♂|25|None}} | {{trainerentry|Spr B2W2 Artist.png|Artist|Horton|{{tt|1200|1104 in Easy Mode, 1296 in Challenge Mode}}|1|561|Sigilyph|♂|{{tt|25|23 in Easy Mode, 27 in Challenge Mode}}|None}} | ||
{{trainerdiv|forest}} | {{trainerdiv|forest}} | ||
{{trainerentry|Spr B2W2 Pokémon Ranger F.png|Pokémon Ranger|Lois|1500|2|406|Budew|♀|25|None|315|Roselia|♀|25|None}} | {{trainerentry|Spr B2W2 Pokémon Ranger F.png|Pokémon Ranger|Lois|{{tt|1500|1380 in Easy Mode, 1620 in Challenge Mode}}|2|406|Budew|♀|{{tt|25|23 in Easy Mode, 27 in Challenge Mode}}|None|315|Roselia|♀|{{tt|25|23 in Easy Mode, 27 in Challenge Mode}}|None}} | ||
{{trainerdiv|forest}} | {{trainerdiv|forest}} | ||
{{trainerentry|Spr B2W2 Dancer.png|Dancer|Brian|800|1|559|Scraggy|♂|25|None}} | {{trainerentry|Spr B2W2 Dancer.png|Dancer|Brian|{{tt|800|736 in Easy Mode, 864 in Challenge Mode}}|1|559|Scraggy|♂|{{tt|25|23 in Easy Mode, 27 in Challenge Mode}}|None}} | ||
{{trainerdiv|forest}} | {{trainerdiv|forest}} | ||
{{trainerentry|Spr B2W2 Backers F.png|Backers|Ava & Aya|1152|2|572|Minccino|♀|24|None|572|Minccino|♀|24|None}} | {{trainerentry|Spr B2W2 Backers F.png|Backers|Ava & Aya|{{tt|1152|1056 in Easy Mode, 1248 in Challenge Mode}}|2|572|Minccino|♀|{{tt|24|22 in Easy Mode, 26 in Challenge Mode}}|None|572|Minccino|♀|{{tt|24|22 in Easy Mode, 26 in Challenge Mode}}|None}} | ||
{{trainerdiv|forest}} | {{trainerdiv|forest}} | ||
{{trainerentry|Spr B2W2 Musician.png|Musician|Preston|800|1|556|Maractus|♂|25|None}} | {{trainerentry|Spr B2W2 Musician.png|Musician|Preston|{{tt|800|736 in Easy Mode, 864 in Challenge Mode}}|1|556|Maractus|♂|{{tt|25|23 in Easy Mode, 27 in Challenge Mode}}|None}} | ||
{{trainerfooter|forest|5}} | {{trainerfooter|forest|5}} | ||
|} | |} | ||
| Line 67: | Line 67: | ||
=== Bianca's HM === | ===Bianca's HM=== | ||
As you leave {{ci|Nimbasa}}, [[Bianca]] catches up to you. | As you leave {{ci|Nimbasa}}, [[Bianca]] catches up to you. She gives you {{HM|02|Fly}}, which lets you instantly return to any familiar city or town. Use it on something like {{p|Pidove}} or {{p|Sigilyph}}. | ||
=== Hidden Grottoes Revealed === | ===Hidden Grottoes Revealed=== | ||
After handing over the HM, [[Bianca]] claims that she hears something. | After handing over the HM, [[Bianca]] claims that she hears something. She leads you north, where she hears a rustling in the trees. She explains that this must be a [[Hidden Grotto]], one of many scattered across the region. These grottoes are hard to find, they simply look like a large shadow under a group of trees. Inside, you can meet a Pokémon with its [[Ability#Hidden Abilities|Hidden Ability]], a visible item, or a hidden item. After a while, another Pokémon may show up, or another item may appear. This grotto happens to have a {{p|Minccino}} inside, which has its Hidden Ability {{a|Skill Link}}. Bianca leaves you to catch it, or not, on your own. | ||
=== The Berry Seller === | ===The Berry Seller=== | ||
A woman near the gate sells a bunch of five Berries every day for {{pdollar}}200. | A woman near the gate sells a bunch of five Berries every day for {{pdollar}}200. These bunches may be [[Pomeg Berry|Pomeg]], [[Kelpsy Berry|Kelpsy]], [[Qualot Berry|Qualot]], [[Hondew Berry|Hondew]], or [[Grepa Berry|Grepa Berries]]. She only sells one bunch per day. | ||
=== The Hungry Maid === | ===The Hungry Maid=== | ||
The Maid inside the trailer is trying to cook a meal, but is looking for more ingredients. | The Maid inside the trailer is trying to cook a meal, but is looking for more ingredients. If you give her {{DL|Item maniac|Hungry maid|any edible item}}, like {{DL|Drink|Berry Juice}} or {{DL|Status ailment healing item|Casteliacone}}, she will pay for your generosity. The items she receives are worth anywhere from {{pdollar}}20 to {{pdollar}}30,000. | ||
=== Battle the Musician === | ===Battle the Musician=== | ||
Defeat Musician Preston to receive a new [[Prop]] for the [[Pokémon Musical]], an Electric Guitar. | Defeat Musician Preston to receive a new [[Prop]] for the [[Pokémon Musical]], an Electric Guitar. | ||
=== Roadblock === | ===Roadblock=== | ||
A large crowd is gathered on the west side of the route. | A large crowd is gathered on the west side of the route. The drawbridge is blocked by a Motorcyclist, his name... Charles. A male Ace Trainer asks for help, so get ready to battle. Charles challenges you to a [[Rotation Battle]]{{sup/5|B2}} or a [[Triple Battle]]{{sup/5|W2}}, so check the order of your party members. | ||
{| align="center" | {| align="center" | ||
| | | | ||
{{Party|color={{black 2 color}}|bordercolor={{black 2 color dark}}|headcolor={{white 2 color light}} | {{Party/Single|color={{black 2 color}}|bordercolor={{black 2 color dark}}|headcolor={{white 2 color light}} | ||
|sprite=Spr B2W2 Biker.png | |sprite=Spr B2W2 Biker.png | ||
|prize={{pdollar}}832 | |prize={{pdollar}}{{tt|832|768 in Easy Mode, 896 in Challenge Mode}} | ||
|class=Motorcyclist|name=Charles | |class=Motorcyclist|name=Charles | ||
|game=B2W2|location=Unova Route 5|locationname=Route 5 | |game=B2W2|location=Unova Route 5|locationname=Route 5 | ||
|pokemon=3 | |pokemon=3 | ||
| | }}|{{Pokémon/5|game=Black and White | ||
|ndex=561|pokemon=Sigilyph | |ndex=561|pokemon=Sigilyph | ||
|type1=Psychic|type2=Flying | |type1=Psychic|type2=Flying | ||
|level=26|gender=male | |level={{tt|26|24 in Easy Mode, 28 in Challenge Mode}}|gender=male | ||
|ability= | |ability=Magic Guard | ||
|move1=Air Cutter|move1type=Flying|move1cat=Special | |move1=Air Cutter|move1type=Flying|move1cat=Special | ||
|move2=Psybeam|move2type=Psychic|move2cat=Special | |move2=Psybeam|move2type=Psychic|move2cat=Special | ||
| Line 104: | Line 104: | ||
|move4=Light Screen|move4type=Psychic|move4cat=Status}} | |move4=Light Screen|move4type=Psychic|move4cat=Status}} | ||
| | |{{Pokémon/5|game=Black and White | ||
|ndex=566|pokemon=Archen | |ndex=566|pokemon=Archen | ||
|type1=Rock|type2=Flying | |type1=Rock|type2=Flying | ||
|level=26|gender=male | |level={{tt|26|24 in Easy Mode, 28 in Challenge Mode}}|gender=male | ||
|ability=Defeatist | |ability=Defeatist | ||
|move1=Pluck|move1type=Flying|move1cat=Physical | |move1=Pluck|move1type=Flying|move1cat=Physical | ||
| Line 114: | Line 114: | ||
|move4=Quick Guard|move4type=Fighting|move4cat=Status}} | |move4=Quick Guard|move4type=Fighting|move4cat=Status}} | ||
| | |{{Pokémon/5|game=Black and White | ||
|ndex=564|pokemon=Tirtouga | |ndex=564|pokemon=Tirtouga | ||
|type1=Water|type2=Rock | |type1=Water|type2=Rock | ||
|level=26|gender=male | |level={{tt|26|24 in Easy Mode, 28 in Challenge Mode}}|gender=male | ||
|ability= | |ability=Solid Rock | ||
|move1=Wide Guard|move1type=Rock|move1cat=Status | |move1=Wide Guard|move1type=Rock|move1cat=Status | ||
|move2=Aqua Jet|move2type=Water|move2cat=Physical | |move2=Aqua Jet|move2type=Water|move2cat=Physical | ||
|move3=AncientPower|move3type=Rock|move3cat=Special | |move3=AncientPower|move3type=Rock|move3cat=Special | ||
|move4=Crunch|move4type=Dark|move4cat=Physical}} | |move4=Crunch|move4type=Dark|move4cat=Physical}} | ||
}} | {{Party/Footer}} | ||
|} | |} | ||
| Line 129: | Line 129: | ||
The crowd disperses when Charles is defeated, and you can proceed west over the drawbridge. | The crowd disperses when Charles is defeated, and you can proceed west over the drawbridge. | ||
== Driftveil Drawbridge == | ==Driftveil Drawbridge== | ||
[[File:Driftveil Drawbridge.png|thumb|left|The Driftveil Drawbridge]] | [[File:Driftveil Drawbridge BW.png|thumb|left|The Driftveil Drawbridge]] | ||
The [[Driftveil Drawbridge]] is managed by the Driftveil Gym Leader, and is raised and lowered to accommodate the city's shipping schedule. | The [[Driftveil Drawbridge]] is managed by the Driftveil Gym Leader, and is raised and lowered to accommodate the city's shipping schedule. Bird Pokémon frequently fly over the bridge, and may drop a few {{DL|Phenomenon|Flying Pokémon's shadow|feathers}}. All but one of the seven varieties can be used to raise a Pokémon's [[Effort values]]. Most of these can also be sold for {{pdollar}}1500, making them a handy source of quick cash. Sometimes {{p|Ducklett}} may rest on the bridge, as well. | ||
=== Funfest Mission === | ===Funfest Mission=== | ||
By talking to the man on the east end of the bridge, the [[Entralink|Funfest Mission]] ''Wings Falling on the Drawbridge'' will be added. | By talking to the man on the east end of the bridge, the [[Entralink|Funfest Mission]] ''Wings Falling on the Drawbridge'' will be added. | ||
=== The Youngster's Wish === | ===The Youngster's Wish=== | ||
In the center of the bridge stands a Youngster. | In the center of the bridge stands a Youngster. He would like to see a {{p|Charizard}}, for which the bridge is nicknamed. If you speak to him with one in your party, he hands over a {{DL|Herbal medicine|Heal Powder}} as thanks. | ||
{{-}} | {{-}} | ||
== Driftveil City == | |||
==Driftveil City== | |||
[[File:Driftveil City Spring BW.png|thumb|300px|Driftveil City{{sup/5|BW}}]] | [[File:Driftveil City Spring BW.png|thumb|300px|Driftveil City{{sup/5|BW}}]] | ||
[[Driftveil City]] is a major port city that distributes a large variety of goods. | [[Driftveil City]] is a major port city that distributes a large variety of goods. The Driftveil Market sells items found nowhere else in [[Unova]]. The city was developed considerably over the last two years, and is now filled with many hotels. In the northwest, construction has begun on [[Clay Tunnel]], a shortcut to [[Twist Mountain]], which is still ongoing. | ||
{| class="expandable" align="center" style="background: #E0C068; {{roundy}}; border: 5px solid #EBD69D;" | {| class="expandable" align="center" style="background: #E0C068; {{roundy}}; border: 5px solid #EBD69D;" | ||
| Line 159: | Line 160: | ||
{{itemlist|Expert Belt|From the man in sunglasses in the Market|B2=yes|W2=yes|display={{DL|In-battle effect item|Expert Belt}}}} | {{itemlist|Expert Belt|From the man in sunglasses in the Market|B2=yes|W2=yes|display={{DL|In-battle effect item|Expert Belt}}}} | ||
{{itemlist|TM Dark|In the Market, near the west entrance|B2=yes|W2=yes|display={{TM|63|Embargo}}}} | {{itemlist|TM Dark|In the Market, near the west entrance|B2=yes|W2=yes|display={{TM|63|Embargo}}}} | ||
{{itemlist|Everstone|From the Waiter on Luxury Suites 23F|B2=yes|W2=yes | {{itemlist|Everstone|From the Waiter on Luxury Suites 23F|B2=yes|W2=yes}} | ||
{{itemlist|Heart Scale|From the Lady on Luxury Suites 1F (one per day)|B2=yes|W2=yes|display={{DL|Valuable item|Heart Scale}}}} | {{itemlist|Heart Scale|From the Lady on Luxury Suites 1F (one per day)|B2=yes|W2=yes|display={{DL|Valuable item|Heart Scale}}}} | ||
{{itemlist|Big Root|From the Veteran on Continental Hotel 25F|B2=yes|W2=yes|display={{DL|In-battle effect item|Big Root}}}} | {{itemlist|Big Root|From the Veteran on Continental Hotel 25F|B2=yes|W2=yes|display={{DL|In-battle effect item|Big Root}}}} | ||
| Line 172: | Line 173: | ||
=== Team Plasma, Old & New === | ===Team Plasma, Old & New=== | ||
On your way into the city, you meet a former member of [[Team Plasma]] arguing with a current member, who is trying to convince his friend to rejoin the group. | On your way into the city, you meet a former member of [[Team Plasma]] arguing with a current member, who is trying to convince his friend to rejoin the group. He refuses, saying that it will make his lord [[N]] sad. The current member laughs, calling the team's former "king" a traitor who disappeared when they needed him. [[Hugh]] arrives suddenly and the current member runs off, with Hugh not far behind. The former member invites you to hear more of their history at their old base, west of the Gym. | ||
=== Grand Hotel === | ===Grand Hotel=== | ||
Grand Hotel Driftveil stands near the stone bridge. | Grand Hotel Driftveil stands near the stone bridge. Speak to the old man on the first floor; if you have seen at least 70 different Pokémon, he rewards you with a {{DL|In-battle effect item|Shell Bell}}. After that, take the elevator to 19F and play with the {{p|Axew}} to receive the [[Haban Berry]] it was holding. | ||
=== Luxury Suites === | ===Luxury Suites=== | ||
Driftveil Luxury Suites sits in the southwest. | Driftveil Luxury Suites sits in the southwest. On the first floor, a Lady asks to see a Pokémon with a certain move; fulfill her request to receive a {{DL|Valuable item|Heart Scale}}. She asks to see a new move every day. On 23F, a Waiter gives you an [[Everstone]]. | ||
=== Continental Hotel === | ===Continental Hotel=== | ||
The Driftveil Continental Hotel is located in the northeast part of the city. | The Driftveil Continental Hotel is located in the northeast part of the city. Talk to the Veteran on 25F to receive a {{DL|In-battle effect item|Big Root}}. | ||
=== Chateau Hotel === | ===Chateau Hotel=== | ||
The Chateau Hotel can be found north of the Market. | The Chateau Hotel can be found north of the Market. On the first floor, you meet a master Move Tutor who is interested in {{DL|Shard|Red Shard}}s. Give him a certain number of them to have him teach a Pokémon a new move. On 25F, a Gentleman gives you an {{DL|In-battle effect item|Air Balloon}}. | ||
=== Move Tutor === | ===Move Tutor=== | ||
The house next to the Chateau Hotel belongs to the local Move Tutor. | The house next to the Chateau Hotel belongs to the local Move Tutor. He is obsessed with {{DL|Shard|Red Shards}}, and will teach a variety of moves for the right number of Shards. The Driftveil Gym's weaknesses include {{t|Ice}}- and {{type|Grass}} attacks, so you may want to have him teach {{m|Ice Punch}} or {{m|Seed Bomb}}. | ||
{| align="center" | {| align="center" | ||
| Line 286: | Line 287: | ||
=== Former Plasma Base === | ===Former Plasma Base=== | ||
When you visit the former [[Team Plasma|Plasma]] base on the hill near the Gym, you meet an old man named [[Rood]] standing outside. | When you visit the former [[Team Plasma|Plasma]] base on the hill near the Gym, you meet an old man named [[Rood]] standing outside. He wishes to have a battle to determine what kind of person you are. | ||
{| align="center" | {| align="center" | ||
| | | | ||
{{Party|color={{red color}}|headcolor={{red color light}}|bordercolor={{red color dark}} | {{Party/Single|color={{red color}}|headcolor={{red color light}}|bordercolor={{red color dark}} | ||
|sprite=Spr B2W2 Rood.png | |sprite=Spr B2W2 Rood.png | ||
|prize={{Pdollar}}2700 | |prize={{Pdollar}}{{tt|2700|2400 in Easy Mode, 3000 in Challenge Mode}} | ||
|class=Pokémon Trainer|name=Rood | |class=Pokémon Trainer|name=Rood | ||
|game=B2W2|location=Driftveil City|locationname=Driftveil City | |game=B2W2|location=Driftveil City|locationname=Driftveil City | ||
|pokemon=2 | |pokemon=2 | ||
| | }}|{{Pokémon/5|game=Black | ||
|ndex=507|pokemon=Herdier | |ndex=507|pokemon=Herdier | ||
|type1=Normal | |type1=Normal | ||
|level=27|gender=male | |level={{tt|27|24 in Easy Mode, 30 in Challenge Mode}}|gender=male | ||
|ability=Intimidate | |ability=Intimidate | ||
|move1=Helping Hand|move1type=Normal|move1cat=Status | |move1=Helping Hand|move1type=Normal|move1cat=Status | ||
| Line 308: | Line 309: | ||
|move4=Crunch|move4type=Dark|move4cat=Physical}} | |move4=Crunch|move4type=Dark|move4cat=Physical}} | ||
| | |{{Pokémon/5|game=Black | ||
|ndex=528|pokemon=Swoobat | |ndex=528|pokemon=Swoobat | ||
|type1=Psychic|type2=Flying | |type1=Psychic|type2=Flying | ||
|level=27|gender=male | |level={{tt|27|24 in Easy Mode, 30 in Challenge Mode}}|gender=male | ||
|ability=Unaware | |ability=Unaware | ||
|move1=Heart Stamp|move1type=Psychic|move1cat=Physical | |move1=Heart Stamp|move1type=Psychic|move1cat=Physical | ||
| Line 317: | Line 318: | ||
|move3=Air Cutter|move3type=Flying|move3cat=Physical | |move3=Air Cutter|move3type=Flying|move3cat=Physical | ||
|move4=Attract|move4type=Normal|move4cat=Status}} | |move4=Attract|move4type=Normal|move4cat=Status}} | ||
}} | {{Party/Footer}} | ||
|} | |} | ||
Afterwards, [[Hugh]] shows up and [[Rood]] leads you both into the building. | Afterwards, [[Hugh]] shows up and [[Rood]] leads you both into the building. Rood explains how he and the other former Plasma members are repenting for their misdeeds from two years ago. Hugh asks where is his sister's missing purrloin but Rood suggests that Team Plasma is still using it. Hugh now leaves to defeat the Pokemon Gym. Rood then asks you to look after a Pokémon for him, a {{p|Zorua}} that once traveled with [[N]]. | ||
=== Driftveil Gym === | ===Driftveil Gym=== | ||
[[File:Driftveil Gym B2W2.png|thumb|Driftveil Gym]] | |||
{{sign|bwbuilding|Driftveil City Pokémon Gym<br>Leader: Clay|The Underground Boss}} | {{sign|bwbuilding|Driftveil City Pokémon Gym<br>Leader: Clay|The Underground Boss}} | ||
The [[Driftveil Gym]] specializes in {{type|Ground}} Pokémon. | The [[Driftveil Gym]] specializes in {{type|Ground}} Pokémon. In keeping with his Miner King title, [[Clay]] has established his Gym in a large underground cavern littered with green crystals. To reach the Gym Leader in the northeast, challengers must navigate a series of conveyor belts through the shadowy chamber. A spotlight snaps on over each platform you visit, and there are four platforms that function as lifts so you can get a better view of your surroundings. | ||
[[Clay]]'s favorite move, {{m|Bulldoze}}, lowers his opponent's {{stat|Speed}} when it hits. | [[Clay]]'s favorite move, {{m|Bulldoze}}, lowers his opponent's {{stat|Speed}} when it hits. To counter this, give your fighters a {{DL|In-battle effect item|Quick Claw}} to let them sometimes attack first. As for his team, all three (or four, if you're playing Challenge Mode) of Clay's Pokémon are weakened by {{type|Water}} attacks. As an alternative, his {{p|Krokorok}} and {{p|Sandslash}} are both vulnerable to {{type|Grass}} moves- while Krokorok, {{p|Onix}} and {{p|Excadrill}} are afraid of {{type|Fighting}} moves. | ||
{| align="center" | {| align="center" | ||
| Line 345: | Line 346: | ||
| | | | ||
{{trainerheader|Ground}} | {{trainerheader|Ground}} | ||
{{trainerentry|Spr B2W2 Worker.png|Worker|Noel|1240|1|343|Baltoy||31|None}} | {{trainerentry|Spr B2W2 Worker.png|Worker|Noel|{{tt|1240|1120 in Easy Mode, 1360 in Challenge Mode}}|1|343|Baltoy||{{tt|31|28 in Easy Mode, 34 in Challenge Mode}}|None}} | ||
{{trainerdiv|Ground}} | {{trainerdiv|Ground}} | ||
{{trainerentry|Spr B2W2 Worker.png|Worker|Tavarius|1160|3|529|Drilbur|♂|29|None|343|Baltoy||29|None|551|Sandile|♂|29|None}} | {{trainerentry|Spr B2W2 Worker.png|Worker|Tavarius|{{tt|1160|1040 in Easy Mode, 1280 in Challenge Mode}}|3|529|Drilbur|♂|{{tt|29|26 in Easy Mode, 32 in Challenge Mode}}|None|343|Baltoy||{{tt|29|26 in Easy Mode, 32 in Challenge Mode}}|None|551|Sandile|♂|{{tt|29|26 in Easy Mode, 32 in Challenge Mode}}|None}} | ||
{{trainerdiv|Ground}} | {{trainerdiv|Ground}} | ||
{{trainerentry|Spr B2W2 Worker.png|Worker|Niel|1200|2|343|Baltoy||30|None|551|Sandile|♂|30| | {{trainerentry|Spr B2W2 Worker.png|Worker|Niel|{{tt|1200|1080 in Easy Mode, 1320 in Challenge Mode}}|2|343|Baltoy||{{tt|30|27 in Easy Mode, 33 in Challenge Mode}}|None|551|Sandile|♂|{{tt|30|27 in Easy Mode, 33 in Challenge Mode}}|none}} | ||
{{trainerdiv|Ground}} | {{trainerdiv|Ground}} | ||
{{trainerentry|Spr B2W2 Worker.png|Worker|Friedrich|1240|1|551|Sandile|♂|31|None}} | {{trainerentry|Spr B2W2 Worker.png|Worker|Friedrich|{{tt|1240|1120 in Easy Mode, 1360 in Challenge Mode}}|1|551|Sandile|♂|{{tt|31|28 in Easy Mode, 34 in Challenge Mode}}|None}} | ||
{{trainerdiv|Ground}} | {{trainerdiv|Ground}} | ||
{{trainerentry|Spr B2W2 Worker.png|Worker|Pasqual|1200|2|529|Drilbur|♂|30|none|343|Baltoy||30| | {{trainerentry|Spr B2W2 Worker.png|Worker|Pasqual|{{tt|1200|1080 in Easy Mode, 1320 in Challenge Mode}}|2|529|Drilbur|♂|{{tt|30|27 in Easy Mode, 33 in Challenge Mode}}|none|343|Baltoy||{{tt|30|27 in Easy Mode, 33 in Challenge Mode}}|none}} | ||
{{trainerdiv|Ground}} | {{trainerdiv|Ground}} | ||
{{trainerentry|Spr B2W2 Worker.png|Worker|Tibor|1200|2|551|Sandile|♂|30|None|529|Drilbur|♂|30| | {{trainerentry|Spr B2W2 Worker.png|Worker|Tibor|{{tt|1200|1080 in Easy Mode, 1320 in Challenge Mode}}|2|551|Sandile|♂|{{tt|30|27 in Easy Mode, 33 in Challenge Mode}}|None|529|Drilbur|♂|{{tt|30|27 in Easy Mode, 33 in Challenge Mode}}|none}} | ||
{{trainerdiv|Ground}} | {{trainerdiv|Ground}} | ||
{{trainerentry|Spr B2W2 Worker.png|Worker|Maynard|1240|1|529|Drilbur|♂|31| | {{trainerentry|Spr B2W2 Worker.png|Worker|Maynard|{{tt|1240|1120 in Easy Mode, 1360 in Challenge Mode}}|1|529|Drilbur|♂|{{tt|31|28 in Easy Mode, 34 in Challenge Mode}}|none}} | ||
{{trainerfooter|Ground|5}} | {{trainerfooter|Ground|5}} | ||
|} | |} | ||
| Line 365: | Line 366: | ||
{| align="center" | {| align="center" | ||
| | | | ||
{{Party|color={{ground color}}|bordercolor={{ground color dark}}|headcolor={{ground color light}} | =====Easy Mode/Normal Mode===== | ||
{{Party/Single | |||
|color={{ground color}} | |||
|bordercolor={{ground color dark}} | |||
|headcolor={{ground color light}} | |||
|sprite=Spr B2W2 Clay.png | |sprite=Spr B2W2 Clay.png | ||
|prize={{ | |prize={{tt|{{pdollar}}3600|Easy Mode}}/{{tt|{{pdollar}}3960|Normal Mode}} | ||
|class=Leader|name=Clay | |class=Leader | ||
|game=B2W2|location=Driftveil Gym | |name=Clay | ||
|game=B2W2 | |||
|location=Driftveil Gym | |||
|pokemon=3 | |pokemon=3 | ||
}}|{{Pokémon/5 | |||
| | |game=Black | ||
|ndex=552|pokemon=Krokorok | |ndex=552 | ||
| | |pokemon=Krokorok | ||
| | |level={{tt|28|Easy Mode}}/{{tt|31|Normal Mode}} | ||
|gender=male | |||
|type1=Ground | |||
|type2=Dark | |||
|ability=Intimidate | |ability=Intimidate | ||
|move1=Crunch|move1type=Dark|move1cat=Physical | |move1=Crunch|move1type=Dark|move1cat=Physical | ||
| Line 381: | Line 391: | ||
|move3=Bulldoze|move3type=Ground|move3cat=Physical | |move3=Bulldoze|move3type=Ground|move3cat=Physical | ||
|move4=Torment|move4type=Dark|move4cat=Status}} | |move4=Torment|move4type=Dark|move4cat=Status}} | ||
|{{Pokémon/5 | |||
| | |game=Black | ||
|ndex=028|pokemon=Sandslash | |ndex=028 | ||
|pokemon=Sandslash | |||
|level={{tt|28|Easy Mode}}/{{tt|31|Normal Mode}} | |||
|gender=male | |||
|type1=Ground | |type1=Ground | ||
|ability=Sand Veil | |ability=Sand Veil | ||
|move1=Crush Claw|move1type=Normal|move1cat=Physical | |move1=Crush Claw|move1type=Normal|move1cat=Physical | ||
| Line 391: | Line 403: | ||
|move3=Fury Cutter|move3type=Bug|move3cat=Physical | |move3=Fury Cutter|move3type=Bug|move3cat=Physical | ||
|move4=Rollout|move4type=Rock|move4cat=Physical}} | |move4=Rollout|move4type=Rock|move4cat=Physical}} | ||
|{{Pokémon/5 | |||
| | |game=Black | ||
|ndex=530|pokemon=Excadrill | |ndex=530 | ||
|type1=Ground|type2=Steel | |pokemon=Excadrill | ||
| | |level={{tt|30|Easy Mode}}/{{tt|33|Normal Mode}} | ||
|gender=male | |||
|type1=Ground | |||
|type2=Steel | |||
|ability=Sand Force | |||
|held=Sitrus Berry | |held=Sitrus Berry | ||
|move1=Slash|move1type=Normal|move1cat=Physical | |move1=Slash|move1type=Normal|move1cat=Physical | ||
|move2=Rock Slide|move2type=Rock|move2cat=Physical | |move2=Rock Slide|move2type=Rock|move2cat=Physical | ||
|move3=Metal Claw|move3type=Steel|move3cat=Physical | |move3=Metal Claw|move3type=Steel|move3cat=Physical | ||
|move4=Bulldoze|move4type=Ground|move4cat=Physical}} | |move4=Bulldoze|move4type=Ground|move4cat=Physical}} | ||
{{Party/Footer}} | |||
=====Challenge Mode===== | |||
{{Party/Single | |||
|color={{ground color}} | |||
|bordercolor={{ground color dark}} | |||
|headcolor={{ground color light}} | |||
|sprite=Spr B2W2 Clay.png | |||
|prize={{PDollar}}4320 | |||
|class=Leader | |||
|name=Clay | |||
|game=B2W2 | |||
|location=Driftveil Gym | |||
|pokemon=4 | |||
}}|{{Pokémon/5 | |||
|game=Black | |||
|ndex=552 | |||
|pokemon=Krokorok | |||
|level=34 | |||
|gender=male | |||
|type1=Ground | |||
|type2=Dark | |||
|held=Sitrus Berry | |||
|ability=Intimidate | |||
|move1=Crunch|move1type=Dark|move1cat=Physical | |||
|move2=Sandstorm|move2type=Rock|move2cat=Status | |||
|move3=Torment|move3type=Dark|move3cat=Status | |||
|move4=Bulldoze|move4type=Ground|move4cat=Physical}} | |||
|{{Pokémon/5 | |||
|game=Black | |||
|ndex=028 | |||
|pokemon=Sandslash | |||
|level=34 | |||
|gender=male | |||
|type1=Ground | |||
|ability=Sand Veil | |||
|move1=Bulldoze|move1type=Ground|move1cat=Physical | |||
|move2=Crush Claw|move2type=Normal|move2cat=Physical | |||
|move3=Hone Claws|move3type=Dark|move3cat=Status | |||
|move4=Rock Slide|move4type=Rock|move4cat=Physical | |||
}} | }} | ||
{{Party/Div|color={{ground color}}}} | |||
|{{Pokémon/5 | |||
|game=Black | |||
|ndex=095 | |||
|pokemon=Onix | |||
|level=34 | |||
|gender=male | |||
|type1=Rock | |||
|type2=Ground | |||
|ability=Sturdy | |||
|move1=Explosion|move1type=Normal|move1cat=Physical | |||
|move2=Bulldoze|move2type=Ground|move2cat=Physical | |||
|move3=Rock Polish|move3type=Rock|move3cat=Status | |||
|move4=Rock Slide|move4type=Rock|move4cat=Physical | |||
}} | |||
|{{Pokémon/5 | |||
|game=Black | |||
|ndex=530 | |||
|pokemon=Excadrill | |||
|level=36 | |||
|gender=male | |||
|type1=Ground | |||
|type2=Steel | |||
|held=Sitrus Berry | |||
|ability=Sand Force | |||
|move1=Slash|move1type=Normal|move1cat=Physical | |||
|move2=Bulldoze|move2type=Ground|move2cat=Physical | |||
|move3=Metal Claw|move3type=Steel|move3cat=Physical | |||
|move4=Rock Slide|move4type=Rock|move4cat=Physical}} | |||
{{Party/Footer}} | |||
|} | |} | ||
|} | |} | ||
| Line 408: | Line 493: | ||
For defeating him, [[Clay]] awards you the {{badge|Quake}}, which ensures that all Pokémon of level 60 or less obey. | For defeating him, [[Clay]] awards you the {{badge|Quake}}, which ensures that all Pokémon of level 60 or less obey. He also gives you {{TM|78|Bulldoze}} as a prize. | ||
Clay then leads you out of the Gym, where you meet up with [[Hugh]] again. | Clay then leads you out of the Gym, where you meet up with [[Hugh]] again. Clay invites the two of you to the [[Pokémon World Tournament]] located south of the city. Hugh rages against Clay for letting former members of [[Team Plasma]] live in his city; while Clay tries to calm him down, Hugh does not seem convinced and runs off to the south. Follow him to the World Tournament area. | ||
Revision as of 18:10, 28 April 2017
Route 5
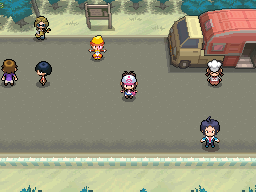
Route 5 is a short path that leads from Nimbasa City to the Driftveil Drawbridge in the west. It is usually a lively place because many Pokémon Trainers like to gather here.
| Trainers | ||||||||||||||||||||||||||||||||||||||||||||||||||||||||||||||||||||||||||||||||||||||||||||||||||||||||||||||
|---|---|---|---|---|---|---|---|---|---|---|---|---|---|---|---|---|---|---|---|---|---|---|---|---|---|---|---|---|---|---|---|---|---|---|---|---|---|---|---|---|---|---|---|---|---|---|---|---|---|---|---|---|---|---|---|---|---|---|---|---|---|---|---|---|---|---|---|---|---|---|---|---|---|---|---|---|---|---|---|---|---|---|---|---|---|---|---|---|---|---|---|---|---|---|---|---|---|---|---|---|---|---|---|---|---|---|---|---|---|---|
| ||||||||||||||||||||||||||||||||||||||||||||||||||||||||||||||||||||||||||||||||||||||||||||||||||||||||||||||
| Available Pokémon | |||||||||||||||||||||||||||||||||||||||||||||||||||||||||||||||||||||||||||||||||||||||||||||||||||||||||||||||||||||||||||||||||||||||||||||||||||||||||||||||||||||||||||||||||||||||||||||||||||||||||||||||||||||||||||||||||||||||||||||||||||||||||||||||||||||||||||||||||||||||||||||||||||||||||||||||||||||||||||||||||||||||||||||||||||||||
|---|---|---|---|---|---|---|---|---|---|---|---|---|---|---|---|---|---|---|---|---|---|---|---|---|---|---|---|---|---|---|---|---|---|---|---|---|---|---|---|---|---|---|---|---|---|---|---|---|---|---|---|---|---|---|---|---|---|---|---|---|---|---|---|---|---|---|---|---|---|---|---|---|---|---|---|---|---|---|---|---|---|---|---|---|---|---|---|---|---|---|---|---|---|---|---|---|---|---|---|---|---|---|---|---|---|---|---|---|---|---|---|---|---|---|---|---|---|---|---|---|---|---|---|---|---|---|---|---|---|---|---|---|---|---|---|---|---|---|---|---|---|---|---|---|---|---|---|---|---|---|---|---|---|---|---|---|---|---|---|---|---|---|---|---|---|---|---|---|---|---|---|---|---|---|---|---|---|---|---|---|---|---|---|---|---|---|---|---|---|---|---|---|---|---|---|---|---|---|---|---|---|---|---|---|---|---|---|---|---|---|---|---|---|---|---|---|---|---|---|---|---|---|---|---|---|---|---|---|---|---|---|---|---|---|---|---|---|---|---|---|---|---|---|---|---|---|---|---|---|---|---|---|---|---|---|---|---|---|---|---|---|---|---|---|---|---|---|---|---|---|---|---|---|---|---|---|---|---|---|---|---|---|---|---|---|---|---|---|---|---|---|---|---|---|---|---|---|---|---|---|---|---|---|---|---|---|---|---|---|---|---|---|---|---|---|---|---|---|---|---|---|---|---|---|---|---|---|---|---|---|---|---|---|---|---|---|---|---|---|---|---|---|---|
| |||||||||||||||||||||||||||||||||||||||||||||||||||||||||||||||||||||||||||||||||||||||||||||||||||||||||||||||||||||||||||||||||||||||||||||||||||||||||||||||||||||||||||||||||||||||||||||||||||||||||||||||||||||||||||||||||||||||||||||||||||||||||||||||||||||||||||||||||||||||||||||||||||||||||||||||||||||||||||||||||||||||||||||||||||||||
| Items | ||||||||||||||||||||||||||||
|---|---|---|---|---|---|---|---|---|---|---|---|---|---|---|---|---|---|---|---|---|---|---|---|---|---|---|---|---|
| ||||||||||||||||||||||||||||
Bianca's HM
As you leave Nimbasa, Bianca catches up to you. She gives you HM02 (Fly), which lets you instantly return to any familiar city or town. Use it on something like Pidove or Sigilyph.
Hidden Grottoes Revealed
After handing over the HM, Bianca claims that she hears something. She leads you north, where she hears a rustling in the trees. She explains that this must be a Hidden Grotto, one of many scattered across the region. These grottoes are hard to find, they simply look like a large shadow under a group of trees. Inside, you can meet a Pokémon with its Hidden Ability, a visible item, or a hidden item. After a while, another Pokémon may show up, or another item may appear. This grotto happens to have a Minccino inside, which has its Hidden Ability Skill Link. Bianca leaves you to catch it, or not, on your own.
The Berry Seller
A woman near the gate sells a bunch of five Berries every day for $200. These bunches may be Pomeg, Kelpsy, Qualot, Hondew, or Grepa Berries. She only sells one bunch per day.
The Hungry Maid
The Maid inside the trailer is trying to cook a meal, but is looking for more ingredients. If you give her any edible item, like Berry Juice or Casteliacone, she will pay for your generosity. The items she receives are worth anywhere from $20 to $30,000.
Battle the Musician
Defeat Musician Preston to receive a new Prop for the Pokémon Musical, an Electric Guitar.
Roadblock
A large crowd is gathered on the west side of the route. The drawbridge is blocked by a Motorcyclist, his name... Charles. A male Ace Trainer asks for help, so get ready to battle. Charles challenges you to a Rotation BattleB2 or a Triple BattleW2, so check the order of your party members.
| |||||||||||||||||||||||||||||||||||||||||||||||||||||||||||||||||||||||||||||||||||||||||||||||||||||||||||||||||||||
The crowd disperses when Charles is defeated, and you can proceed west over the drawbridge.
Driftveil Drawbridge
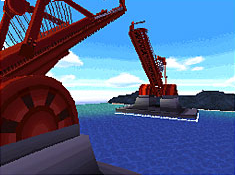
The Driftveil Drawbridge is managed by the Driftveil Gym Leader, and is raised and lowered to accommodate the city's shipping schedule. Bird Pokémon frequently fly over the bridge, and may drop a few feathers. All but one of the seven varieties can be used to raise a Pokémon's Effort values. Most of these can also be sold for $1500, making them a handy source of quick cash. Sometimes Ducklett may rest on the bridge, as well.
Funfest Mission
By talking to the man on the east end of the bridge, the Funfest Mission Wings Falling on the Drawbridge will be added.
The Youngster's Wish
In the center of the bridge stands a Youngster. He would like to see a Charizard, for which the bridge is nicknamed. If you speak to him with one in your party, he hands over a Heal Powder as thanks.
Driftveil City
Driftveil City is a major port city that distributes a large variety of goods. The Driftveil Market sells items found nowhere else in Unova. The city was developed considerably over the last two years, and is now filled with many hotels. In the northwest, construction has begun on Clay Tunnel, a shortcut to Twist Mountain, which is still ongoing.
| Items | ||||||||||||||||||||||||||||||||||||||||||||||||||||||||||||||||
|---|---|---|---|---|---|---|---|---|---|---|---|---|---|---|---|---|---|---|---|---|---|---|---|---|---|---|---|---|---|---|---|---|---|---|---|---|---|---|---|---|---|---|---|---|---|---|---|---|---|---|---|---|---|---|---|---|---|---|---|---|---|---|---|---|
| ||||||||||||||||||||||||||||||||||||||||||||||||||||||||||||||||
Team Plasma, Old & New
On your way into the city, you meet a former member of Team Plasma arguing with a current member, who is trying to convince his friend to rejoin the group. He refuses, saying that it will make his lord N sad. The current member laughs, calling the team's former "king" a traitor who disappeared when they needed him. Hugh arrives suddenly and the current member runs off, with Hugh not far behind. The former member invites you to hear more of their history at their old base, west of the Gym.
Grand Hotel
Grand Hotel Driftveil stands near the stone bridge. Speak to the old man on the first floor; if you have seen at least 70 different Pokémon, he rewards you with a Shell Bell. After that, take the elevator to 19F and play with the Axew to receive the Haban Berry it was holding.
Luxury Suites
Driftveil Luxury Suites sits in the southwest. On the first floor, a Lady asks to see a Pokémon with a certain move; fulfill her request to receive a Heart Scale. She asks to see a new move every day. On 23F, a Waiter gives you an Everstone.
Continental Hotel
The Driftveil Continental Hotel is located in the northeast part of the city. Talk to the Veteran on 25F to receive a Big Root.
Chateau Hotel
The Chateau Hotel can be found north of the Market. On the first floor, you meet a master Move Tutor who is interested in Red Shards. Give him a certain number of them to have him teach a Pokémon a new move. On 25F, a Gentleman gives you an Air Balloon.
Move Tutor
The house next to the Chateau Hotel belongs to the local Move Tutor. He is obsessed with Red Shards, and will teach a variety of moves for the right number of Shards. The Driftveil Gym's weaknesses include Ice- and Grass-type attacks, so you may want to have him teach Ice Punch or Seed Bomb.
|
|
Former Plasma Base
When you visit the former Plasma base on the hill near the Gym, you meet an old man named Rood standing outside. He wishes to have a battle to determine what kind of person you are.
| ||||||||||||||||||||||||||||||||||||||||||||||||||||||||||||||||||||||||||||||||
Afterwards, Hugh shows up and Rood leads you both into the building. Rood explains how he and the other former Plasma members are repenting for their misdeeds from two years ago. Hugh asks where is his sister's missing purrloin but Rood suggests that Team Plasma is still using it. Hugh now leaves to defeat the Pokemon Gym. Rood then asks you to look after a Pokémon for him, a Zorua that once traveled with N.
Driftveil Gym
|
||||
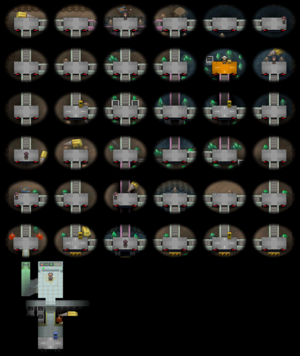
The Driftveil Gym specializes in Ground-type Pokémon. In keeping with his Miner King title, Clay has established his Gym in a large underground cavern littered with green crystals. To reach the Gym Leader in the northeast, challengers must navigate a series of conveyor belts through the shadowy chamber. A spotlight snaps on over each platform you visit, and there are four platforms that function as lifts so you can get a better view of your surroundings.
Clay's favorite move, Bulldoze, lowers his opponent's Speed when it hits. To counter this, give your fighters a Quick Claw to let them sometimes attack first. As for his team, all three (or four, if you're playing Challenge Mode) of Clay's Pokémon are weakened by Water-type attacks. As an alternative, his Krokorok and Sandslash are both vulnerable to Grass-type moves- while Krokorok, Onix and Excadrill are afraid of Fighting-type moves.
For defeating him, Clay awards you the Quake Badge, which ensures that all Pokémon of level 60 or less obey. He also gives you TM78 (Bulldoze) as a prize.
Clay then leads you out of the Gym, where you meet up with Hugh again. Clay invites the two of you to the Pokémon World Tournament located south of the city. Hugh rages against Clay for letting former members of Team Plasma live in his city; while Clay tries to calm him down, Hugh does not seem convinced and runs off to the south. Follow him to the World Tournament area.
|
Black 2 and White 2 walkthrough |
|

|
This article is part of Project Walkthroughs, a Bulbapedia project that aims to write comprehensive step-by-step guides on each Pokémon game. |
