Aether Paradise: Difference between revisions
No edit summary |
|||
| (2 intermediate revisions by one other user not shown) | |||
| Line 18: | Line 18: | ||
==In the games== | ==In the games== | ||
{{spoilers}} | |||
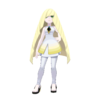
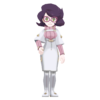
After assisting [[Faba]] in stopping two {{tc|Team Skull Grunt}}s from harassing a {{p|Slowpoke}} on [[Memorial Hill]], the branch chief invites the player to [[Hano Grand Resort]] after they finish their grand trial with [[Olivia]]. Upon arriving at the resort with [[Hau]], Faba will take them to Aether Paradise. The player and Hau are then introduced to [[Wicke]], who gives them a tour of the facility. At the top floor, the player meets the President, [[Lusamine]], who welcomes the two trial-goers and professes her love of {{OBP|Pokémon|species}}. | After assisting [[Faba]] in stopping two {{tc|Team Skull Grunt}}s from harassing a {{p|Slowpoke}} on [[Memorial Hill]], the branch chief invites the player to [[Hano Grand Resort]] after they finish their grand trial with [[Olivia]]. Upon arriving at the resort with [[Hau]], Faba will take them to Aether Paradise. The player and Hau are then introduced to [[Wicke]], who gives them a tour of the facility. At the top floor, the player meets the President, [[Lusamine]], who welcomes the two trial-goers and professes her love of {{OBP|Pokémon|species}}. | ||
The meeting is interrupted, however, by an Ultra Wormhole, which produces an {{p|Nihilego|unidentified Pokémon}}. The player is prompted to battle it, which eventually ends in it fleeing. After being thanked by the Aether Foundation's staff, Hau and the player are ferried off to [[Malie City]] on [[Ula'ula Island]]. | The meeting is interrupted, however, by an [[Ultra Wormhole]], which produces an {{p|Nihilego|unidentified Pokémon}}. The player is prompted to battle it, which eventually ends in it fleeing. After being thanked by the Aether Foundation's staff, Hau and the player are ferried off to [[Malie City]] on [[Ula'ula Island]]. | ||
Later, after the player has defeated [[Team Skull]] at [[Shady House|their base]] in [[Po Town]], [[Lillie]] is revealed to have been taken away by [[Plumeria]]. [[Gladion]] later reveals that Lillie was taken to Aether Paradise, where the player, Hau, and Gladion start looking for her next. While raiding the facility, new details about {{p|Cosmog}}, the [[Ultra Beast]]s, and {{p|Type: Null}} are revealed. It also turns out that the Aether Foundation has been working together with Team Skull and sponsoring their criminal activities, forcing the player to battle their way through members of the evil team, including their Boss, [[Guzma]]. | |||
In the big mansion at the end of Aether Paradise, the player finds Lillie, who is facing Lusamine, her mother, about Cosmog's fate. The player, Lillie, Hau, and Gladion follow Lusamine into Aether Paradise's "Preservation Room", where Lusamine reveals how she is intending to use Cosmog's power to open Ultra Wormholes all across Alola and summon multiple Ultra Beasts through them. As wormholes start opening and Ultra Beasts start emerging all over Alola, the player engages Lusamine in a battle. After Lusamine is defeated, she uses a specially designed {{ball|Beast}} to capture the Ultra Beast that emerged through the wormhole she had created inside the room, before both she and Guzma disappear into the fading wormhole themselves. | |||
The following day, Gladion tells the player about the {{p|Solgaleo|Legendary}} {{p|Lunala|Pokémon}} of Alola, which is said to be able to travel between worlds, and gives Lillie the {{key|VII|Moon Flute}}{{sup/7|S}}/{{key|VII|Sun Flute}}{{sup/7|M}}, one of the items required to summon the Legendary Pokémon. Afterwards, the player and Lillie head to [[Seafolk Village]] on [[Poni Island]]. | |||
{{endspoilers}} | |||
==Items== | ==Items== | ||
| Line 29: | Line 37: | ||
{{Itemlist|Rare Candy|B1F: Docks, behind the cargo north of the elevator|Su=yes|M=yes|display={{DL|Vitamin|Rare Candy}}}} | {{Itemlist|Rare Candy|B1F: Docks, behind the cargo north of the elevator|Su=yes|M=yes|display={{DL|Vitamin|Rare Candy}}}} | ||
{{Itemlist|TM Psychic VI|B1F: Docks, from [[Wicke]] after the [[Ultra Beast]] encounter|Su=yes|M=yes|display={{TM|29|Psychic}}}} | {{Itemlist|TM Psychic VI|B1F: Docks, from [[Wicke]] after the [[Ultra Beast]] encounter|Su=yes|M=yes|display={{TM|29|Psychic}}}} | ||
{{Itemlist|X Sp. Atk|B1F: Docks, southwest of the | {{Itemlist|X Sp. Atk|B1F: Docks, in the southwest, near the south end of the ferry, after passing [[Nanu]]'s [[island challenge|grand trial]]|Su=yes|M=yes|display={{DL|Battle item|X Sp. Atk}}}} | ||
{{Itemlist|TM Poison VI|B1F: Docks, | {{Itemlist|TM Poison VI|B1F: Docks, in the southwest corner of the area, after passing Nanu's grand trial|Su=yes|M=yes|display={{TM|06|Toxic}}}} | ||
{{Itemlist|Max Revive|B2F: Lab area, from [[Hau]] after entering the area|Su=yes|M=yes|display={{DL|Revive|Max Revive}}}} | {{Itemlist|Max Revive|B2F: Lab area, from [[Hau]] after entering the area, after passing Nanu's grand trial|Su=yes|M=yes|display={{DL|Revive|Max Revive}}}} | ||
{{Itemlist|Big Malasada|B2F: Lab area, from Wicke after becoming Champion|Su=yes|M=yes|display={{DL|Status condition healing item|Big Malasada}} ×2}} | {{Itemlist|Big Malasada|B2F: Lab area, from Wicke after becoming Champion|Su=yes|M=yes|display={{DL|Status condition healing item|Big Malasada}} ×2}} | ||
{{Itemlist|Full Restore|Secret Lab A, behind the computer|Su=yes|M=yes|display={{DL|Potion|Full Restore}}}} | {{Itemlist|Full Restore|Secret Lab A, behind the computer|Su=yes|M=yes|display={{DL|Potion|Full Restore}}}} | ||
{{Itemlist|DNA Splicers|Secret Lab A, from an Aether Foundation Employee after becoming Champion|Su=yes|M=yes}} | {{Itemlist|DNA Splicers|Secret Lab A, from an Aether Foundation Employee after becoming Champion|Su=yes|M=yes}} | ||
| Line 42: | Line 47: | ||
{{Itemlist|Beast Ball|Secret Lab B, from Wicke after defeating {{FB|Salon Maiden|Anabel}}|Su=yes|M=yes|display={{ball|Beast}} ×10}} | {{Itemlist|Beast Ball|Secret Lab B, from Wicke after defeating {{FB|Salon Maiden|Anabel}}|Su=yes|M=yes|display={{ball|Beast}} ×10}} | ||
{{Itemlist|None|Secret Lab B, from [[Looker]] after completing all the UB missions|Su=yes|M=yes|display={{pdollar}}1,000,000}} | {{Itemlist|None|Secret Lab B, from [[Looker]] after completing all the UB missions|Su=yes|M=yes|display={{pdollar}}1,000,000}} | ||
{{Itemlist|Full Heal|Outside (north side), at the end of the southwest path|Su=yes|M=yes|display={{DL|Status condition healing item|Full Heal}}}} | |||
{{Itemlist|Master Ball|Outside (north side), from Gladion after defeating [[Lusamine]]|Su=yes|M=yes}} | |||
{{Itemlist|Hyper Potion|Outside (south side), at the end of the northeast path|Su=yes|M=yes|display={{DL|Potion|Hyper Potion}}}} | |||
{{Itlistfoot|steel}} | {{Itlistfoot|steel}} | ||
===Zygarde Cube=== | ===Zygarde Cube=== | ||
During the player's first visit, none of the Zygarde Cells at Aether Paradise are accessible. They only become accessible after the player has passed Nanu's grand trial. | |||
{{Itlisth|steel}} | {{Itlisth|steel}} | ||
{{Itemlist|Zygarde Cell|B2F: Lab area, | {{Itemlist|Zygarde Cell|B2F: Lab area, at the end of the hallway containing the secret labs|Su=yes|M=yes|display=[[Zygarde Cube|Zygarde Cell]]}} | ||
{{Itemlist|Zygarde Cell|Outside, | {{Itemlist|Zygarde Cell|Outside (north side), at the end of the southeast path|Su=yes|M=yes|display=[[Zygarde Cube|Zygarde Cell]]}} | ||
{{Itemlist|Zygarde Cell|Outside, | {{Itemlist|Zygarde Cell|Outside (north side), on the west side of the mansion{{sup/t|D}}|Su=yes|M=yes|display=[[Zygarde Cube|Zygarde Cell]]}} | ||
{{Itemlist|Zygarde Cell|Outside, between | {{Itemlist|Zygarde Cell|Outside (south side), between two pools on the west side{{sup/t|N}}|Su=yes|M=yes|display=[[Zygarde Cube|Zygarde Cell]]}} | ||
{{Itemlist|Zygarde Cell| | {{Itemlist|Zygarde Cell|In the mansion at the north end of the compound, under the table on the right side of the foyer|Su=yes|M=yes|display=[[Zygarde Cube|Zygarde Cell]]}} | ||
{{Itlistfoot|steel}} | {{Itlistfoot|steel}} | ||
| Line 62: | Line 71: | ||
==Trainers== | ==Trainers== | ||
===Multi Battle partners=== | |||
[[Hau]] will team up with the {{player}} in three [[Multi Battle]]s; first against a pair of {{tc|Aether Foundation Employee}}s in Secret Lab B on B2F, next against the first pair of Employees on 1F, and finally against [[Faba]] and an Employee on the same floor. [[Gladion]] will join the player to battle the second pair of Employees on 1F. | [[Hau]] will team up with the {{player}} in three [[Multi Battle]]s; first against a pair of {{tc|Aether Foundation Employee}}s in Secret Lab B on B2F, next against the first pair of Employees on 1F, and finally against [[Faba]] and an Employee on the same floor. [[Gladion]] will join the player to battle the second pair of Employees on 1F. | ||
| Line 137: | Line 147: | ||
|ability=Surge Surfer | |ability=Surge Surfer | ||
|level=38 | |level=38 | ||
|move1= | |move1=Electro Ball|move1type=Electric|move1cat=Special | ||
|move2=Quick Attack|move2type=Normal|move2cat=Physical | |move2=Quick Attack|move2type=Normal|move2cat=Physical | ||
|move3=Psychic|move3type=Psychic|move3cat=Special}} | |move3=Psychic|move3type=Psychic|move3cat=Special}} | ||
| Line 186: | Line 196: | ||
|ability=Surge Surfer | |ability=Surge Surfer | ||
|level=38 | |level=38 | ||
|move1= | |move1=Electro Ball|move1type=Electric|move1cat=Special | ||
|move2=Quick Attack|move2type=Normal|move2cat=Physical | |move2=Quick Attack|move2type=Normal|move2cat=Physical | ||
|move3=Psychic|move3type=Psychic|move3cat=Special}} | |move3=Psychic|move3type=Psychic|move3cat=Special}} | ||
| Line 253: | Line 263: | ||
{{Trainerentry|VSAether Foundation Employee F.png{{!}}150px|Aether Foundation Employee||1,728|2|372|Shelgon|♀|37|None|732|Trumbeak|♀|36|None}} | {{Trainerentry|VSAether Foundation Employee F.png{{!}}150px|Aether Foundation Employee||1,728|2|372|Shelgon|♀|37|None|732|Trumbeak|♀|36|None}} | ||
{{trainerdiv|steel}} | {{trainerdiv|steel}} | ||
{{Trainerentry|VSAether Foundation Employee M.png{{!}}150px|Aether Foundation Employee||1,776|3|047|Parasect|♂|36|None| | {{Trainerentry|VSAether Foundation Employee M.png{{!}}150px|Aether Foundation Employee||1,776|3|047|Parasect|♂|36|None|426|Drifblim|♂|36|None|329|Vibrava|♂|37|None}} | ||
{{trainerdiv|steel}} | {{trainerdiv|steel}} | ||
{{Trainerentry|VSAether Foundation Employee M.png{{!}}150px|Aether Foundation Employee||1,776|1|057|Primeape|♂|37|None}} | {{Trainerentry|VSAether Foundation Employee M.png{{!}}150px|Aether Foundation Employee||1,776|1|057|Primeape|♂|37|None}} | ||
| Line 285: | Line 295: | ||
{{Party/Footer}} | {{Party/Footer}} | ||
;After reading the report in Secret Lab B | |||
{{trainerheader|steel}} | {{trainerheader|steel}} | ||
{{trainerentry|VSAether Foundation Employee M.png{{!}}150px|Aether Foundation Employee|| | {{trainerentry|VSAether Foundation Employee M.png{{!}}150px|Aether Foundation Employee||3,552<br><sup>[[Double Battle]] with the following<br>Aether Foundation Employee</sup>|1|750|Mudsdale|♂|37|None}} | ||
{{trainerentry|VSAether Foundation Employee M.png{{!}}150px|Aether Foundation Employee|| | {{trainerentry|VSAether Foundation Employee M.png{{!}}150px|Aether Foundation Employee||3,552<br><sup>[[Double Battle]] with the previous<br>Aether Foundation Employee</sup>|1|279|Pelipper|♂|37|None}} | ||
{{trainerdiv|steel}} | {{trainerdiv|steel}} | ||
{{trainerentry|VSAether Foundation Employee M.png{{!}}150px|Aether Foundation Employee|| | {{trainerentry|VSAether Foundation Employee M.png{{!}}150px|Aether Foundation Employee||3,648<br><sup>[[Double Battle]] with the following<br>Aether Foundation Employee</sup>|1|126|Magmar|♂|38|None}} | ||
{{trainerentry|VSAether Foundation Employee M.png{{!}}150px|Aether Foundation Employee|| | {{trainerentry|VSAether Foundation Employee M.png{{!}}150px|Aether Foundation Employee||3,648<br><sup>[[Double Battle]] with the previous<br>Aether Foundation Employee</sup>|1|125|Electabuzz|♂|38|None}} | ||
{{trainerfooter|steel|7}} | {{trainerfooter|steel|7}} | ||
| Line 311: | Line 321: | ||
|class2=Aether Foundation | |class2=Aether Foundation | ||
|classlink2=Aether Foundation Employee (Trainer class) | |classlink2=Aether Foundation Employee (Trainer class) | ||
|name2= | |name2=Employee | ||
|sprite2=VSAether Foundation Employee M.png | |sprite2=VSAether Foundation Employee M.png | ||
|size2=150px | |size2=150px | ||
| Line 360: | Line 370: | ||
|type1=Bug | |type1=Bug | ||
|type2=Flying | |type2=Flying | ||
|ability= | |ability=Swarm | ||
|level=38 | |level=38 | ||
|move1=Light Screen|move1type=Psychic|move1cat=Status | |move1=Light Screen|move1type=Psychic|move1cat=Status | ||
|move2=Reflect|move2type=Psychic|move2cat=Status | |move2=Reflect|move2type=Psychic|move2cat=Status | ||
|move3= | |move3=Bug Buzz|move3type=Bug|move3cat=Special | ||
|move4= | |move4=Air Slash|move4type=Flying|move4cat=Special}} | ||
{{Party/Footer}} | {{Party/Footer}} | ||
;Post-game | |||
{{Party/Single | {{Party/Single | ||
|color={{white color light}} | |color={{white color light}} | ||
| Line 454: | Line 464: | ||
{{Trainerentry|VSAether Foundation Employee scientist.png{{!}}150px|Aether Foundation Employee||1,776|1|233|Porygon2||37|None}} | {{Trainerentry|VSAether Foundation Employee scientist.png{{!}}150px|Aether Foundation Employee||1,776|1|233|Porygon2||37|None}} | ||
{{trainerdiv|steel|Secret Lab B}} | {{trainerdiv|steel|Secret Lab B}} | ||
{{trainerentry|VSAether Foundation Employee M.png{{!}}150px|Aether Foundation Employee|| | {{trainerentry|VSAether Foundation Employee M.png{{!}}150px|Aether Foundation Employee||3,552<br><sup>[[Double Battle]] with the following<br>Aether Foundation Employee</sup>|1|067|Machoke|♂|37|None}} | ||
{{trainerentry|VSAether Foundation Employee F.png{{!}}150px|Aether Foundation Employee|| | {{trainerentry|VSAether Foundation Employee F.png{{!}}150px|Aether Foundation Employee||3,552<br><sup>[[Double Battle]] with the previous<br>Aether Foundation Employee</sup>|1|583|Vanillish|♀|37|None}} | ||
{{trainerfooter|steel|7}} | {{trainerfooter|steel|7}} | ||
| Line 486: | Line 496: | ||
|ability=Emergency Exit | |ability=Emergency Exit | ||
|level=41 | |level=41 | ||
|move1= | |move1=Swords Dance|move1type=Normal|move1cat=Status | ||
|move2=Razor Shell|move2type=Water|move2cat=Physical | |move2=Razor Shell|move2type=Water|move2cat=Physical | ||
|move3= | |move3=First Impression|move3type=Bug|move3cat=Physical | ||
}} | |||
|{{Pokémon/7 | |{{Pokémon/7 | ||
|ndex=168 | |ndex=168 | ||
| Line 495: | Line 506: | ||
|type1=Bug | |type1=Bug | ||
|type2=Poison | |type2=Poison | ||
|ability= | |ability=Swarm | ||
|level=40 | |level=40 | ||
|move1=Fell Stinger|move1type=Bug|move1cat=Physical | |move1=Fell Stinger|move1type=Bug|move1cat=Physical | ||
| Line 509: | Line 520: | ||
|ability=Intimidate | |ability=Intimidate | ||
|level=40 | |level=40 | ||
|move1= | |move1=Air Slash|move1type=Flying|move1cat=Special | ||
|move2= | |move2=Bug Buzz|move2type=Bug|move2cat=Special}} | ||
|{{Pokémon/7 | |{{Pokémon/7 | ||
|ndex=127 | |ndex=127 | ||
| Line 518: | Line 529: | ||
|ability=Mold Breaker | |ability=Mold Breaker | ||
|level=40 | |level=40 | ||
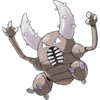
|move1= | |move1=Double Hit|move1type=Normal|move1cat=Physical | ||
|move2=Brick Break|move2type=Fighting|move2cat=Physical | |move2=Brick Break|move2type=Fighting|move2cat=Physical | ||
|move3= | |move3=X-Scissor|move3type=Bug|move3cat=Physical}} | ||
{{Party/Footer}} | {{Party/Footer}} | ||
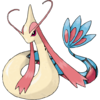
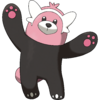
=== | ===Mansion=== | ||
{{Party/Single | {{Party/Single | ||
|color={{white color}} | |color={{white color}} | ||
| Line 545: | Line 556: | ||
|gender=female | |gender=female | ||
|type1=Fairy | |type1=Fairy | ||
|move1= | |move1=Moonblast|move1type=Fairy|move1cat=Special | ||
|move2= | |move2=Cosmic Power|move2type=Psychic|move2cat=Status | ||
|move3= | |move3=Metronome|move3type=Normal|move3cat=Status}} | ||
|{{Pokémon/7 | | {{Pokémon/7 | ||
|game=SM | |game=SM | ||
|ndex= | |ndex=549 | ||
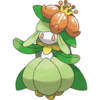
|pokemon= | |pokemon=Lilligant | ||
|ability= | |gender=female | ||
|ability=Own Tempo | |||
|level=41 | |level=41 | ||
|type1=Grass | |||
|type1= | |move1=Petal Dance|move1type=Grass|move1cat=Special | ||
|move1= | |move2=Teeter Dance|move2type=Normal|move2cat=Status | ||
|move2= | |move3=Stun Spore|move3type=Grass|move3cat=Status}} | ||
|move3= | | {{Pokémon/7 | ||
|{{Pokémon/7 | |||
|game=SM | |game=SM | ||
|ndex=429 | |ndex=429 | ||
| Line 567: | Line 578: | ||
|level=41 | |level=41 | ||
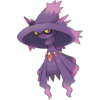
|type1=Ghost | |type1=Ghost | ||
|move1= | |move1=Shadow Ball|move1type=Ghost|move1cat=Special | ||
|move2= | |move2=Mystical Fire|move2type=Fire|move2cat=Special | ||
|move3=Power Gem|move3type=Rock|move3cat=Special}} | |move3=Power Gem|move3type=Rock|move3cat=Special}} | ||
{{Party/Div|color={{white color}}}} | {{Party/Div|color={{white color}}}} | ||
| style="margin:auto" |{{Pokémon/7 | | style="margin:auto" | {{Pokémon/7 | ||
|game=SM | |||
|ndex=350 | |||
|pokemon=Milotic | |||
|ability=Marvel Scale | |||
|level=41 | |||
|gender=female | |||
|type1=Water | |||
|move1=Hydro Pump|move1type=Water|move1cat=Special | |||
|move2=Safeguard|move2type=Normal|move2cat=Status | |||
|move3=Flail|move3type=Normal|move3cat=Physical}} | |||
| style="margin:auto" | {{Pokémon/7 | |||
|game=SM | |game=SM | ||
|ndex=760 | |ndex=760 | ||
| Line 581: | Line 603: | ||
|type2=Fighting | |type2=Fighting | ||
|move1=Baby-Doll Eyes|move1type=Fairy|move1cat=Status | |move1=Baby-Doll Eyes|move1type=Fairy|move1cat=Status | ||
|move2= | |move2=Hammer Arm|move2type=Fighting|move2cat=Physical | ||
|move3= | |move3=Take Down|move3type=Normal|move3cat=Physical}} | ||
{{Party/Footer}} | {{Party/Footer}} | ||
Revision as of 10:48, 11 December 2016

|
This article is incomplete. Please feel free to edit this article to add missing information and complete it. Reason: Missing map, Pokémon Abilities, and layout section with complete layout maps |
| ||||
| ||||
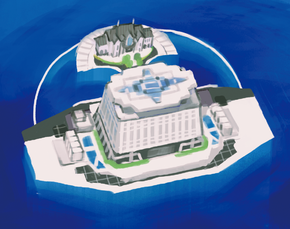
| Map description: | A VLFS or a "very large floating structure." This is where the Aether Foundation's research facilities are. | |||
|---|---|---|---|---|
| Location: | Central Alola | |||
| Region: | Alola | |||
| Generations: | VII | |||
| Pokémon world locations | ||||
Aether Paradise (Japanese: エーテルパラダイス Aether Paradise) is a very large floating structure that serves as an artificial island located in the middle of the Alola region, near Akala Island. It was created by the Aether Foundation to serve as a base for their research.
To protect the wild Pokémon being treated in their base, a jamming signal prevents the use of empty Poké Balls within the facility.
In the games
After assisting Faba in stopping two Team Skull Grunts from harassing a Slowpoke on Memorial Hill, the branch chief invites the player to Hano Grand Resort after they finish their grand trial with Olivia. Upon arriving at the resort with Hau, Faba will take them to Aether Paradise. The player and Hau are then introduced to Wicke, who gives them a tour of the facility. At the top floor, the player meets the President, Lusamine, who welcomes the two trial-goers and professes her love of Pokémon.
The meeting is interrupted, however, by an Ultra Wormhole, which produces an unidentified Pokémon. The player is prompted to battle it, which eventually ends in it fleeing. After being thanked by the Aether Foundation's staff, Hau and the player are ferried off to Malie City on Ula'ula Island.
Later, after the player has defeated Team Skull at their base in Po Town, Lillie is revealed to have been taken away by Plumeria. Gladion later reveals that Lillie was taken to Aether Paradise, where the player, Hau, and Gladion start looking for her next. While raiding the facility, new details about Cosmog, the Ultra Beasts, and Type: Null are revealed. It also turns out that the Aether Foundation has been working together with Team Skull and sponsoring their criminal activities, forcing the player to battle their way through members of the evil team, including their Boss, Guzma.
In the big mansion at the end of Aether Paradise, the player finds Lillie, who is facing Lusamine, her mother, about Cosmog's fate. The player, Lillie, Hau, and Gladion follow Lusamine into Aether Paradise's "Preservation Room", where Lusamine reveals how she is intending to use Cosmog's power to open Ultra Wormholes all across Alola and summon multiple Ultra Beasts through them. As wormholes start opening and Ultra Beasts start emerging all over Alola, the player engages Lusamine in a battle. After Lusamine is defeated, she uses a specially designed Beast Ball to capture the Ultra Beast that emerged through the wormhole she had created inside the room, before both she and Guzma disappear into the fading wormhole themselves.
The following day, Gladion tells the player about the Legendary Pokémon of Alola, which is said to be able to travel between worlds, and gives Lillie the Moon FluteS/Sun FluteM, one of the items required to summon the Legendary Pokémon. Afterwards, the player and Lillie head to Seafolk Village on Poni Island.
| Spoilers end here. |
|---|
Items
| Item | Location | Games | |
|---|---|---|---|
| All Memory disks | 2F: Conservation area, from Gladion after becoming Champion | S M | |
| Stick | 1F: Entrance, from an Aether Foundation Employee by the north exit | S M | |
| Dubious Disc | 1F: Entrance, from Faba after battling him post-game | S M | |
| Rare Candy | B1F: Docks, behind the cargo north of the elevator | S M | |
| TM29 (Psychic) | B1F: Docks, from Wicke after the Ultra Beast encounter | S M | |
| X Sp. Atk | B1F: Docks, in the southwest, near the south end of the ferry, after passing Nanu's grand trial | S M | |
| TM06 (Toxic) | B1F: Docks, in the southwest corner of the area, after passing Nanu's grand trial | S M | |
| Max Revive | B2F: Lab area, from Hau after entering the area, after passing Nanu's grand trial | S M | |
| Big Malasada ×2 | B2F: Lab area, from Wicke after becoming Champion | S M | |
| Full Restore | Secret Lab A, behind the computer | S M | |
| DNA Splicers | Secret Lab A, from an Aether Foundation Employee after becoming Champion | S M | |
| Prison Bottle | Secret Lab A, from an Aether Foundation Employee after becoming Champion | S M | |
| Soul Dew | Secret Lab A, from an Aether Foundation Employee after becoming Champion | S M | |
| Beast Ball ×10 | Secret Lab B, from Wicke after defeating Anabel | S M | |
| $1,000,000 | Secret Lab B, from Looker after completing all the UB missions | S M | |
| Full Heal | Outside (north side), at the end of the southwest path | S M | |
| Master Ball | Outside (north side), from Gladion after defeating Lusamine | S M | |
| Hyper Potion | Outside (south side), at the end of the northeast path | S M | |
Zygarde Cube
During the player's first visit, none of the Zygarde Cells at Aether Paradise are accessible. They only become accessible after the player has passed Nanu's grand trial.
| Item | Location | Games | |
|---|---|---|---|
| Zygarde Cell | Zygarde Cell | B2F: Lab area, at the end of the hallway containing the secret labs | S M |
| Zygarde Cell | Zygarde Cell | Outside (north side), at the end of the southeast path | S M |
| Zygarde Cell | Zygarde Cell | Outside (north side), on the west side of the mansionDay | S M |
| Zygarde Cell | Zygarde Cell | Outside (south side), between two pools on the west sideNight | S M |
| Zygarde Cell | Zygarde Cell | In the mansion at the north end of the compound, under the table on the right side of the foyer | S M |
Pokémon
| Pokémon | Allies | Games | Location | Levels | Rate | ||||||||||
|---|---|---|---|---|---|---|---|---|---|---|---|---|---|---|---|
| Special Pokémon | |||||||||||||||
|
N/A | S | M |
|
27 | One | |||||||||
| Gift Pokémon After becoming Champion | |||||||||||||||
|
N/A | S | M |
|
40 | One | |||||||||
| A colored background means that the Pokémon can be found in this location in the specified game. A white background with a colored letter means that the Pokémon cannot be found here. | |||||||||||||||
Trainers
Multi Battle partners
Hau will team up with the player in three Multi Battles; first against a pair of Aether Foundation Employees in Secret Lab B on B2F, next against the first pair of Employees on 1F, and finally against Faba and an Employee on the same floor. Gladion will join the player to battle the second pair of Employees on 1F.
|
|||||||||||||||||||||||||||||||||||||||||||||||||||||||||||||||||||||||||||||||||||||||||||||||||||||||||||||
| |||||||||||||||||||||||||||||||||||||||||||||||||||||||||||||||||||||||||||||||||||||||||||||||||||||||||||||
|
|||||||||||||||||||||||||||||||||||||||||||||||||||||||||||||||||||||||||||||||||||||||||||||||||||||||||||||
| |||||||||||||||||||||||||||||||||||||||||||||||||||||||||||||||||||||||||||||||||||||||||||||||||||||||||||||
|
|||||||||||||||||||||||||||||||||||||||||||||||||||||||||||||||||||||||||||||||||||||||||||||||||||||||||||
| |||||||||||||||||||||||||||||||||||||||||||||||||||||||||||||||||||||||||||||||||||||||||||||||||||||||||||
|
||||||||||||||||||||||||||||||||||||||||||||||||||||||||||||||||||||||||
| ||||||||||||||||||||||||||||||||||||||||||||||||||||||||||||||||||||||||
B1F: Docks
| Trainer | Pokémon | |||||||||||
|---|---|---|---|---|---|---|---|---|---|---|---|---|
|
| |||||||||||
| ||||||||||||
|
| |||||||||||
| ||||||||||||
|
| |||||||||||
| ||||||||||||
|
| |||||||||||
| ||||||||||||
| ||||||||||||
|
| |||||||||||
1F: Entrance
|
||||||||||||||||||||||||||||||||||
| ||||||||||||||||||||||||||||||||||
- After reading the report in Secret Lab B
| Trainer | Pokémon | |||||||||||
|---|---|---|---|---|---|---|---|---|---|---|---|---|
|
| |||||||||||
|
| |||||||||||
|
| |||||||||||
|
| |||||||||||
|
||||||||||||||||||||||||||||||||||||||||||||||||||||||||||||||||||||||||||||||||||||||||||||||||||||||||||||||||||||||||||||||||||||||||||||
| ||||||||||||||||||||||||||||||||||||||||||||||||||||||||||||||||||||||||||||||||||||||||||||||||||||||||||||||||||||||||||||||||||||||||||||
- Post-game
|
||||||||||||||||||||||||||||||||||||||||||||||||||||||||||||||||||||||||||||||||||||||||||||||||||||||||||||||||||||||||||||||||||||||||||||||||||||||||||||||||||||||||||||
| ||||||||||||||||||||||||||||||||||||||||||||||||||||||||||||||||||||||||||||||||||||||||||||||||||||||||||||||||||||||||||||||||||||||||||||||||||||||||||||||||||||||||||||
B2F: Lab area
| Trainer | Pokémon | |||||||||||
|---|---|---|---|---|---|---|---|---|---|---|---|---|
| Hallway | ||||||||||||
|
| |||||||||||
|
| |||||||||||
|
| |||||||||||
| Secret Lab B | ||||||||||||
|
| |||||||||||
|
| |||||||||||
Outside
| Trainer | Pokémon | |||||||||||
|---|---|---|---|---|---|---|---|---|---|---|---|---|
|
| |||||||||||
|
| |||||||||||
|
||||||||||||||||||||||||||||||||||||||||||||||||||||||||||||||||||||||||||||||||||||||||||||||||||||||||||||||||||||||||||||||||||||||||||||||||
| ||||||||||||||||||||||||||||||||||||||||||||||||||||||||||||||||||||||||||||||||||||||||||||||||||||||||||||||||||||||||||||||||||||||||||||||||
Mansion
|
|||||||||||||||||||||||||||||||||||||||||||||||||||||||||||||||||||||||||||||||||||||||||||||||||||||||||||||||||||||||||||||||||||||||||||||||||||||||||||||||||||||||||||||
| |||||||||||||||||||||||||||||||||||||||||||||||||||||||||||||||||||||||||||||||||||||||||||||||||||||||||||||||||||||||||||||||||||||||||||||||||||||||||||||||||||||||||||||
In other languages
| ||||||||||||||||||||||||||||||||
| Aether Paradise • Heahea City • Aether Bases (Route 8 • Route 16) • Aether House | ||
| President | Branch Chiefs | |
| Lusamine (Masters • anime) |
Wicke | Faba (anime) |
| Other members | ||
| Aether Foundation Employees | Scientists | |
| Former | Related | |
| Professor Mohn | Lillie (Masters • anime) |
Gladion (Masters • anime) |
| Animation and manga | ||
| Former members: Jessie • James • Meowth Ultra Guardians: Ash • Lana • Kiawe • Lillie • Sophocles • Mallow • Gladion | ||
| See also: Team Skull • Ultra Recon Squad | ||

|
This article is part of Project Locations, a Bulbapedia project that aims to write comprehensive articles on every location in the Pokémon world. |
