Abandoned Ship: Difference between revisions
No edit summary |
mNo edit summary |
||
| (11 intermediate revisions by 8 users not shown) | |||
| Line 1: | Line 1: | ||
{{Infobox location | {{Infobox location | ||
|image=Abandoned Ship RSE.png | |image=Abandoned Ship RSE.png | ||
|other_info= | |other_info=S.S. Cactus | ||
|image_size=240 | |image_size=240 | ||
|type= | |type=ocean | ||
|location_name= | |location_name=Abandoned Ship | ||
|japanese_name= | |japanese_name=すてられ{{tt|船|ぶね}} | ||
|translated_name= | |translated_name=Abandoned Ship | ||
|location=On {{rt|108|Hoenn | |location=On {{rt|108|Hoenn}} | ||
|region=Hoenn | |region=Hoenn | ||
|generation={{Gen|III | |generation={{Gen|III}} | ||
|map=Hoenn | |map=Hoenn Abandoned Ship Map.png | ||
}} | }} | ||
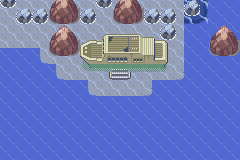
The '''Abandoned Ship''' (Japanese: '''すてられ{{tt|船|ぶね}}''' ''Abandoned Ship'') is a wrecked ship located on {{rt|108|Hoenn}} in [[Hoenn]], originally being a ship named the '''S.S. Cactus''' (Japanese: '''カクタスごう''' ''Cactus''). The second part of the ship can only be accessed by using {{m|Dive}} and contains the {{key|III|Scanner}}. | |||
In {{g|Omega Ruby and Alpha Sapphire}}, [[Sea Mauville]] takes the place of the Abandoned Ship. | |||
==Geography== | ==Geography== | ||
The Abandoned Ship is a tattered, old ship that looks like it could carry passengers and cargo when it was in operation. This old ship has many rusted holes, broken doors and items of furniture scattered around rooms. One room has a huge pool of water, in which the player can dive down to reach a lower floor. The Abandoned Ship has 20 accessible rooms including a captain's office and underwater rooms. | The Abandoned Ship is a tattered, old ship that looks like it could carry passengers and cargo when it was in operation. This old ship has many rusted holes, broken doors and items of furniture scattered around rooms. One room has a huge pool of water, in which the player can dive down to reach a lower floor. The Abandoned Ship has 20 accessible rooms including a captain's office and underwater rooms. | ||
| Line 30: | Line 25: | ||
==History== | ==History== | ||
The Abandoned Ship is mentioned by a character in the [[Oceanic Museum]], saying that the model of the [[S.S. Anne]] reminds him of the Abandoned Ship. The ship contained a rare {{key|III|Scanner}} when it sank and it is now buried deep within the ship. | |||
The Abandoned Ship is mentioned by a character in the [[Oceanic Museum]], saying that the model of the [[S.S. Anne]] reminds him of the Abandoned Ship. The ship contained a rare {{key| | |||
==Items== | ==Items== | ||
The Abandoned Ship cannot be accessed without {{m|Surf}}, so all items located here require Surf to obtain. | The Abandoned Ship cannot be accessed without {{m|Surf}}, so all items located here require Surf to obtain. | ||
{{Itlisth| | {{Itlisth|ocean}} | ||
{{itemlist|Harbor Mail|1F, in the northwest (bow-starboard) room in the entrance|Ru=yes|Sa=yes|E=yes|display={{DL|Mail|Harbor Mail}}}} | {{itemlist|Harbor Mail|1F, in the northwest (bow-starboard) room in the entrance|Ru=yes|Sa=yes|E=yes|display={{DL|Mail|Harbor Mail}}}} | ||
{{itemlist|Dive Ball|B1F, in the room with a broken door|Ru=yes|Sa=yes|E=yes|display={{ball|Dive}}}} | {{itemlist|Dive Ball|B1F, in the room with a broken door|Ru=yes|Sa=yes|E=yes|display={{ball|Dive}}}} | ||
| Line 48: | Line 38: | ||
{{itemlist|TM Ice|In the storage closet|Ru=yes|Sa=yes|E=yes|display={{TM|13|Ice Beam}}}} | {{itemlist|TM Ice|In the storage closet|Ru=yes|Sa=yes|E=yes|display={{TM|13|Ice Beam}}}} | ||
{{itemlist|Water Stone|Room 3 (requires {{m|Dive}})|Ru=yes|Sa=yes|E=yes|display={{evostone|Water Stone}}}} | {{itemlist|Water Stone|Room 3 (requires {{m|Dive}})|Ru=yes|Sa=yes|E=yes|display={{evostone|Water Stone}}}} | ||
{{itemlist| | {{itemlist|Key to Room 1|Room 3 (requires {{m|Dive}}) ''(hidden)''|Ru=yes|Sa=yes|E=yes|display={{key|III|Rm. 1 Key}}}} | ||
{{itemlist|TM Water|Room 1 (requires {{m|Dive}})|Ru=yes|Sa=yes|E=yes|display={{TM|18|Rain Dance}}}} | {{itemlist|TM Water|Room 1 (requires {{m|Dive}})|Ru=yes|Sa=yes|E=yes|display={{TM|18|Rain Dance}}}} | ||
{{itemlist| | {{itemlist|Key to Room 4|Room 1 (requires {{m|Dive}}) ''(hidden)''|Ru=yes|Sa=yes|E=yes|display={{key|III|Rm. 4 Key}}}} | ||
{{itemlist| | {{itemlist|Key to Room 6|Room 4 (requires {{m|Dive}}) ''(hidden)''|Ru=yes|Sa=yes|E=yes|display={{key|III|Rm. 6 Key}}}} | ||
{{itemlist|Luxury Ball|Room 6 (requires {{m|Dive}})|Ru=yes|Sa=yes|E=yes|display={{ball|Luxury}}}} | {{itemlist|Luxury Ball|Room 6 (requires {{m|Dive}})|Ru=yes|Sa=yes|E=yes|display={{ball|Luxury}}}} | ||
{{itemlist| | {{itemlist|Key to Room 2|Room 5 (requires {{m|Dive}}) ''(hidden)''|Ru=yes|Sa=yes|E=yes|display={{key|III|Rm. 2 Key}}}} | ||
{{itemlist|Scanner|Room 2 (requires {{m|Dive}})|Ru=yes|Sa=yes|E=yes|display={{key|III|Scanner}}}} | {{itemlist|Scanner|Room 2 (requires {{m|Dive}})|Ru=yes|Sa=yes|E=yes|display={{key|III|Scanner}}}} | ||
{{itlistfoot| | {{itlistfoot|ocean}} | ||
==Pokémon== | ==Pokémon== | ||
{{Catch/header|ocean|no}} | |||
{{Catch/header| | {{Catch/div|ocean|Surfing}} | ||
{{Catch/div| | |||
{{Catch/entry3|072|Tentacool|yes|yes|yes|Surf|5-35|99%|type1=Water|type2=Poison}} | {{Catch/entry3|072|Tentacool|yes|yes|yes|Surf|5-35|99%|type1=Water|type2=Poison}} | ||
{{Catch/entry3|073|Tentacruel|yes|yes|yes|Surf|30-35|1%|type1=Water|type2=Poison}} | {{Catch/entry3|073|Tentacruel|yes|yes|yes|Surf|30-35|1%|type1=Water|type2=Poison}} | ||
{{Catch/div| | {{Catch/div|ocean|Fishing}} | ||
{{Catch/entry3|072|Tentacool|yes|yes|yes|Fish Old|5-10|30%|type1=Water|type2=Poison}} | {{Catch/entry3|072|Tentacool|yes|yes|yes|Fish Old|5-10|30%|type1=Water|type2=Poison}} | ||
{{Catch/entry3|129|Magikarp|yes|yes|yes|Fish Old|5-10|70%|type1=Water}} | {{Catch/entry3|129|Magikarp|yes|yes|yes|Fish Old|5-10|70%|type1=Water}} | ||
| Line 117: | Line 59: | ||
{{Catch/entry3|072|Tentacool|yes|yes|yes|Fish Super|25-35|80%|type1=Water|type2=Poison}} | {{Catch/entry3|072|Tentacool|yes|yes|yes|Fish Super|25-35|80%|type1=Water|type2=Poison}} | ||
{{Catch/entry3|073|Tentacruel|yes|yes|yes|Fish Super|20-35|20%|type1=Water|type2=Poison}} | {{Catch/entry3|073|Tentacruel|yes|yes|yes|Fish Super|20-35|20%|type1=Water|type2=Poison}} | ||
{{Catch/footer | {{Catch/footer|ocean}} | ||
==Trainers== | ==Trainers== | ||
===Pokémon Ruby and Sapphire=== | ===Pokémon Ruby and Sapphire=== | ||
{{trainerheader| | {{trainerheader|ocean}} | ||
{{trainerdiv| | {{trainerdiv|ocean|B1F}} | ||
{{trainerentry|Spr RS Sailor.png|Sailor|Duncan|832|2|320|Wailmer|♂|26||067|Machoke|♂|26||36=ヒデフミ|37=Hidefumi}} | {{trainerentry|Spr RS Sailor.png|Sailor|Duncan|832|2|320|Wailmer|♂|26||067|Machoke|♂|26||36=ヒデフミ|37=Hidefumi}} | ||
{{trainerdiv| | {{trainerdiv|ocean|1F}} | ||
{{trainerentry|Spr RS Tuber M.png|Tuber|Charlie|108|1|183|Marill|♂|27||36=マナブ|37=Manabu}} | {{trainerentry|Spr RS Tuber M.png|Tuber|Charlie|108|1|183|Marill|♂|27||36=マナブ|37=Manabu}} | ||
{{trainerdiv| | {{trainerdiv|ocean}} | ||
{{trainerentry|Spr RS Young Couple.png|Young Couple|Lois & Hal|1728|2|313|Volbeat|♂|27||314|Illumise|♀|27||36=アヤとフミ|37=Aya and Fumi|38=Nav}} | {{trainerentry|Spr RS Young Couple.png|Young Couple|Lois & Hal|1728|2|313|Volbeat|♂|27||314|Illumise|♀|27||36=アヤとフミ|37=Aya and Fumi|38=Nav}} | ||
{{trainerfooter| | {{trainerfooter|ocean|3}} | ||
===Pokémon Emerald=== | ===Pokémon Emerald=== | ||
{{trainerheader| | {{trainerheader|ocean}} | ||
{{trainerdiv| | {{trainerdiv|ocean|1F (stern side of non-hidden floor)}} | ||
{{trainerentry|Spr RS Beauty.png|Beauty|Thalia|2000<br/><small>Potential [[Double Battle]] with Demetrius</small>|2|320|Wailmer|♀|25||116|Horsea|♀|25||36=ショウ|37=Shō|38=Nav}} | {{trainerentry|Spr RS Beauty.png|Beauty|Thalia|2000<br/><small>Potential [[Double Battle]] with Demetrius</small>|2|320|Wailmer|♀|25||116|Horsea|♀|25||36=ショウ|37=Shō|38=Nav}} | ||
{{trainerentry|Spr RS Youngster.png|Youngster|Demetrius|400<br/><small>Potential [[Double Battle]] with Thalia</small>|2|263|Zigzagoon|♂|25||309|Electrike|♂|25||36=フミタケ|37=Fumitake}} | {{trainerentry|Spr RS Youngster.png|Youngster|Demetrius|400<br/><small>Potential [[Double Battle]] with Thalia</small>|2|263|Zigzagoon|♂|25||309|Electrike|♂|25||36=フミタケ|37=Fumitake}} | ||
{{trainerdiv| | {{trainerdiv|ocean|B1F}} | ||
{{trainerentry|Spr RS Sailor.png|Sailor|Duncan|800|2|363|Spheal|♂|25||067|Machoke|♂|25||36=ヒデフミ|37=Hidefumi}} | {{trainerentry|Spr RS Sailor.png|Sailor|Duncan|800|2|363|Spheal|♂|25||067|Machoke|♂|25||36=ヒデフミ|37=Hidefumi}} | ||
{{trainerdiv| | {{trainerdiv|ocean|1F (bow side of non-hidden floor)}} | ||
{{trainerentry|Spr RS Tuber M.png|Tuber|Charlie|104|1|183|Marill|♂|26||36=マナブ|37=Manabu}} | {{trainerentry|Spr RS Tuber M.png|Tuber|Charlie|104|1|183|Marill|♂|26||36=マナブ|37=Manabu}} | ||
{{trainerdiv| | {{trainerdiv|ocean}} | ||
{{trainerentry|Spr RS Ruin Maniac.png|Ruin Maniac|Garrison|1560<br/><small>Potential [[Double Battle]] with Jani</small>|1|028|Sandslash|♂|26||36=ツネヤス|37=Tsuneyasu}} | {{trainerentry|Spr RS Ruin Maniac.png|Ruin Maniac|Garrison|1560<br/><small>Potential [[Double Battle]] with Jani</small>|1|028|Sandslash|♂|26||36=ツネヤス|37=Tsuneyasu}} | ||
{{trainerentry|Spr RS Tuber F.png|Tuber|Jani|104<br/><small>Potential [[Double Battle]] with Garrison</small>|1|183|Marill|♀|26||36=マミ|37=Mami}} | {{trainerentry|Spr RS Tuber F.png|Tuber|Jani|104<br/><small>Potential [[Double Battle]] with Garrison</small>|1|183|Marill|♀|26||36=マミ|37=Mami}} | ||
{{trainerdiv| | {{trainerdiv|ocean}} | ||
{{trainerentry|Spr RS Young Couple.png|Young Couple|Kira & Dan|1600|2|313|Volbeat|♂|25||314|Illumise|♀|25||36=ナツとフミ|37=Natsu and Fumi|38=Nav}} | {{trainerentry|Spr RS Young Couple.png|Young Couple|Kira & Dan|1600|2|313|Volbeat|♂|25||314|Illumise|♀|25||36=ナツとフミ|37=Natsu and Fumi|38=Nav}} | ||
{{ | {{trainerdiv|ocean|Rematch}} | ||
{{trainerentry|Spr RS Beauty.png|Beauty|Thalia{{tt|*|First rematch}}|2720|2|320|Wailmer|♀|34||116|Horsea|♀|34|36=ショウ|37=Shō|38=Nav}} | |||
{{trainerentry|Spr RS Beauty.png|Beauty|Thalia{{tt|*|Second and third rematch}}|{{tt|2880|Second rematch}}/{{tt|3040|Third rematch}}|3|370|Luvdisc|♀|{{tt|36|Second rematch}}/{{tt|38|Third rematch}}||320|Wailmer|♀|{{tt|36|Second rematch}}/{{tt|38|Third rematch}}||117|Seadra|♀|{{tt|36|Second rematch}}/{{tt|38|Third rematch}}|36=ショウ|37=Shō|38=Nav}} | |||
{{ | {{trainerentry|Spr RS Beauty.png|Beauty|Thalia{{tt|*|Fourth rematch onwards}}|3200|3|370|Luvdisc|♀|40||321|Wailord|♀|40||230|Kingdra|♀|40|36=ショウ|37=Shō|38=Nav}} | ||
{{ | {{trainerdiv|ocean}} | ||
{{ | {{trainerentry|Spr RS Young Couple.png|Young Couple|Kira & Dan|{{tt|1920|First rematch}}/{{tt|2112|Second rematch}}/{{tt|2304|Third rematch}}/{{tt|2496|Fourth rematch onwards}}|2|313|Volbeat|♂|{{tt|30|First rematch}}/{{tt|33|Second rematch}}/{{tt|36|Third rematch}}/{{tt|39|Fourth rematch onwards}}||314|Illumise|♀|{{tt|30|First rematch}}/{{tt|33|Second rematch}}/{{tt|36|Third rematch}}/{{tt|39|Fourth rematch onwards}}||36=ナツとフミ|37=Natsu and Fumi|38=Nav}} | ||
{{ | {{trainerfooter|ocean|3}} | ||
{{trainerentry| | |||
{{trainerdiv| | |||
{{trainerentry| | |||
{{ | |||
{{ | |||
{{trainerfooter| | |||
==Layout== | ==Layout== | ||
{| class="roundy" style="margin:auto; background: #000; border: 3px solid #{{locationcolor/dark| | {| class="roundy" style="margin:auto; background: #000; border: 3px solid #{{locationcolor/dark|ocean}}" | ||
|- | |- | ||
! style="background:#{{locationcolor/light| | ! style="background:#{{locationcolor/light|ocean}}; {{roundytl|5px}}" | Version | ||
! style="background:#{{locationcolor/light| | ! style="background:#{{locationcolor/light|ocean}}" | Deck | ||
! style="background:#{{locationcolor/light| | ! style="background:#{{locationcolor/light|ocean}}" | Captain's office | ||
! style="background:#{{locationcolor/light| | ! style="background:#{{locationcolor/light|ocean}}" | 1F | ||
! style="background:#{{locationcolor/light| | ! style="background:#{{locationcolor/light|ocean}}" | B1F | ||
! style="background:#{{locationcolor/light| | ! style="background:#{{locationcolor/light|ocean}}" | Underwater | ||
! style="background:#{{locationcolor/light| | ! style="background:#{{locationcolor/light|ocean}}; {{roundytr|5px}}" | Hidden floor | ||
|- | |- | ||
! style="background:#{{ruby color}}" | {{color2|fff|Pokémon Ruby and Sapphire Versions|Ruby}} | ! style="background:#{{ruby color}}" | {{color2|fff|Pokémon Ruby and Sapphire Versions|Ruby}} | ||
| Line 214: | Line 117: | ||
! style="background:#{{emerald color}}" | {{color2|fff|Pokémon Emerald Version|Emerald}} | ! style="background:#{{emerald color}}" | {{color2|fff|Pokémon Emerald Version|Emerald}} | ||
|- | |- | ||
| colspan="7" style="background:#{{locationcolor/light| | | colspan="7" style="background:#{{locationcolor/light|ocean}}; {{roundybottom|5px}}" | | ||
|} | |} | ||
| Line 248: | Line 151: | ||
==Trivia== | ==Trivia== | ||
* In {{2v2|Ruby|Sapphire}}, Tuber Charlie is affected by a minor [[glitch]] which also affects Aroma Lady Rose and Gentleman Walter on | * In {{2v2|Ruby|Sapphire}}, Tuber Charlie is affected by a minor [[glitch]] which also affects {{tc|Aroma Lady}} Rose on {{rt|118|Hoenn}} and {{tc|Gentleman}} Walter on {{rt|121|Hoenn}}. Because he always approaches the player if he catches sight of him/her, he will walk right through a wall if it is in front of him. This glitch was corrected in Emerald as well as Spanish versions of Ruby and Sapphire. | ||
* | * If Tuber Charlie spots the player character on the "stairs" of the ship and challenges him/her to a battle, the battle terrain is that of a cave instead of a building. | ||
==In other languages== | ==In other languages== | ||
{{Langtable|color={{locationcolor/light|ocean}}|bordercolor={{locationcolor/dark|ocean}} | |||
{{Langtable|color={{locationcolor/light| | |||
|zh_cmn=棄船 ''{{tt|Qìchuán|Abandoned Ship}}''{{tt|*|Anime}}<br>被遗弃的海船 ''{{tt|'Bèi Yíqì de Hǎichuán|Abandoned Ship}}''{{tt|*|Adventures (Jilin edition)}} | |zh_cmn=棄船 ''{{tt|Qìchuán|Abandoned Ship}}''{{tt|*|Anime}}<br>被遗弃的海船 ''{{tt|'Bèi Yíqì de Hǎichuán|Abandoned Ship}}''{{tt|*|Adventures (Jilin edition)}} | ||
|fr_eu=Épave | |fr_eu=Épave | ||
| Line 278: | Line 171: | ||
[[Category:Ruby and Sapphire locations]] | [[Category:Ruby and Sapphire locations]] | ||
[[Category:Emerald locations]] | [[Category:Emerald locations]] | ||
[[Category:Abandoned buildings]] | [[Category:Abandoned buildings]] | ||
[[Category:Underwater locations]] | [[Category:Underwater locations]] | ||
Revision as of 19:26, 18 May 2016
| ||||
| ||||
| Location: | On Route 108 | |||
|---|---|---|---|---|
| Region: | Hoenn | |||
| Generations: | III | |||
 Location of Abandoned Ship in Hoenn. | ||||
| Pokémon world locations | ||||
The Abandoned Ship (Japanese: すてられ船 Abandoned Ship) is a wrecked ship located on Route 108 in Hoenn, originally being a ship named the S.S. Cactus (Japanese: カクタスごう Cactus). The second part of the ship can only be accessed by using Dive and contains the Scanner.
In Pokémon Omega Ruby and Alpha Sapphire, Sea Mauville takes the place of the Abandoned Ship.
Geography
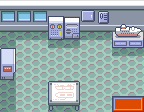
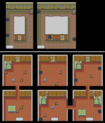
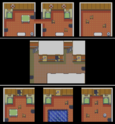
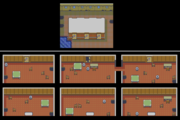
The Abandoned Ship is a tattered, old ship that looks like it could carry passengers and cargo when it was in operation. This old ship has many rusted holes, broken doors and items of furniture scattered around rooms. One room has a huge pool of water, in which the player can dive down to reach a lower floor. The Abandoned Ship has 20 accessible rooms including a captain's office and underwater rooms.
Many Trainers train their Pokémon in the Abandoned Ship, mostly Tubers and Sailors, but also a Young Couple, who battle the player in a Double Battle.
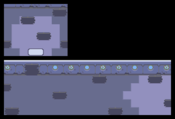
After Dive is used to access the second part of the ship, the player will encounter five locked doors. As soon as a room is entered, a few spots in the room will gleam, showing that there is something there (either a key or "trash"). The gleams only happen just after the room is entered through the door. The player should check for keys on the gleaming spaces like other hidden items: by facing the space and pressing the 'A' button (standing on the space will not work). Once the key is found, the player can use the new key to access the next room.
History
The Abandoned Ship is mentioned by a character in the Oceanic Museum, saying that the model of the S.S. Anne reminds him of the Abandoned Ship. The ship contained a rare Scanner when it sank and it is now buried deep within the ship.
Items
The Abandoned Ship cannot be accessed without Surf, so all items located here require Surf to obtain.
| Item | Location | Games | |
|---|---|---|---|
| Harbor Mail | 1F, in the northwest (bow-starboard) room in the entrance | R S E | |
| Dive Ball | B1F, in the room with a broken door | R S E | |
| Escape Rope | B1F, in the southwestern (bow-port) room | R S E | |
| Revive | 1F, in the northern (starboard) room near Tuber Charlie | R S E | |
| Storage Key | In the southwestern (bow-port) corner of the captain's office | R S E | |
| TM13 (Ice Beam) | In the storage closet | R S E | |
| Water Stone | Room 3 (requires Dive) | R S E | |
| Rm. 1 Key | Room 3 (requires Dive) (hidden) | R S E | |
| TM18 (Rain Dance) | Room 1 (requires Dive) | R S E | |
| Rm. 4 Key | Room 1 (requires Dive) (hidden) | R S E | |
| Rm. 6 Key | Room 4 (requires Dive) (hidden) | R S E | |
| Luxury Ball | Room 6 (requires Dive) | R S E | |
| Rm. 2 Key | Room 5 (requires Dive) (hidden) | R S E | |
| Scanner | Room 2 (requires Dive) | R S E | |
Pokémon
| Pokémon | Games | Location | Levels | Rate | |||||||||||
|---|---|---|---|---|---|---|---|---|---|---|---|---|---|---|---|
| Surfing | |||||||||||||||
|
R | S | E |
|
5-35 | 99% | |||||||||
|
R | S | E |
|
30-35 | 1% | |||||||||
| Fishing | |||||||||||||||
|
R | S | E |
|
5-10 | 30% | |||||||||
|
R | S | E |
|
5-10 | 70% | |||||||||
|
R | S | E |
|
10-30 | 40% | |||||||||
|
R | S | E |
|
10-30 | 60% | |||||||||
|
R | S | E |
|
25-35 | 80% | |||||||||
|
R | S | E |
|
20-35 | 20% | |||||||||
| A colored background means that the Pokémon can be found in this location in the specified game. A white background with a colored letter means that the Pokémon cannot be found here. | |||||||||||||||
Trainers
Pokémon Ruby and Sapphire
| Trainer | Pokémon | |||||||||||
|---|---|---|---|---|---|---|---|---|---|---|---|---|
| B1F | ||||||||||||
|
| |||||||||||
| ||||||||||||
| 1F | ||||||||||||
|
| |||||||||||
|
| |||||||||||
| ||||||||||||
| Trainers with a PokéNav by their names will be registered in the Trainer's Eyes or Match Call function after the first battle, and may have a rematch with the player with higher-level Pokémon. | ||||||||||||
Pokémon Emerald
| Trainer | Pokémon | |||||||||||
|---|---|---|---|---|---|---|---|---|---|---|---|---|
| 1F (stern side of non-hidden floor) | ||||||||||||
|
| |||||||||||
| ||||||||||||
|
| |||||||||||
| ||||||||||||
| B1F | ||||||||||||
|
| |||||||||||
| ||||||||||||
| 1F (bow side of non-hidden floor) | ||||||||||||
|
| |||||||||||
|
| |||||||||||
|
| |||||||||||
|
| |||||||||||
| ||||||||||||
| Rematch | ||||||||||||
|
| |||||||||||
| ||||||||||||
|
| |||||||||||
| ||||||||||||
| ||||||||||||
|
| |||||||||||
| ||||||||||||
| ||||||||||||
|
| |||||||||||
| ||||||||||||
| Trainers with a PokéNav by their names will be registered in the Trainer's Eyes or Match Call function after the first battle, and may have a rematch with the player with higher-level Pokémon. | ||||||||||||
Layout
| Version | Deck | Captain's office | 1F | B1F | Underwater | Hidden floor |
|---|---|---|---|---|---|---|
| Ruby | 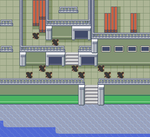
|
|
|
|
|
|
| Sapphire | ||||||
| Emerald | ||||||
In the anime
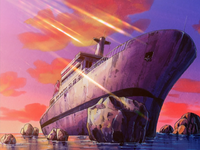
The abandoned ship, also known as the Forsaken Ship, appeared in Abandon Ship! of the anime.
Soon after Tommy's Mudkip evolved into Marshtomp and mastered Iron Tail, the duo went on the Abandoned Ship. However, a storm came which caused the ship to crash and Marshtomp got lost on there. Despite that, Tommy got rescued along with the other passengers. Marshtomp eventually evolved into Swampert during their time apart and believed that Tommy abandoned it. Since the crash, the ship became inhabited by Water-type Pokémon.
Years later, Tommy returned to the Abandoned Ship to search for Marshtomp. Ash and his friends also arrived on the abandoned ship after the boat they rode on ran out of fuel and it just drifted them there. The group met Tommy while entering and helped him search for Marshtomp. During the search, Swampert slowly caught several people (including Team Rocket). As Swampert was about to catch Pikachu next, Pikachu caught sight of it and it jumped out of the water. The remaining people that weren't caught, Ash, Brock, and Tommy chased after Swampert and led them to the room where the people caught by Swampert and tied up by Spinarak's String Shot were. Tommy immediately recognized Swampert as the Marshtomp that was separated long ago. He got to reunite with Swampert with some convincing on Tommy's part. With Swampert reunited with Tommy and Team Rocket defeated, the duo took Ash and his friends to Slateport City.
Pokémon seen on the Abandoned Ship
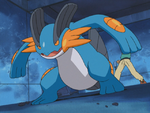 Marshtomp → Swampert |
 Azurill |
 Marill |
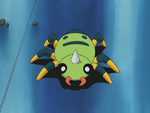 Spinarak |
 Golduck |
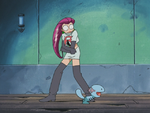 Wooper |
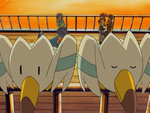 Wingull |
In the manga
In the Pokémon Adventures manga
In the 16th volume of the Pokémon Adventures manga, both Ruby and Sapphire arrive at the decades-old Abandoned Ship on Route 108, where they battle Team Magma over an important Scanner.
Later, Wattson, Flannery, and Winona fight here against Kyogre and Team Aqua.
Trivia
- In Ruby and Sapphire, Tuber Charlie is affected by a minor glitch which also affects Aroma Lady Rose on Route 118 and Gentleman Walter on Route 121. Because he always approaches the player if he catches sight of him/her, he will walk right through a wall if it is in front of him. This glitch was corrected in Emerald as well as Spanish versions of Ruby and Sapphire.
- If Tuber Charlie spots the player character on the "stairs" of the ship and challenges him/her to a battle, the battle terrain is that of a cave instead of a building.
In other languages
| ||||||||||||||||||||||||
| Hoenn | ||||||||
|---|---|---|---|---|---|---|---|---|
|
| ||||||||
|

|
This article is part of Project Locations, a Bulbapedia project that aims to write comprehensive articles on every location in the Pokémon world. |
